> ## Documentation Index
> Fetch the complete documentation index at: https://novu-c5de82d9-docs-homepage-redesign.mintlify.site/llms.txt
> Use this file to discover all available pages before exploring further.
# Amazon SES
> A step-by-step guide to manually configure Amazon SES with Novu for email activity tracking.
Amazon SES requires a manual configuration flow to enable Email Activity Tracking in Novu. This process involves creating an IAM user, setting up an SNS topic, subscribing Novu’s webhook, and linking SES configuration sets with the SNS topic.
Email Activity Tracking is available on **Novu Cloud** and **Enterprise self-hosted** only. It is not included in the **Community self-hosted** edition. Contact us at [sales@novu.co](mailto:sales@novu.co) to learn more about Enterprise self-hosted licensing.
Setting up Amazon SES for activity tracking is a multi-step process because it requires configuring several AWS services (IAM, SNS, and SES) to work together. This guide provides a complete, step-by-step walkthrough.
## Step 1: Create an IAM User
First, you need to create a dedicated IAM user in AWS that Novu will use to interact with SES.
1. Log in to your AWS Console and navigate to the **IAM** service.
2. In the sidebar under **Access Management**, click **Users**.
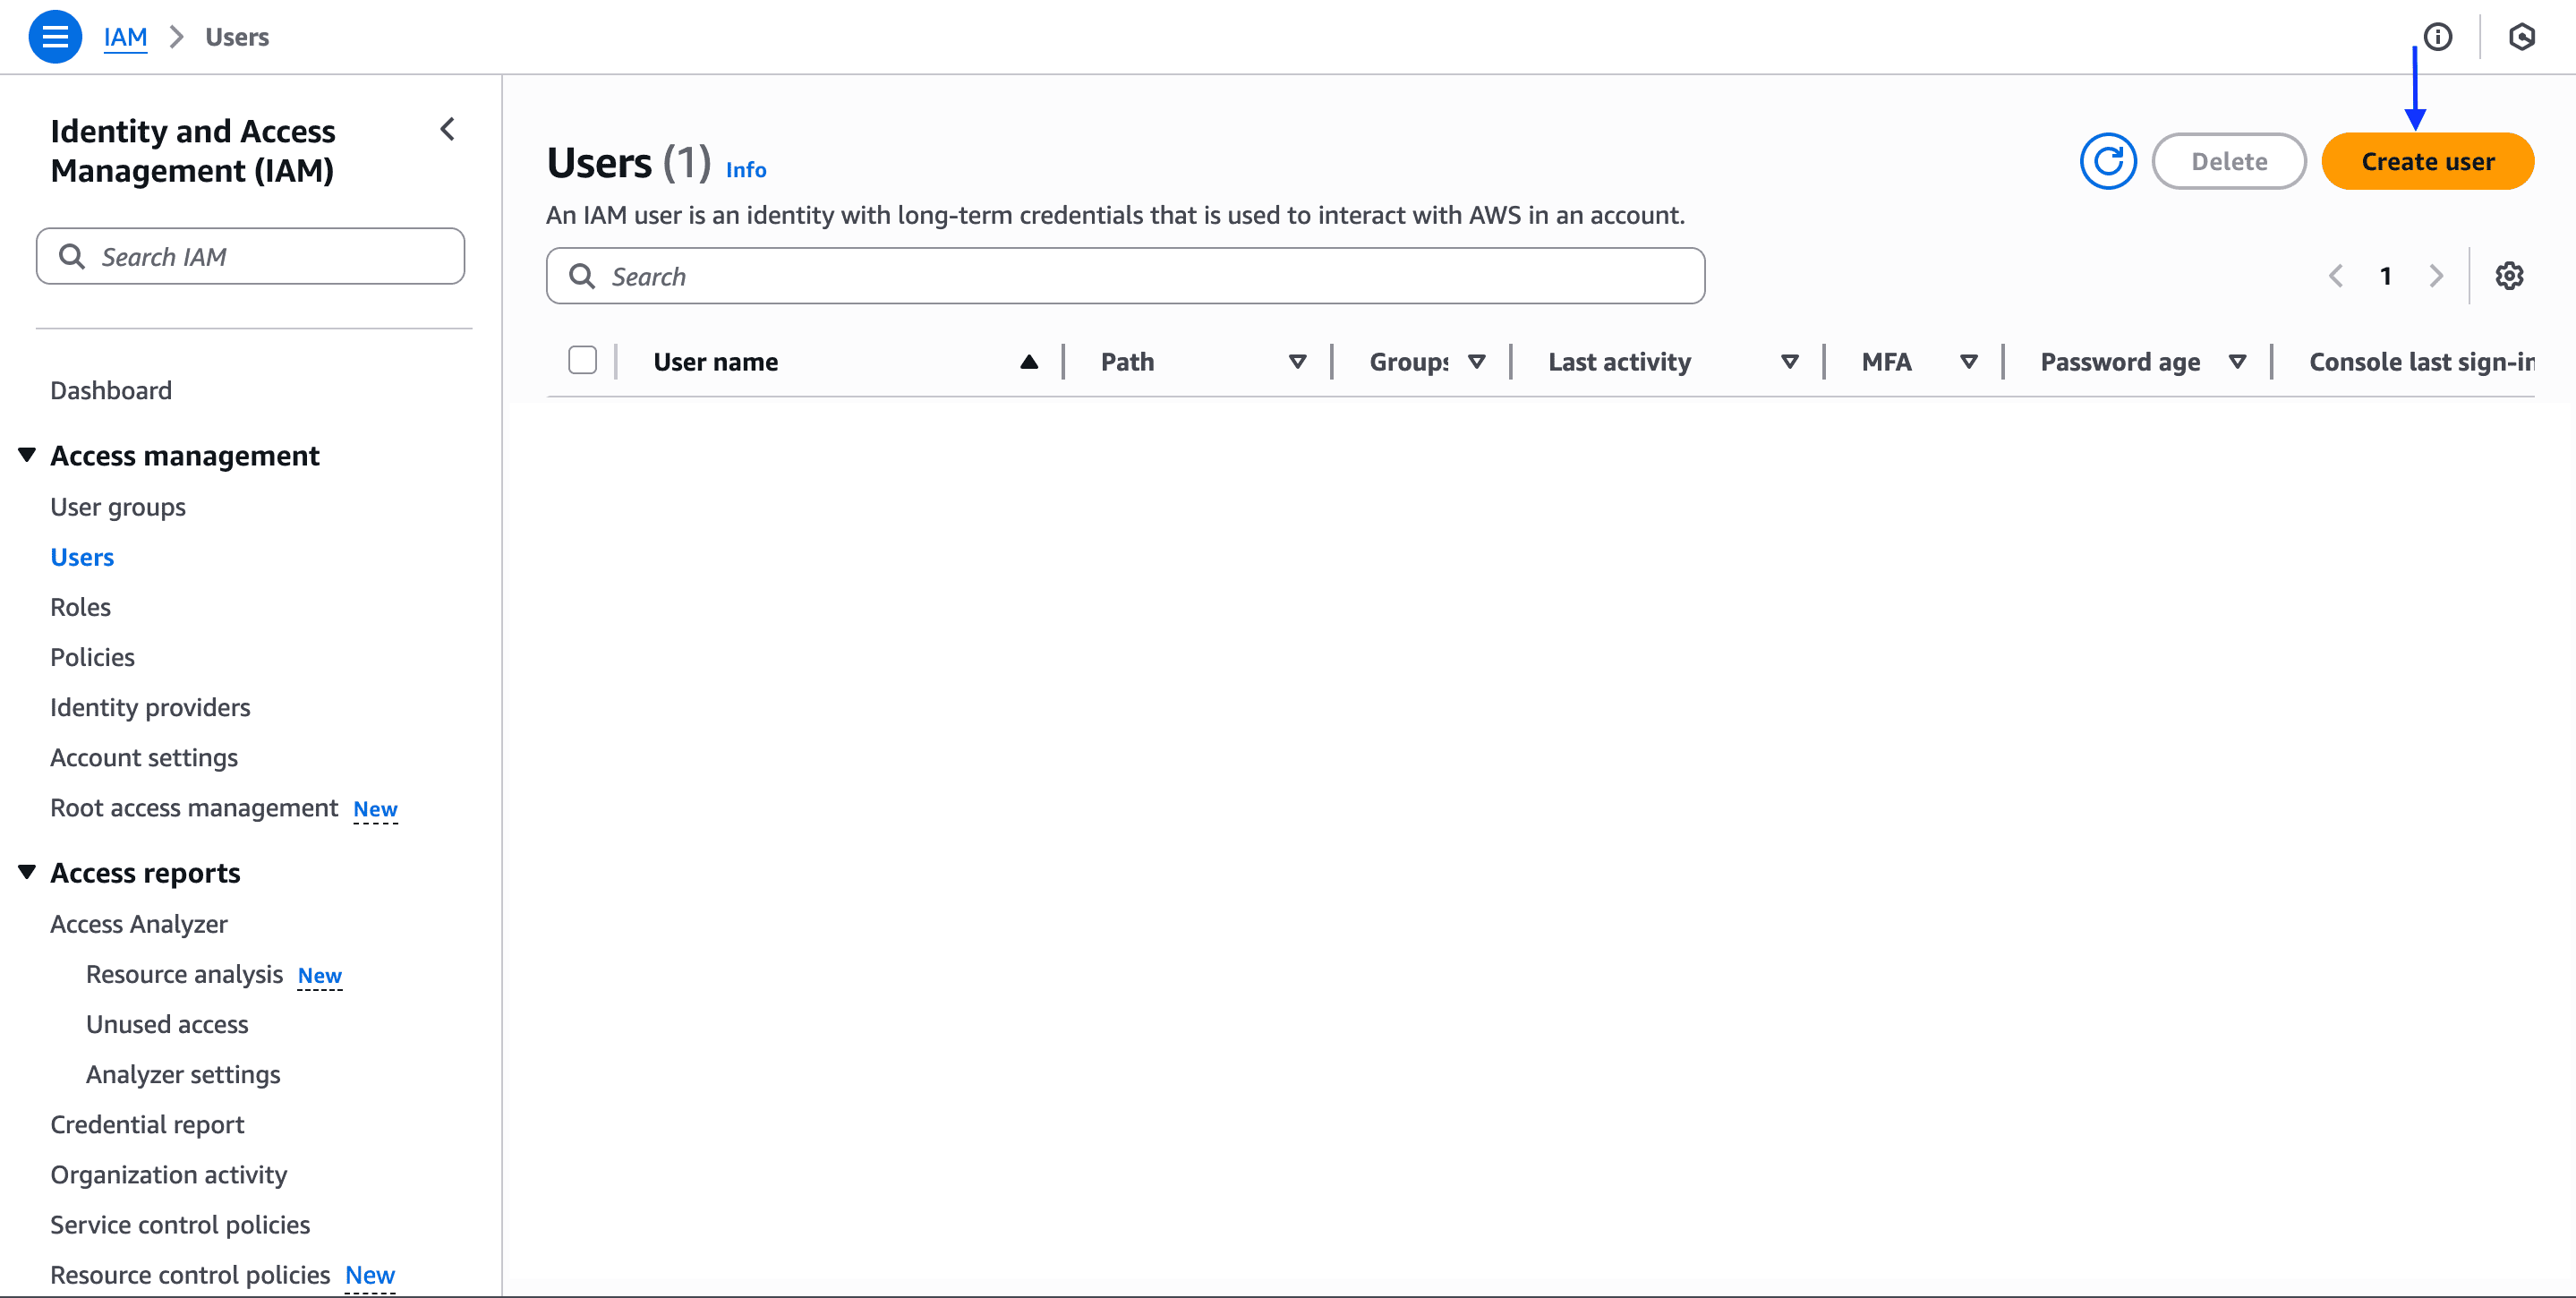 3. Click **Create user**, enter a name for the user, then click **Next**.
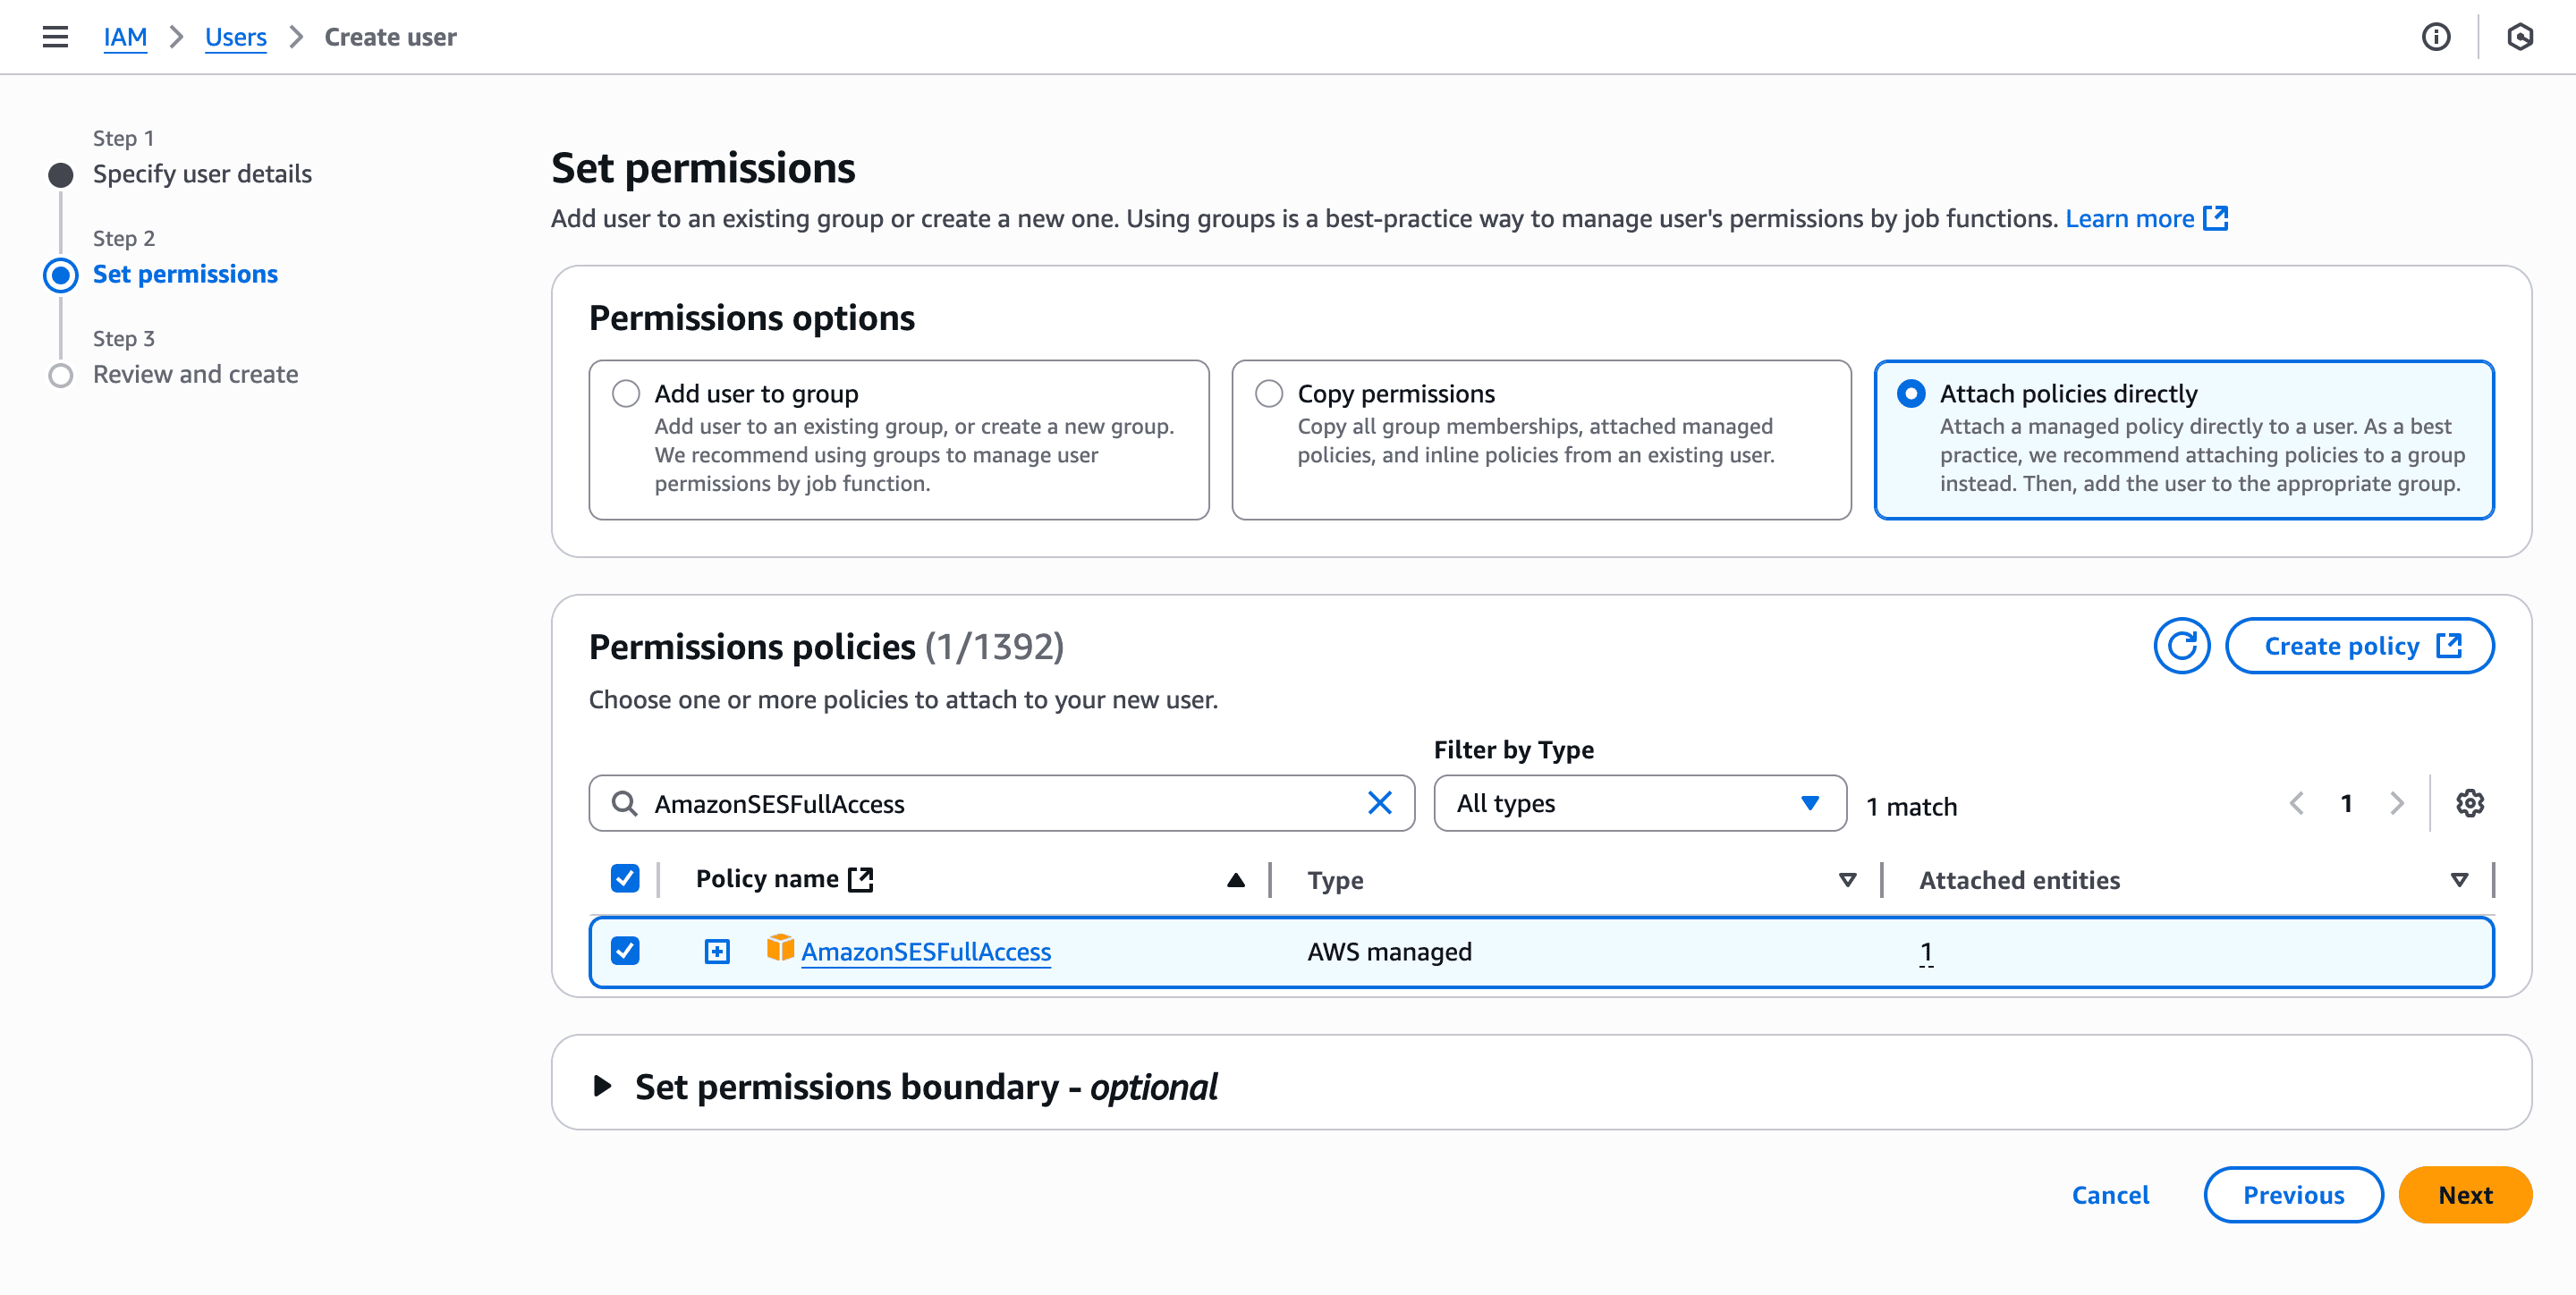
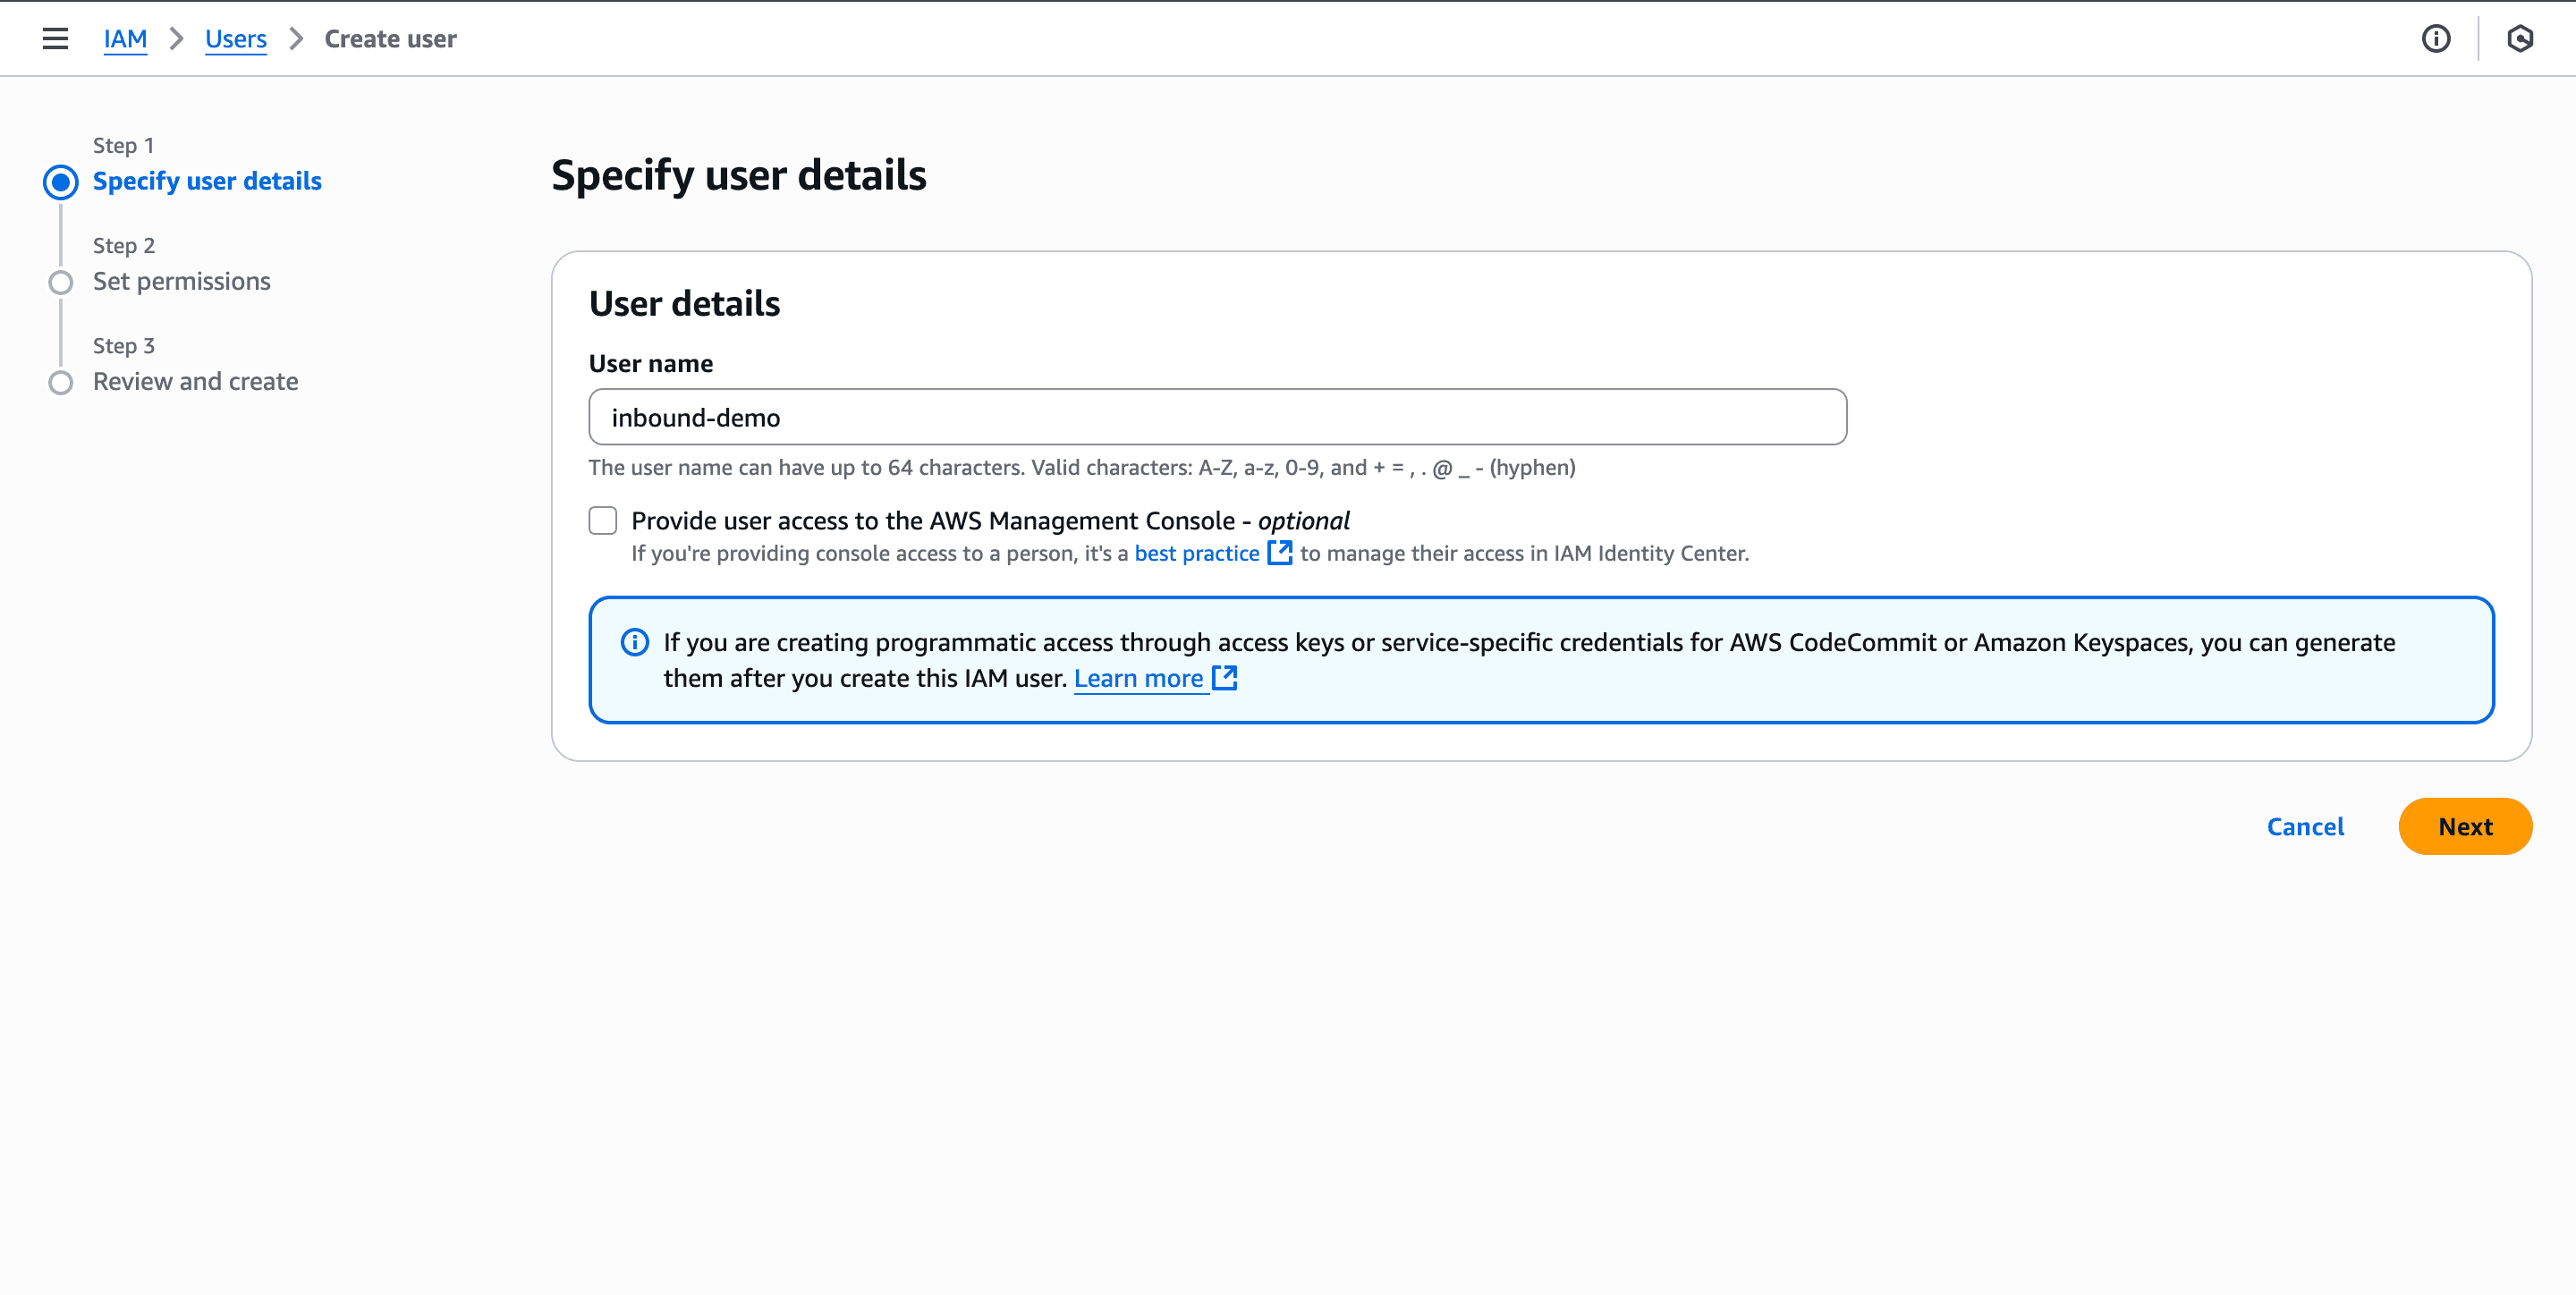 4. On the permissions page, select **Attach policies directly**.
5. In the search box, find and select the **`AmazonSESFullAccess`** policy. Click **Next**.
4. On the permissions page, select **Attach policies directly**.
5. In the search box, find and select the **`AmazonSESFullAccess`** policy. Click **Next**.
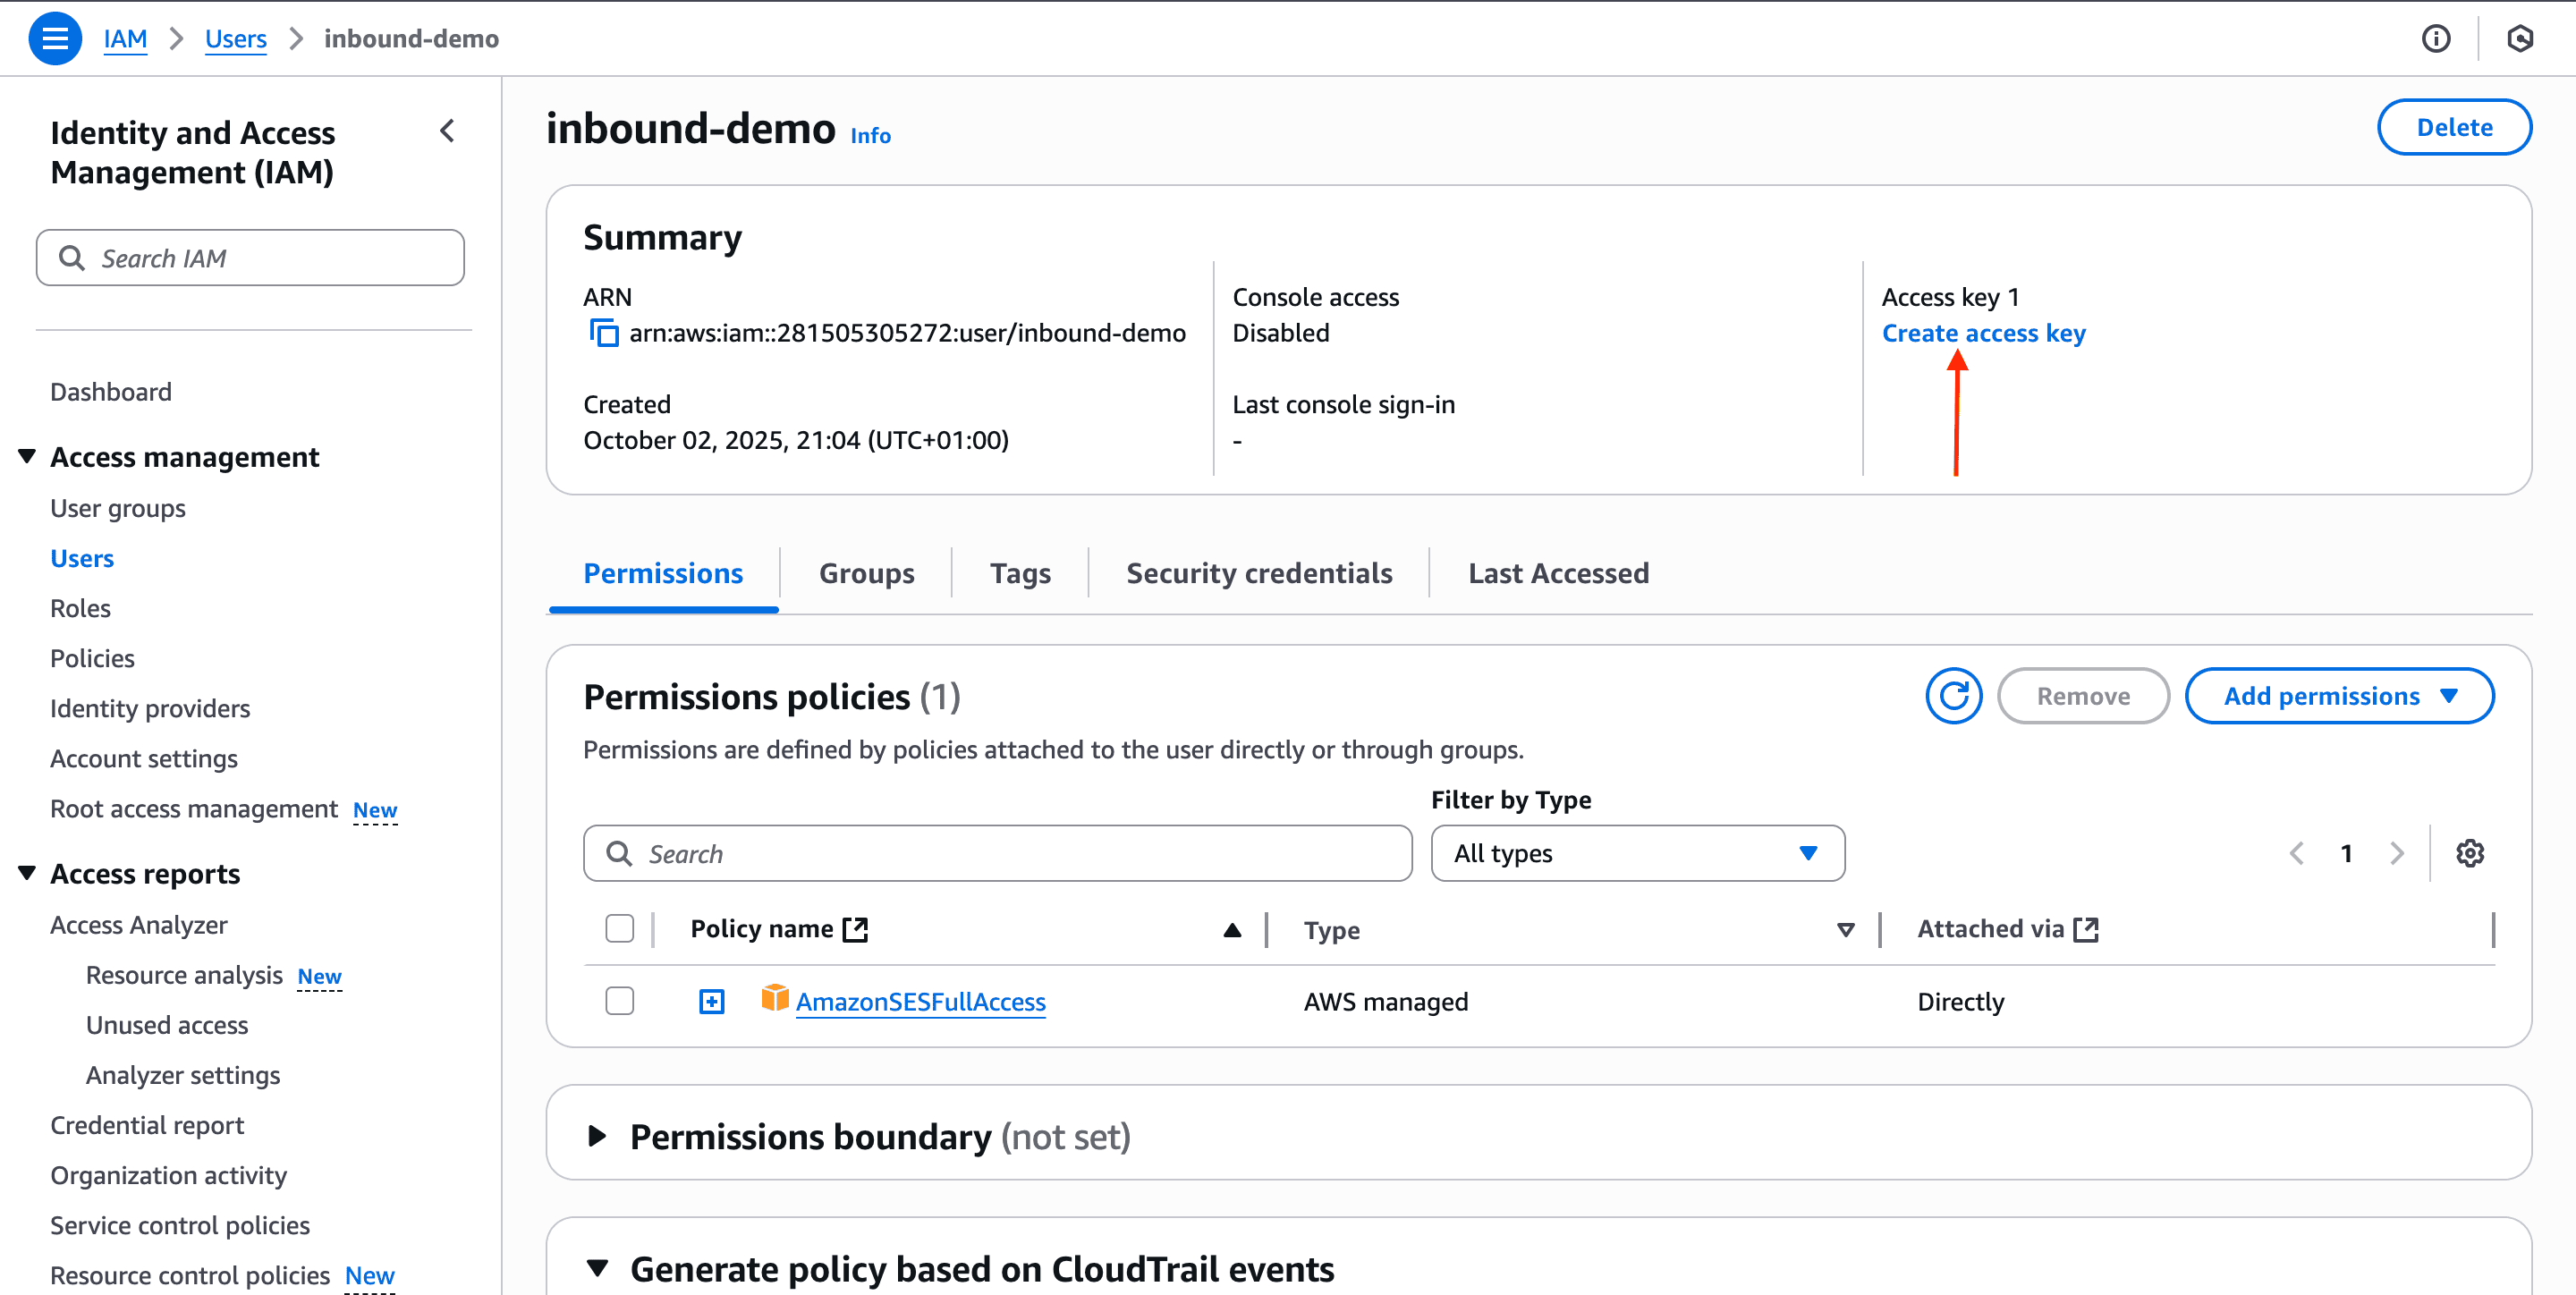
 6. Click **Next**, review the details, then click **Create user**. You will be redirected to the user list, where the new user will appear.
## Step 2: Generate access keys
1. Click on the user you just created.
2. On the user’s page, click **Create access key**.
6. Click **Next**, review the details, then click **Create user**. You will be redirected to the user list, where the new user will appear.
## Step 2: Generate access keys
1. Click on the user you just created.
2. On the user’s page, click **Create access key**.
 3. Under **Access key best practices & alternatives**, select **Application running on an AWS compute service** or the right use case for you.
4. Check the confirmation box and click **Next**.
5. Add a description tag, then click **Create access key**.
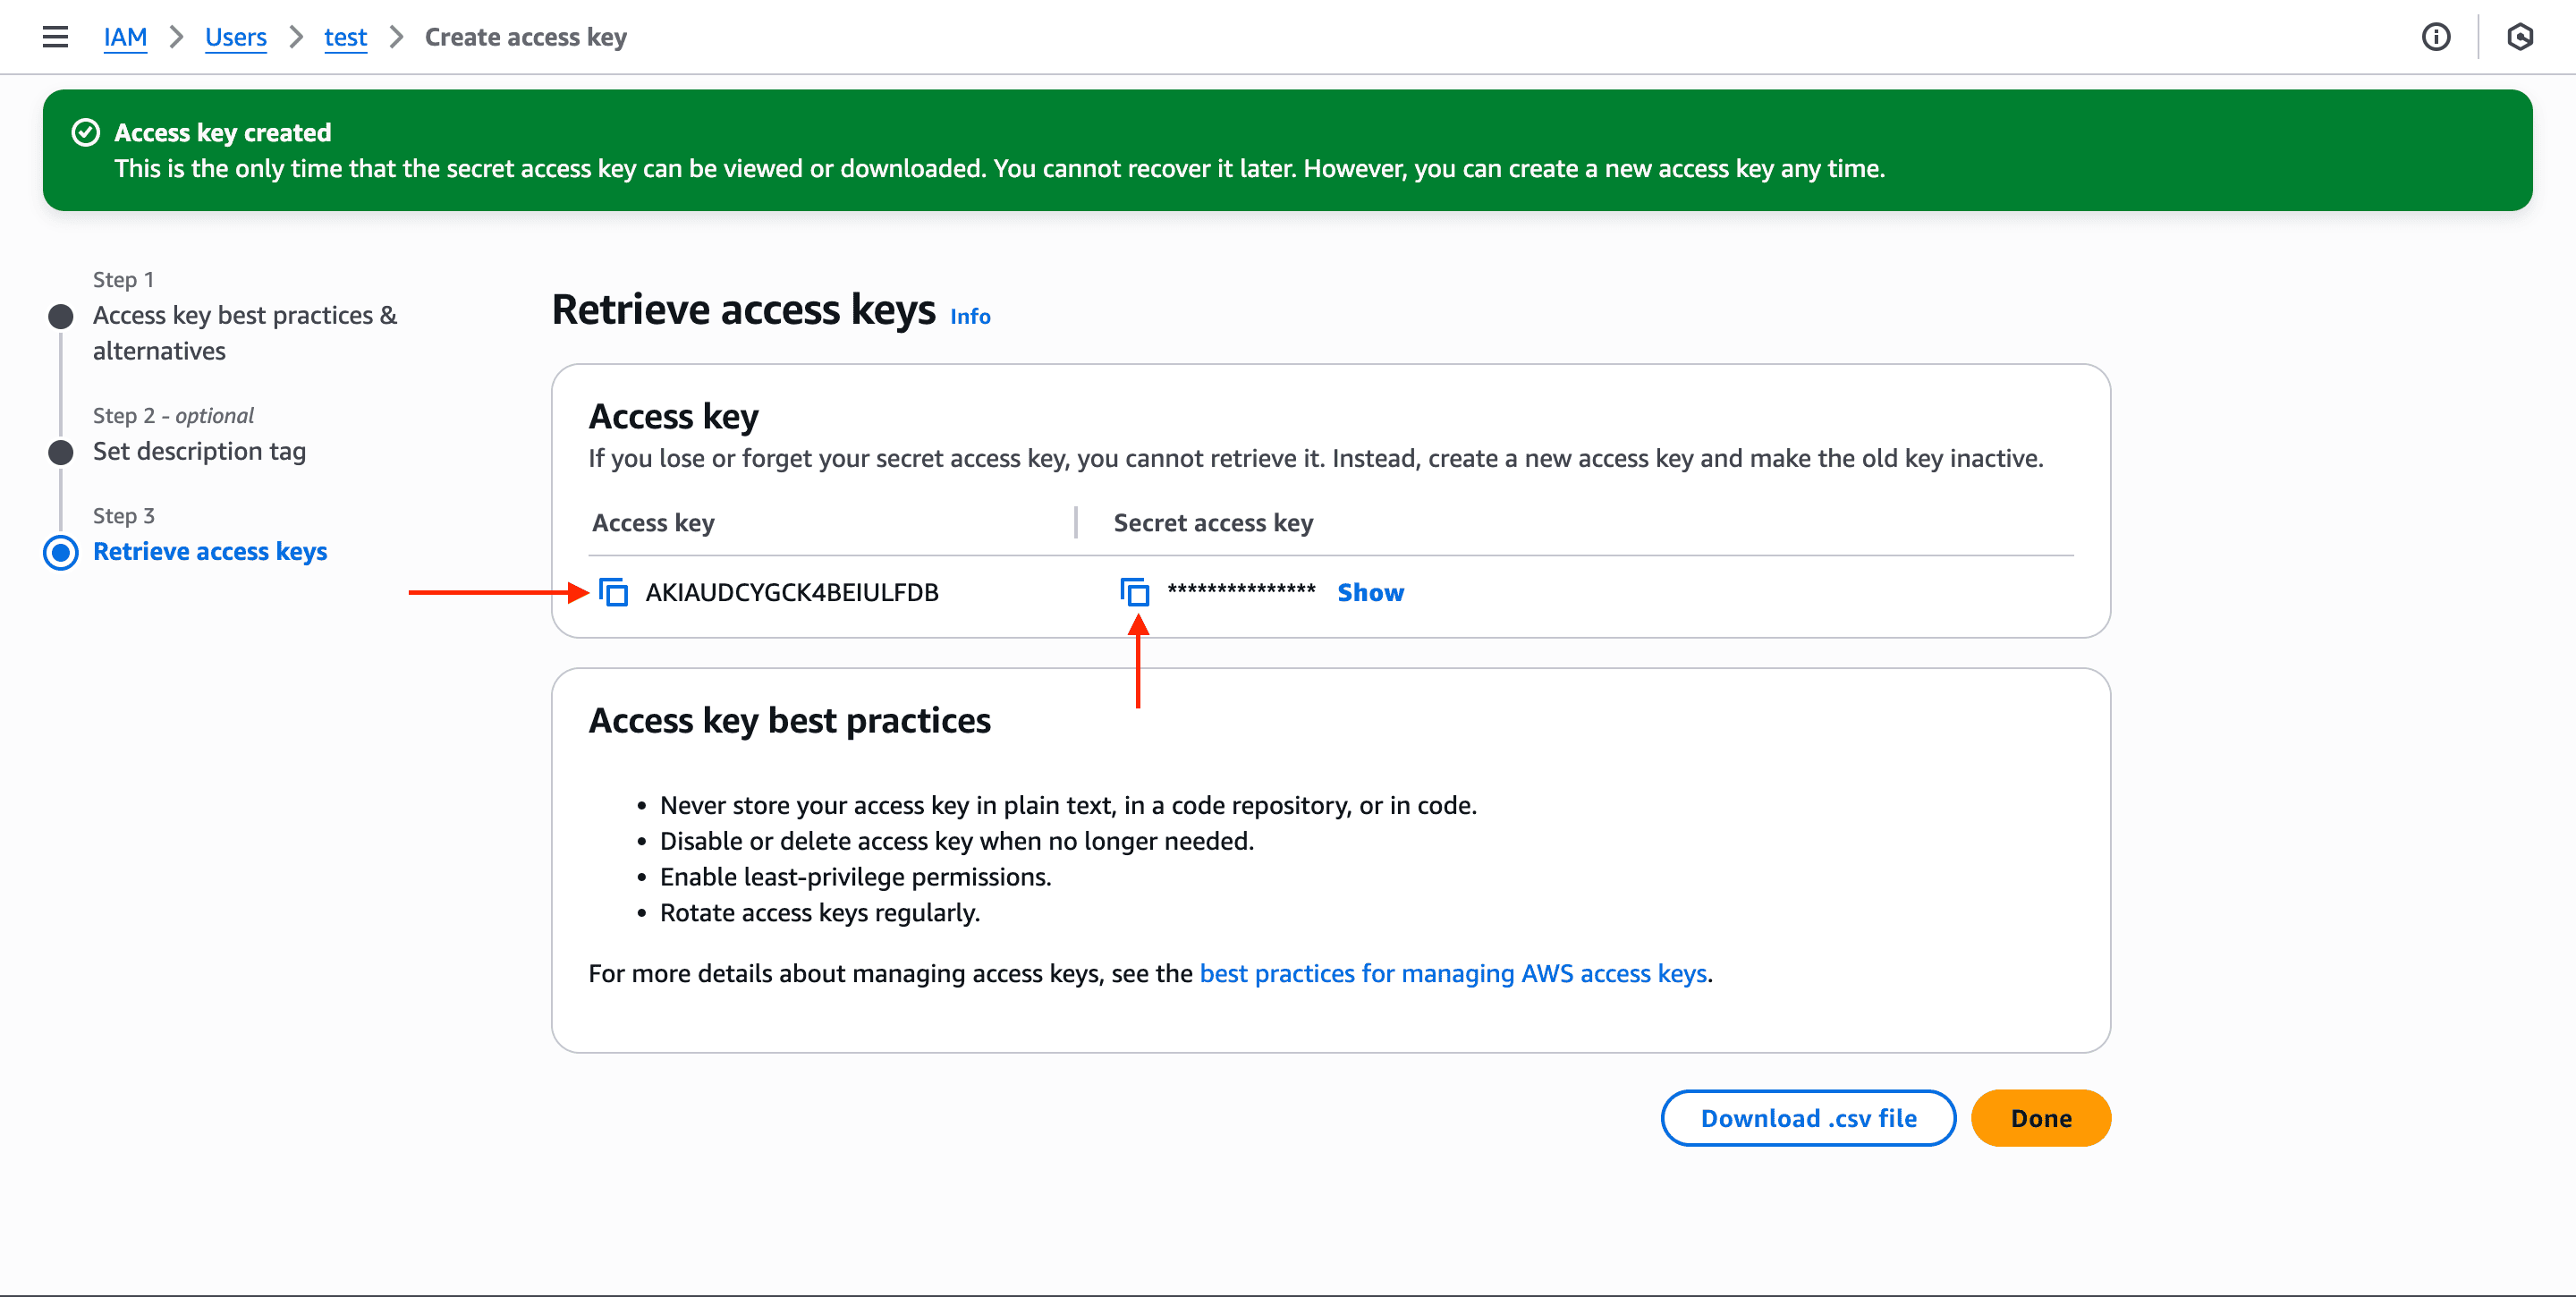
6. (Optional) On the **Retrieve access keys** page, you will see the **Access key** and **Secret access key** click **Download .csv file**. This file contains these access keys, you'll need in the next step.
7. Click **Done**.
3. Under **Access key best practices & alternatives**, select **Application running on an AWS compute service** or the right use case for you.
4. Check the confirmation box and click **Next**.
5. Add a description tag, then click **Create access key**.
6. (Optional) On the **Retrieve access keys** page, you will see the **Access key** and **Secret access key** click **Download .csv file**. This file contains these access keys, you'll need in the next step.
7. Click **Done**.
 ## Step 3: Set up the SES integration in Novu
Now, use the keys you just downloaded to connect your SES account to Novu.
1. In the Novu dashboard, go to the Integration Store.
2. Click **Connect provider** and select **SES**.
3. Under **Delivery Provider Credentials**, open the .csv file you downloaded in [Step 2](/platform/integrations/email/activity-tracking/manual-configuration/ses#step-2-generate-access-keys).
4. Copy the **Access key** into the **Access key ID** field.
5. Copy the **Secret access key** into the **Secret access key** field.
## Step 3: Set up the SES integration in Novu
Now, use the keys you just downloaded to connect your SES account to Novu.
1. In the Novu dashboard, go to the Integration Store.
2. Click **Connect provider** and select **SES**.
3. Under **Delivery Provider Credentials**, open the .csv file you downloaded in [Step 2](/platform/integrations/email/activity-tracking/manual-configuration/ses#step-2-generate-access-keys).
4. Copy the **Access key** into the **Access key ID** field.
5. Copy the **Secret access key** into the **Secret access key** field.
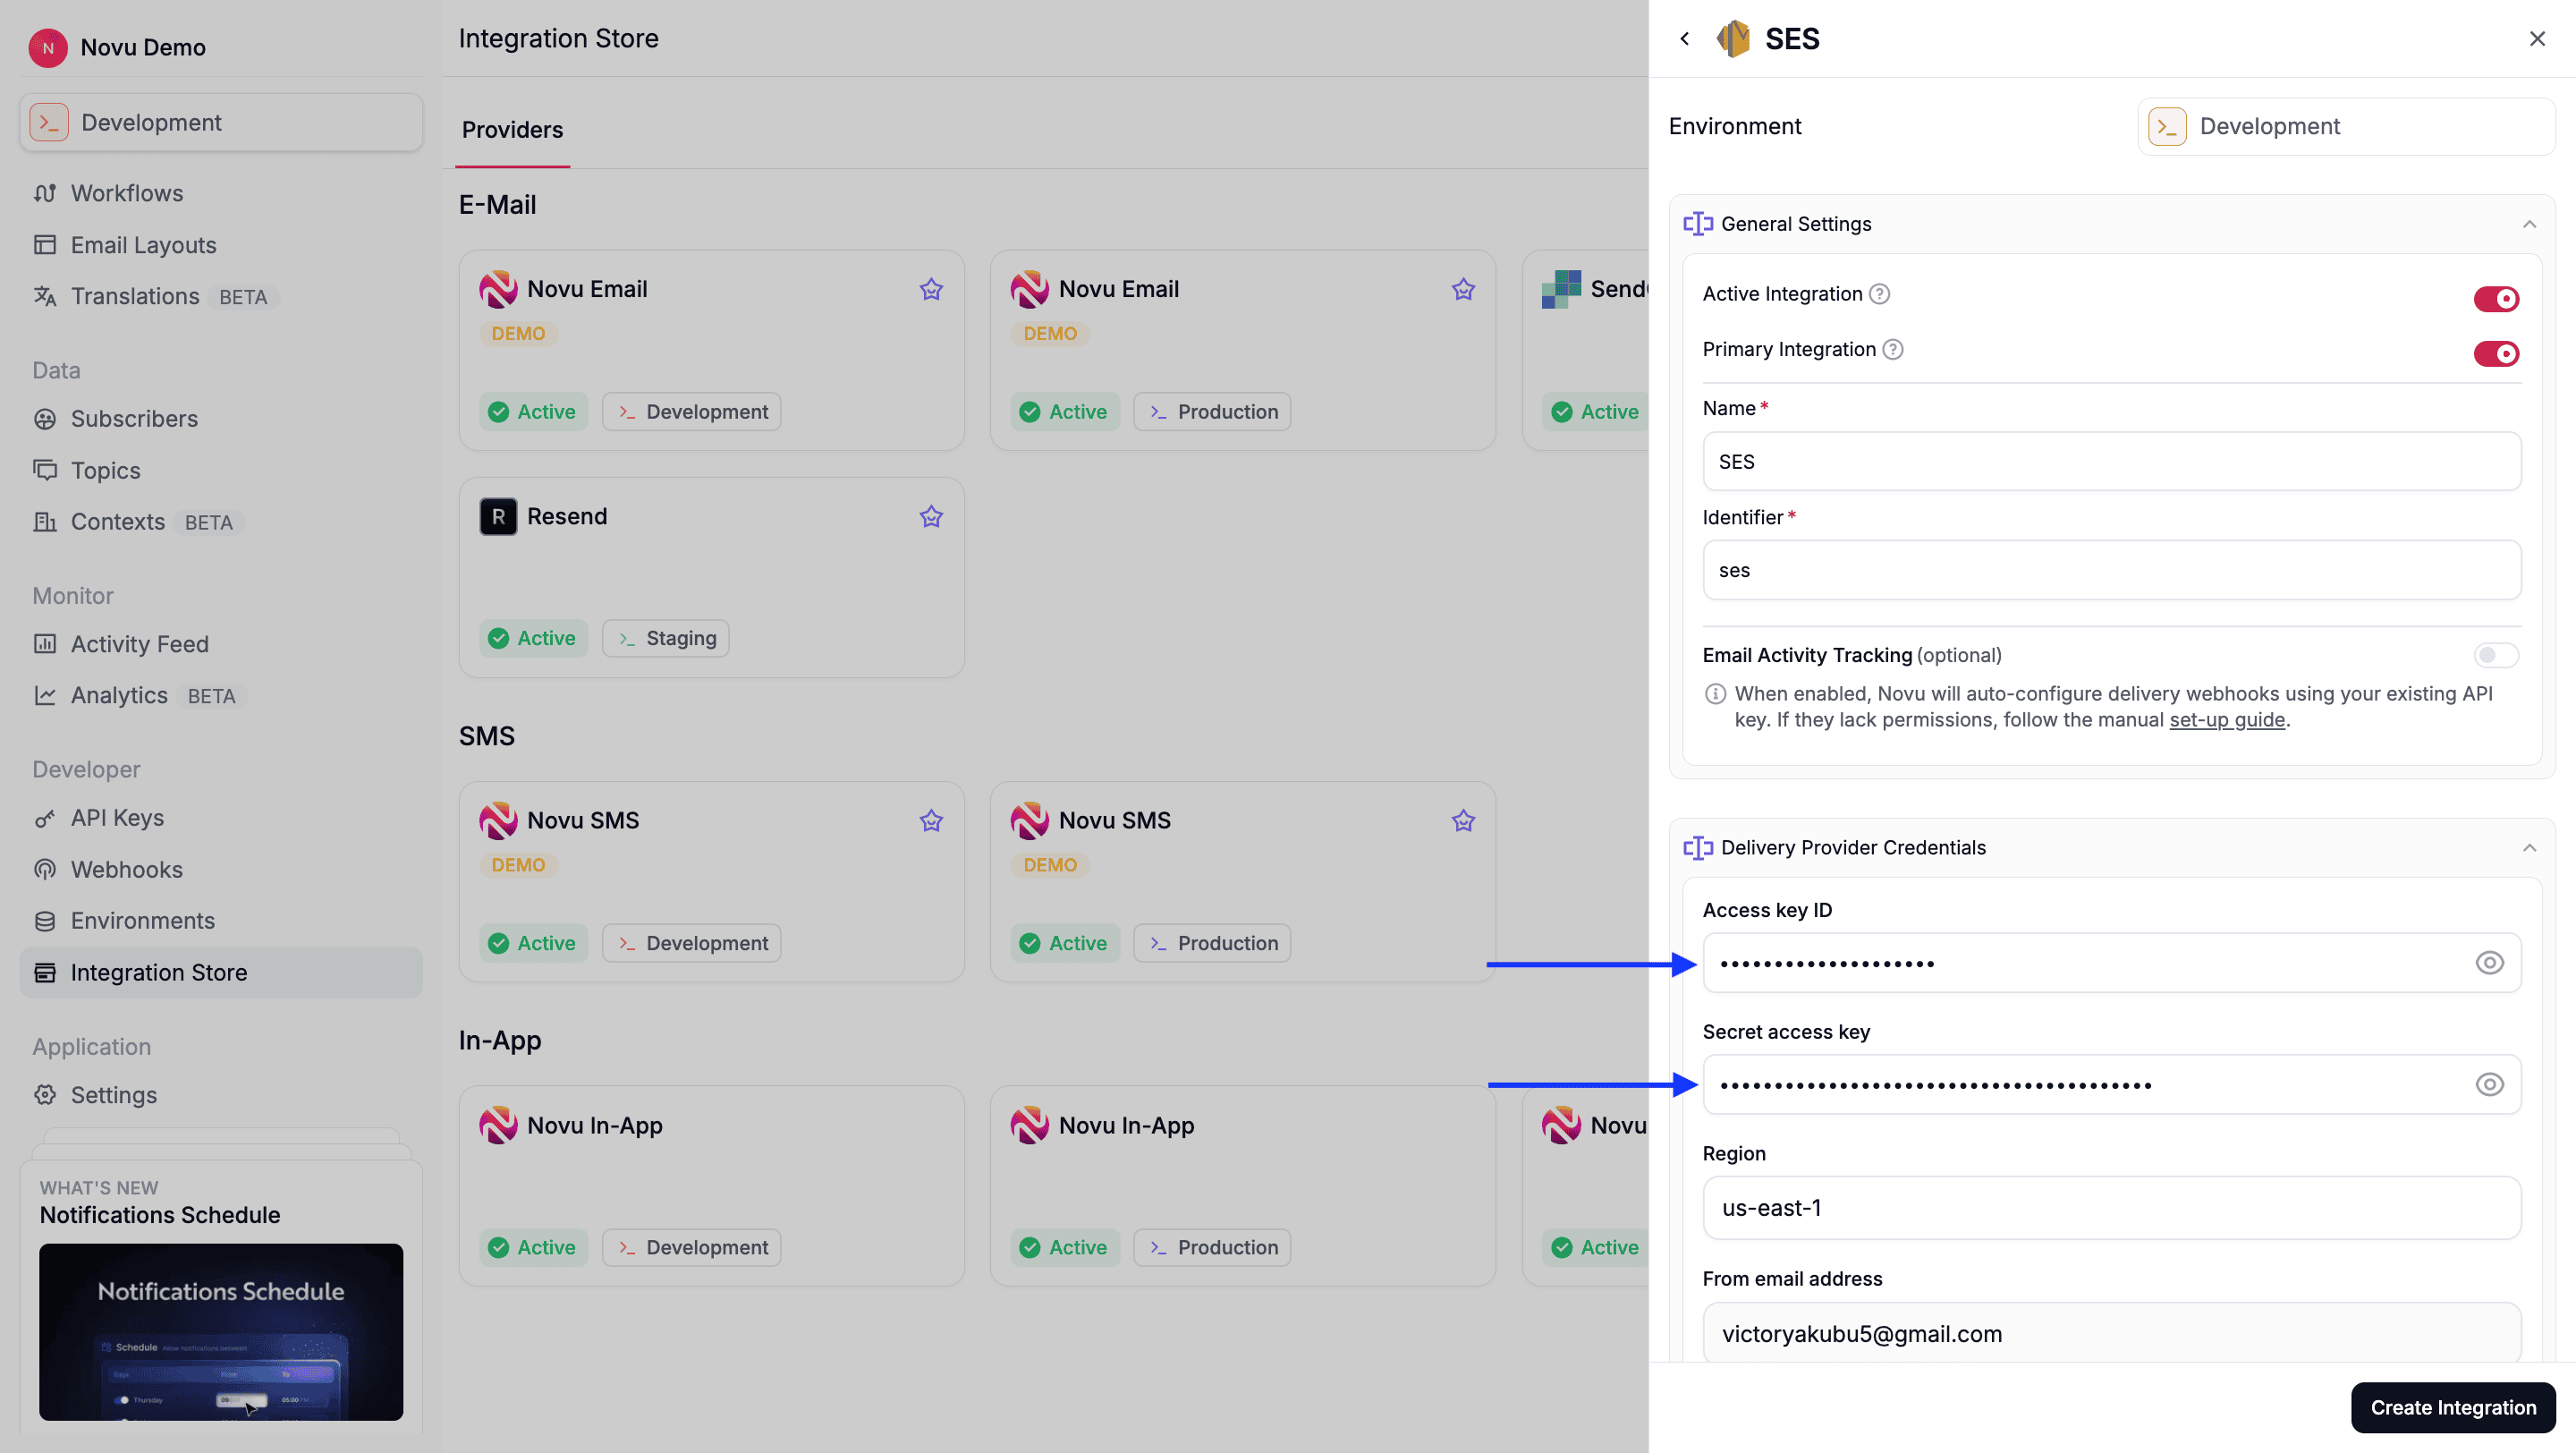 6. Fill in the remaining required fields, then click **Create integration**.
## Step 4: Create an SNS Topic
Next, you'll set up an SNS (Simple Notification Service) topic to receive events from SES.
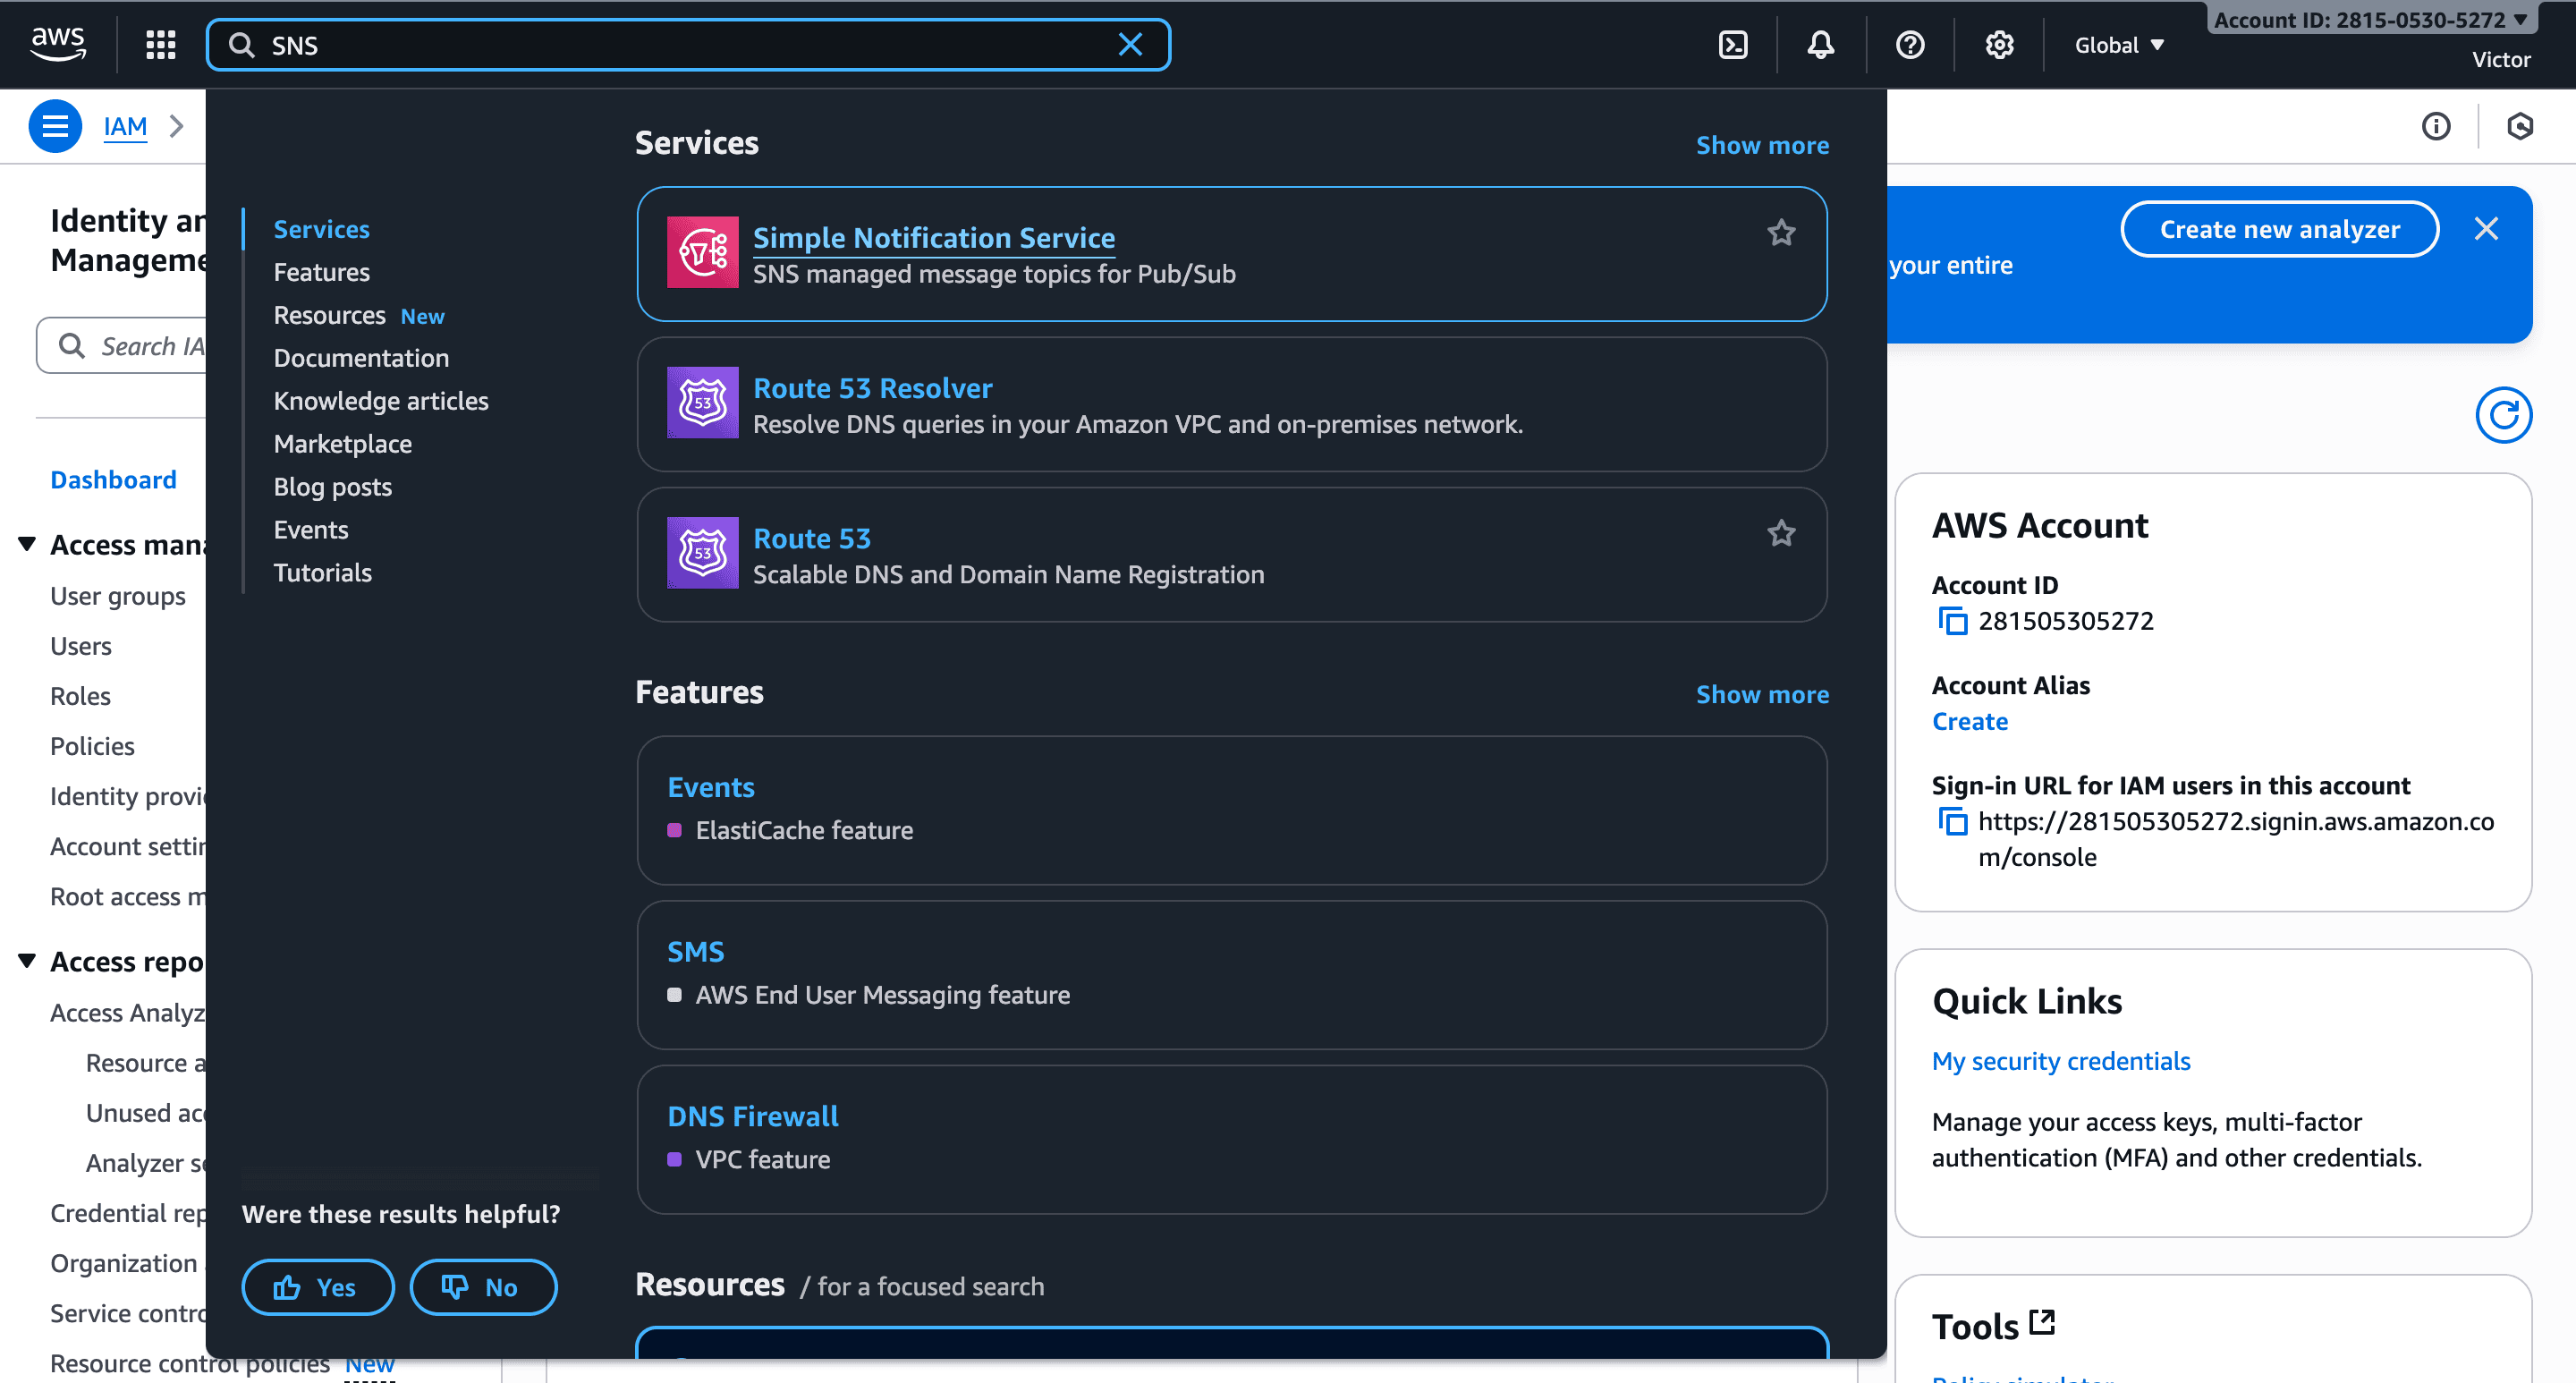
1. In the AWS console, search for SNS (Simple Notification Service), this will open the SNS dashboard.
6. Fill in the remaining required fields, then click **Create integration**.
## Step 4: Create an SNS Topic
Next, you'll set up an SNS (Simple Notification Service) topic to receive events from SES.
1. In the AWS console, search for SNS (Simple Notification Service), this will open the SNS dashboard.
 2. In the sidebar, click **Topics**.
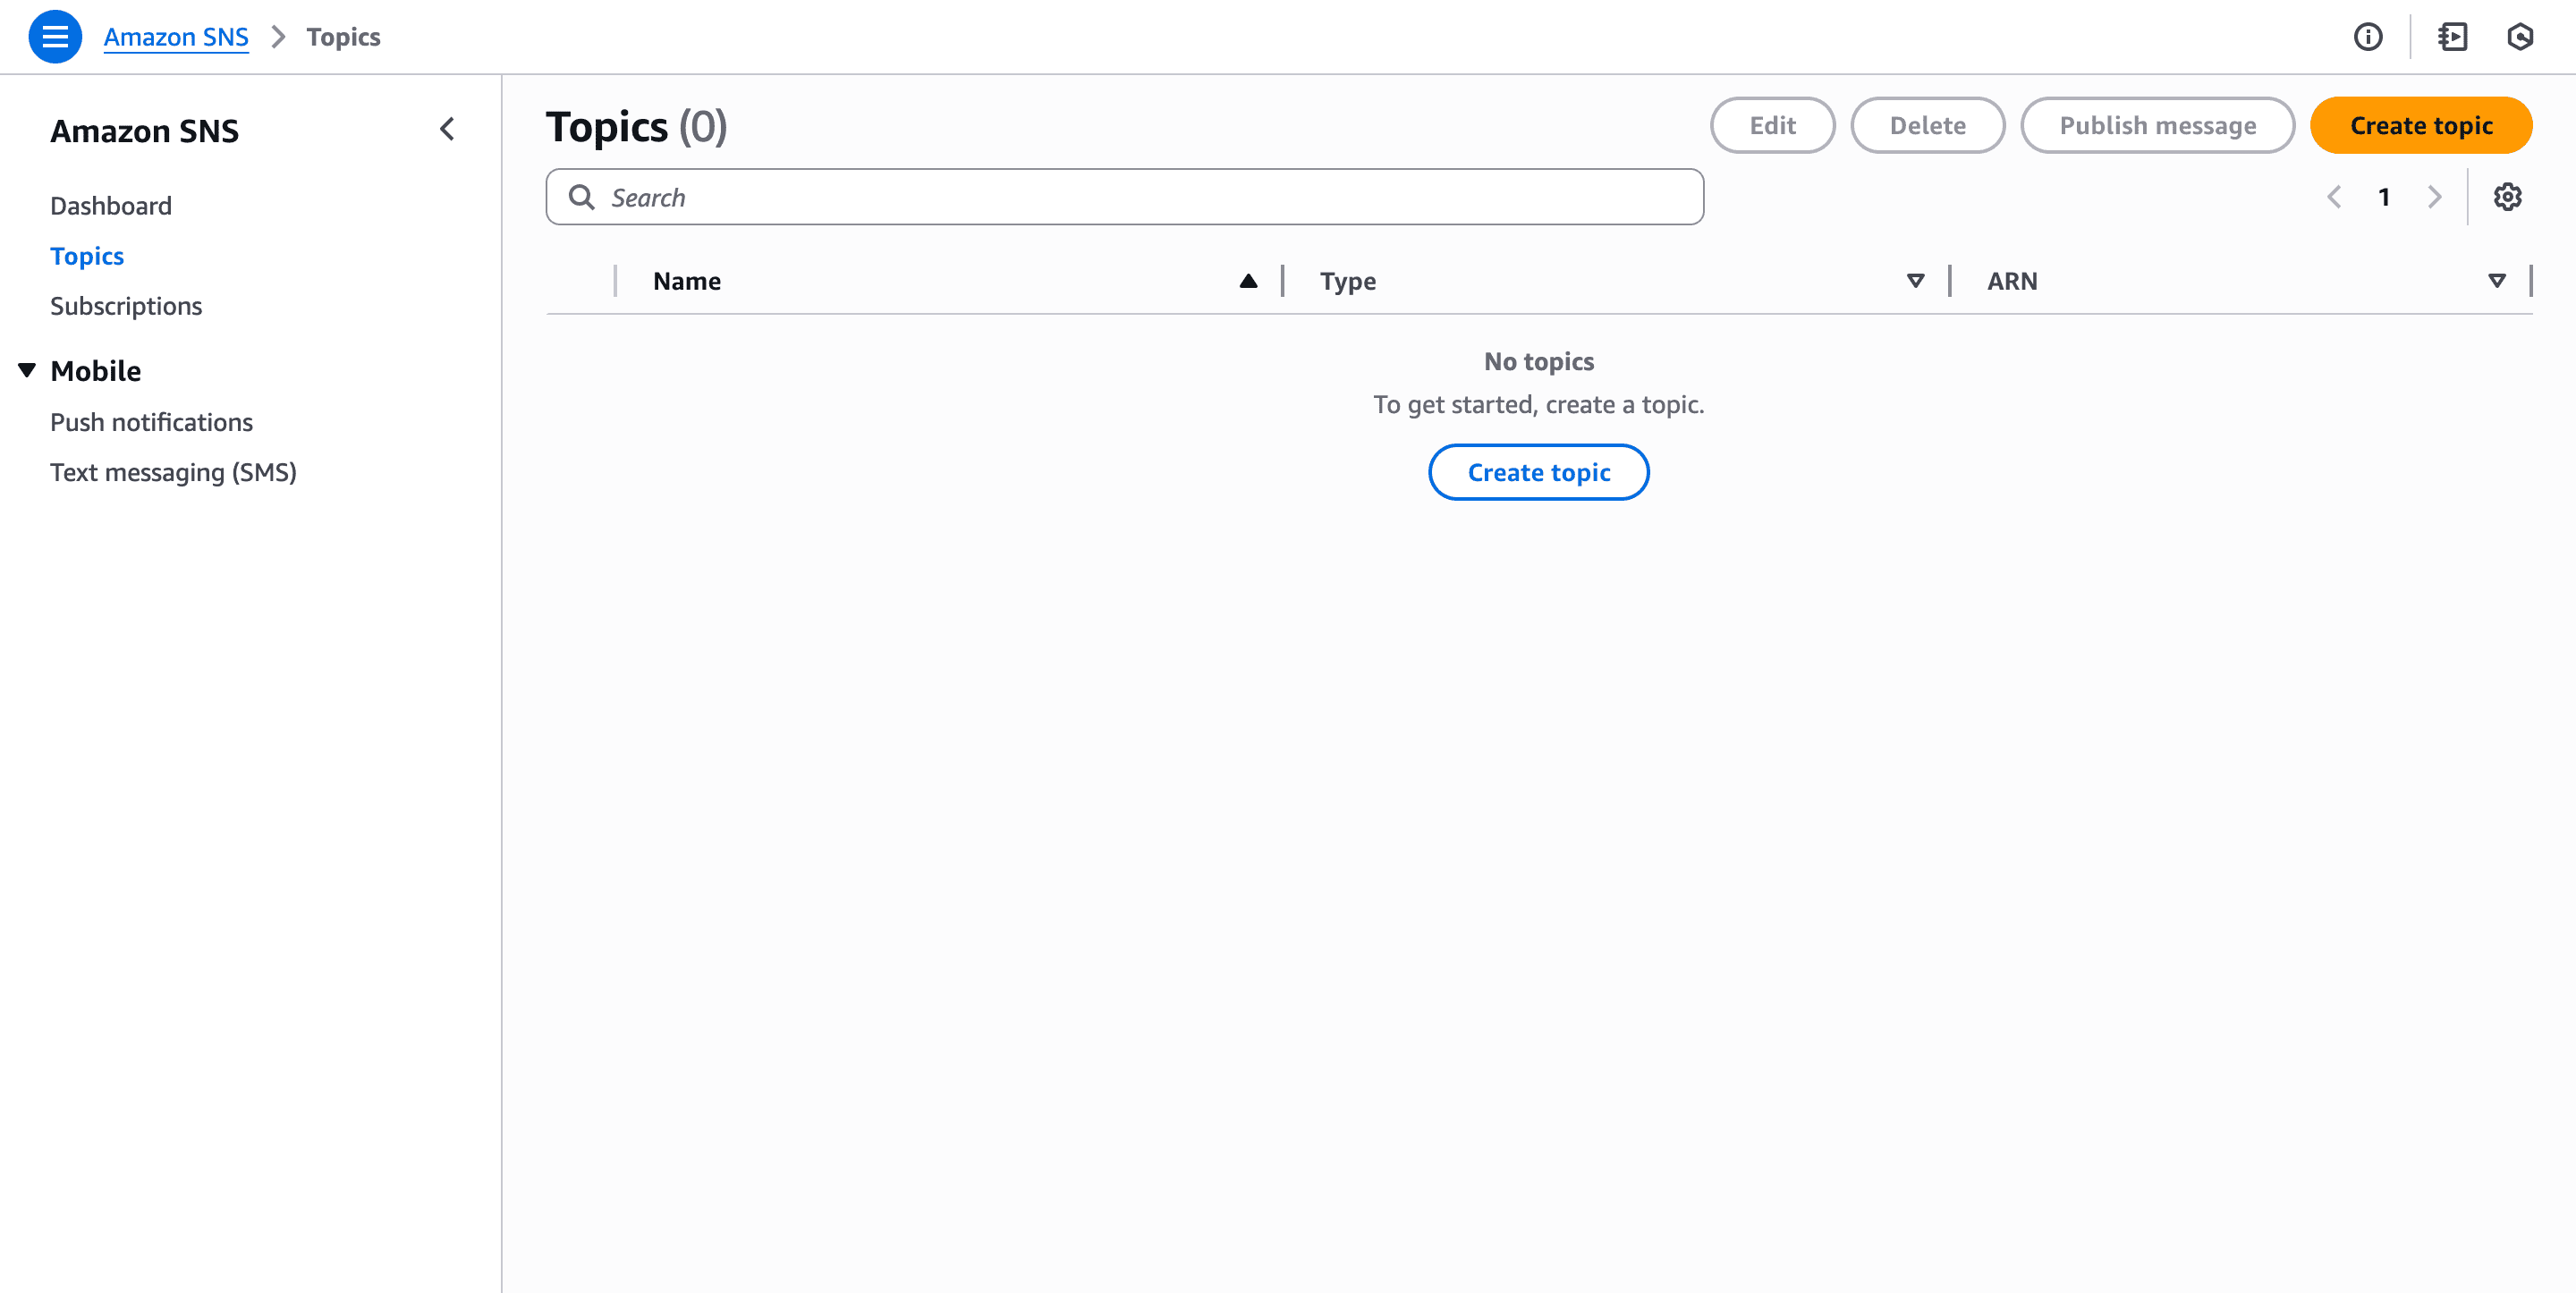 3. Click **Create topic**
4. Select the **Standard** option.
3. Click **Create topic**
4. Select the **Standard** option.
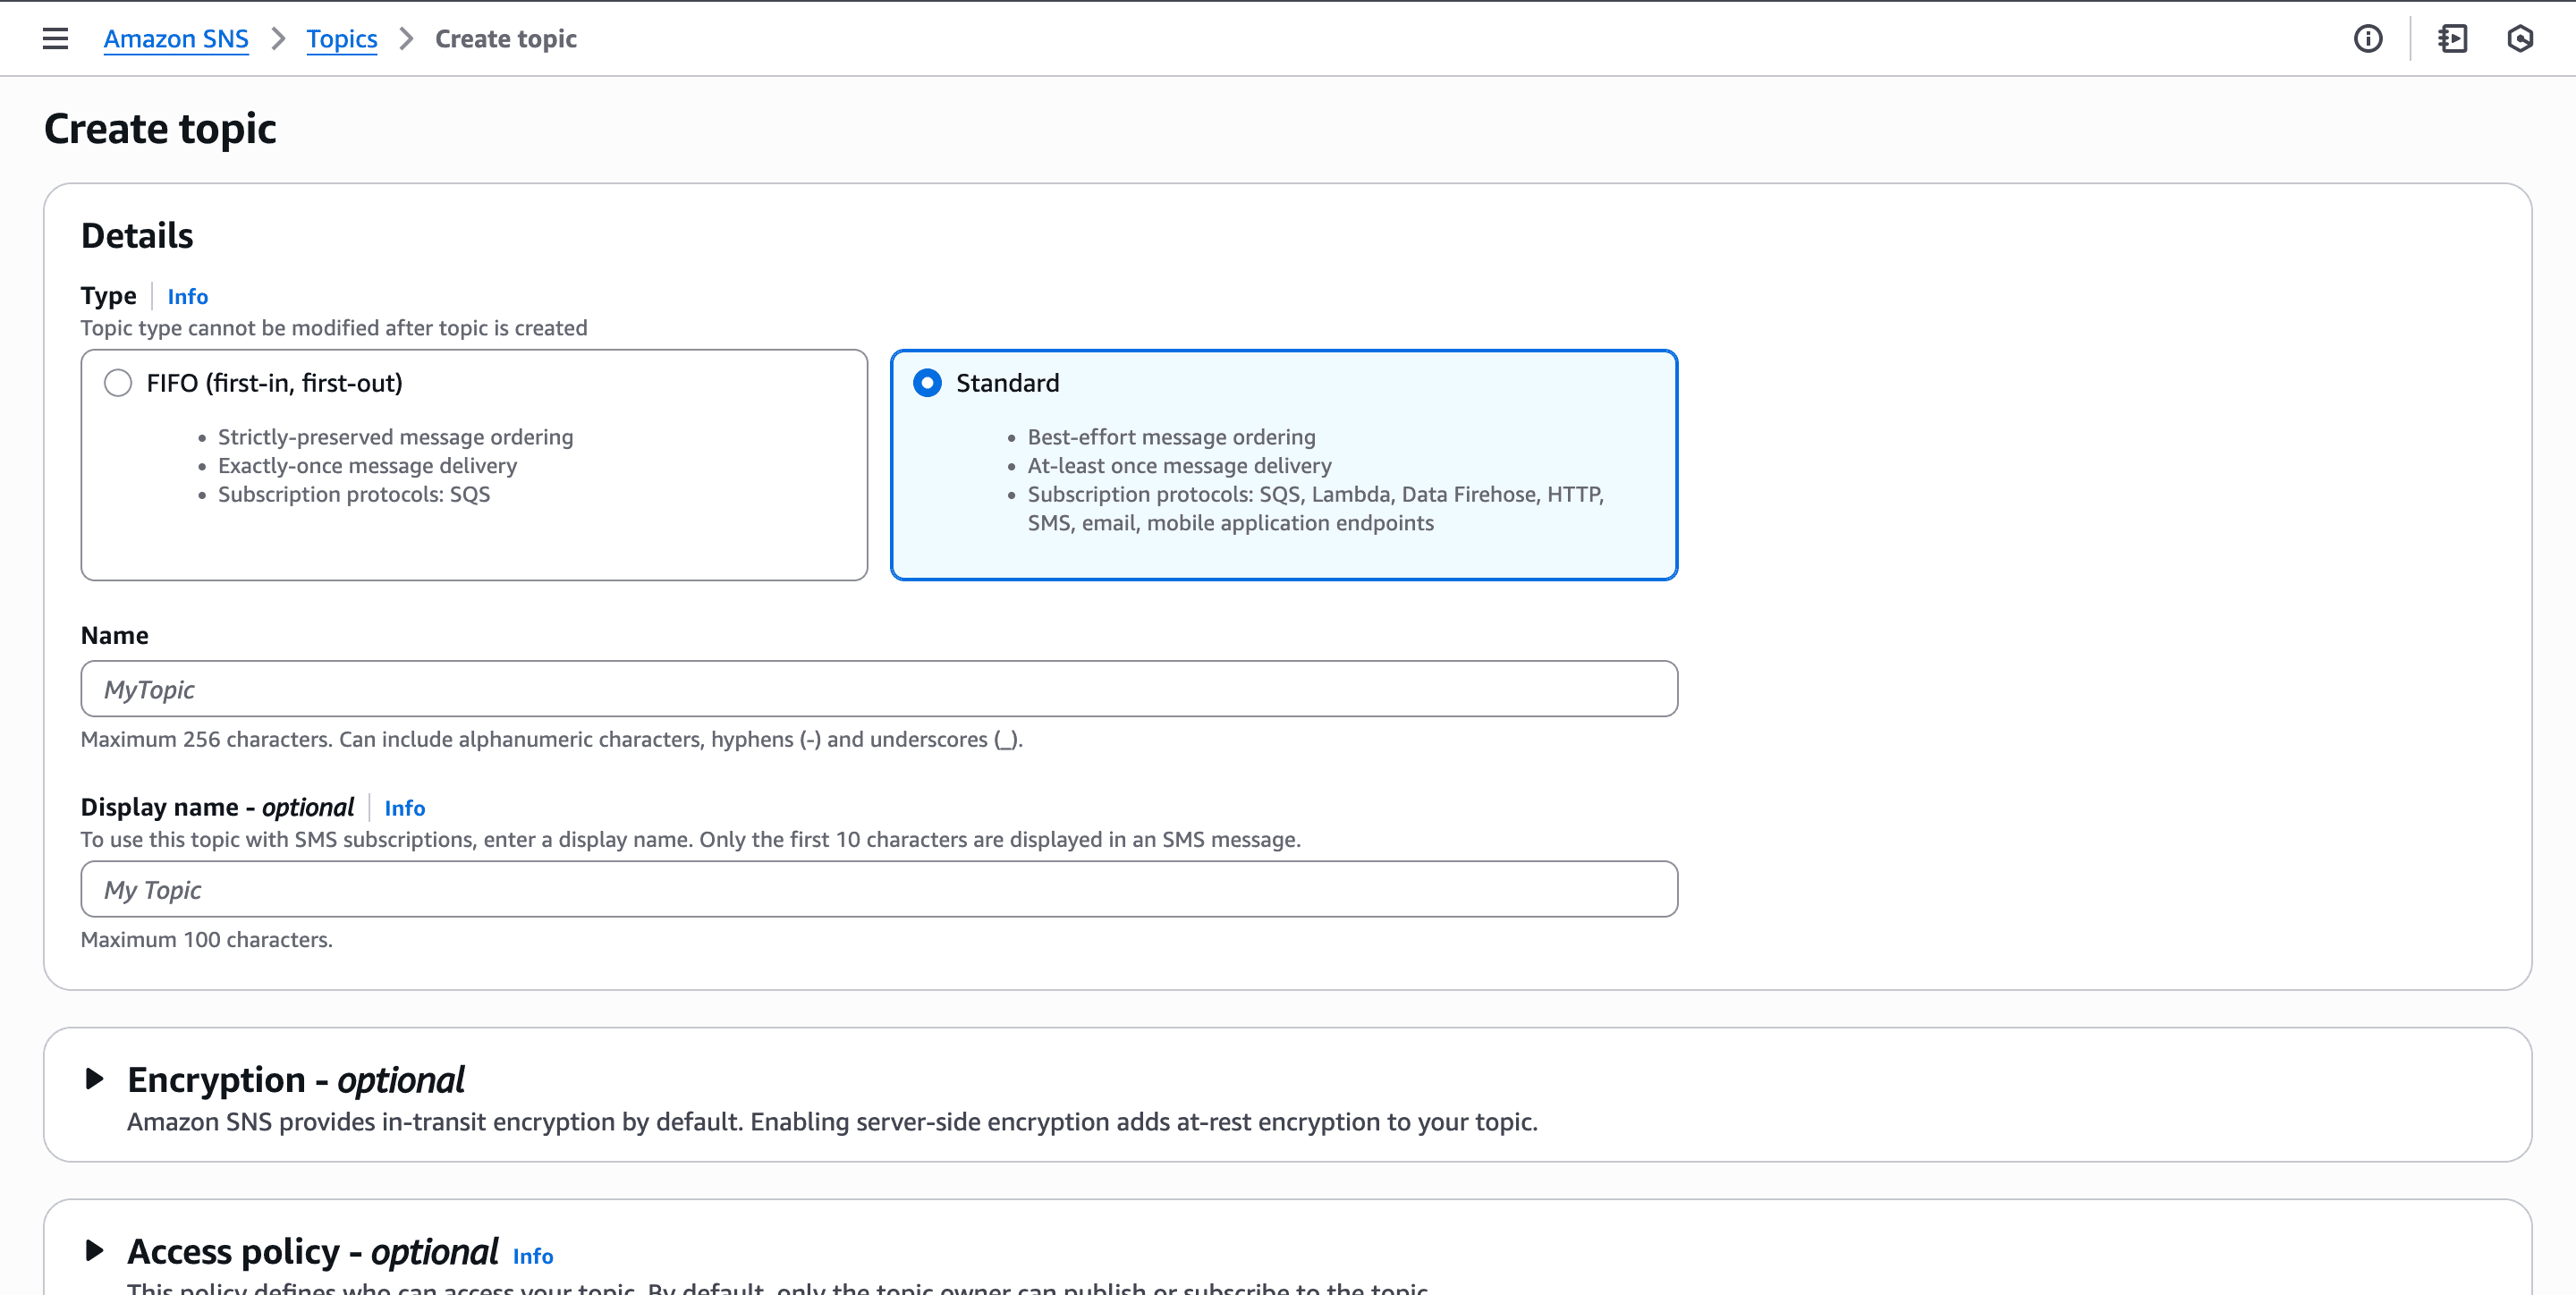 5. Enter a topic name, then scroll down and click **Create topic**.
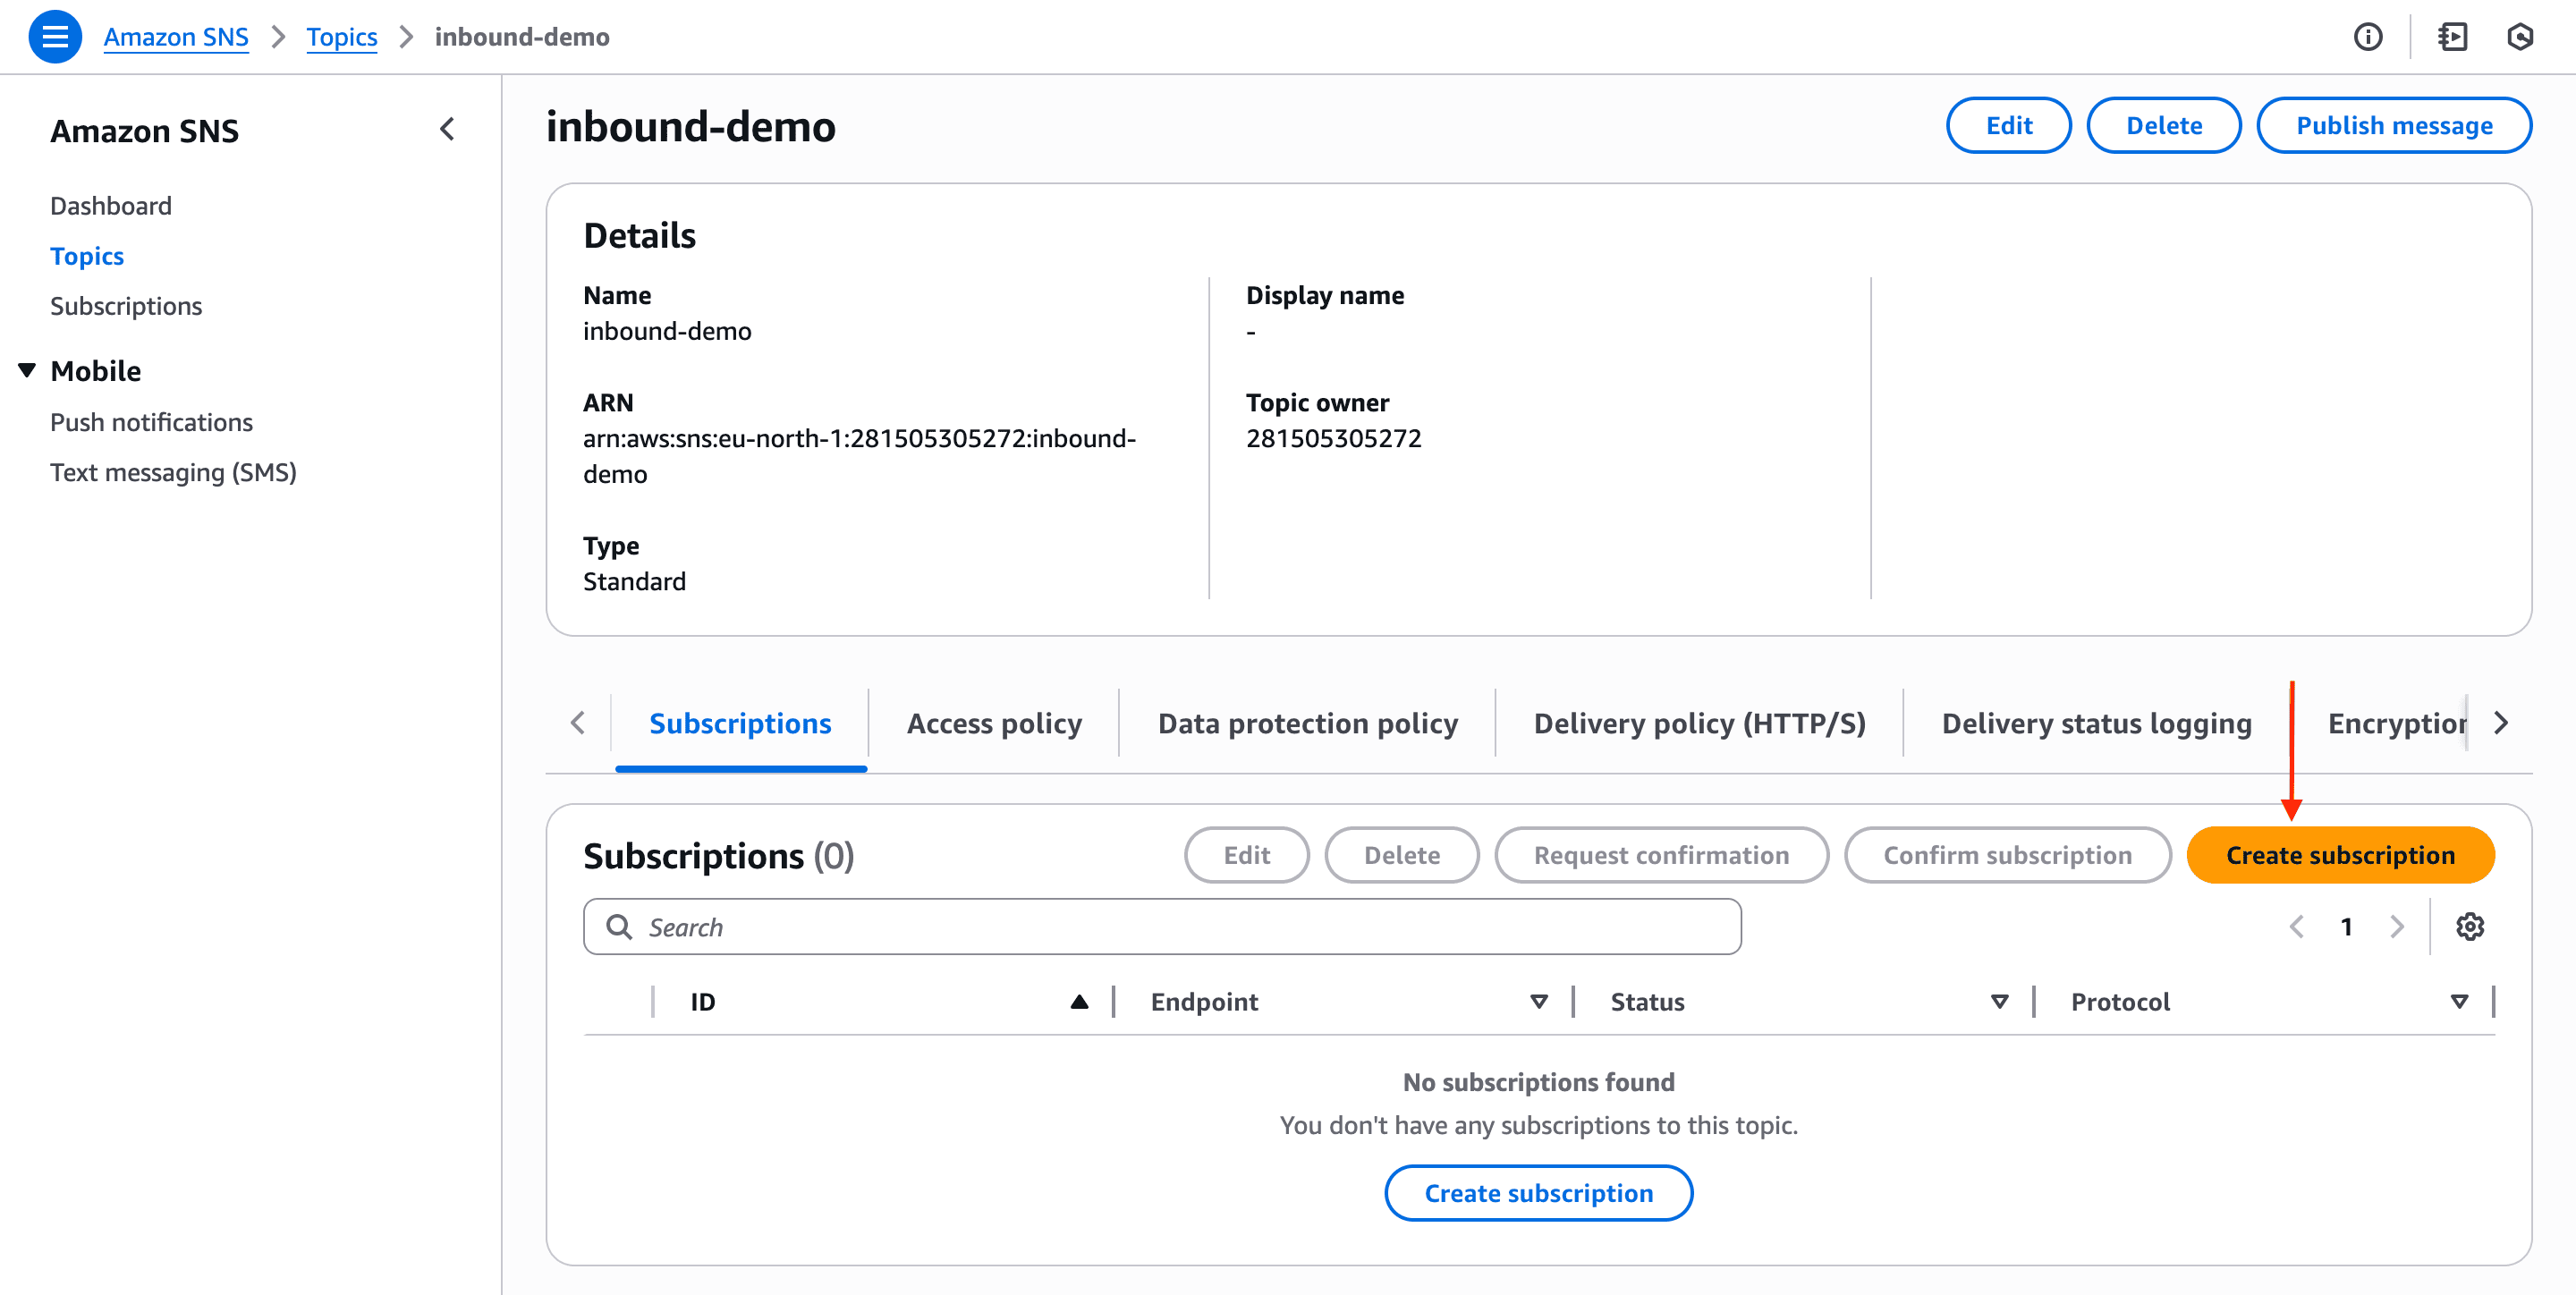
## Step 5: Subscribe Novu’s webhook to the SNS topic
1. On the topic's page, click **Create subscription**.
5. Enter a topic name, then scroll down and click **Create topic**.
## Step 5: Subscribe Novu’s webhook to the SNS topic
1. On the topic's page, click **Create subscription**.
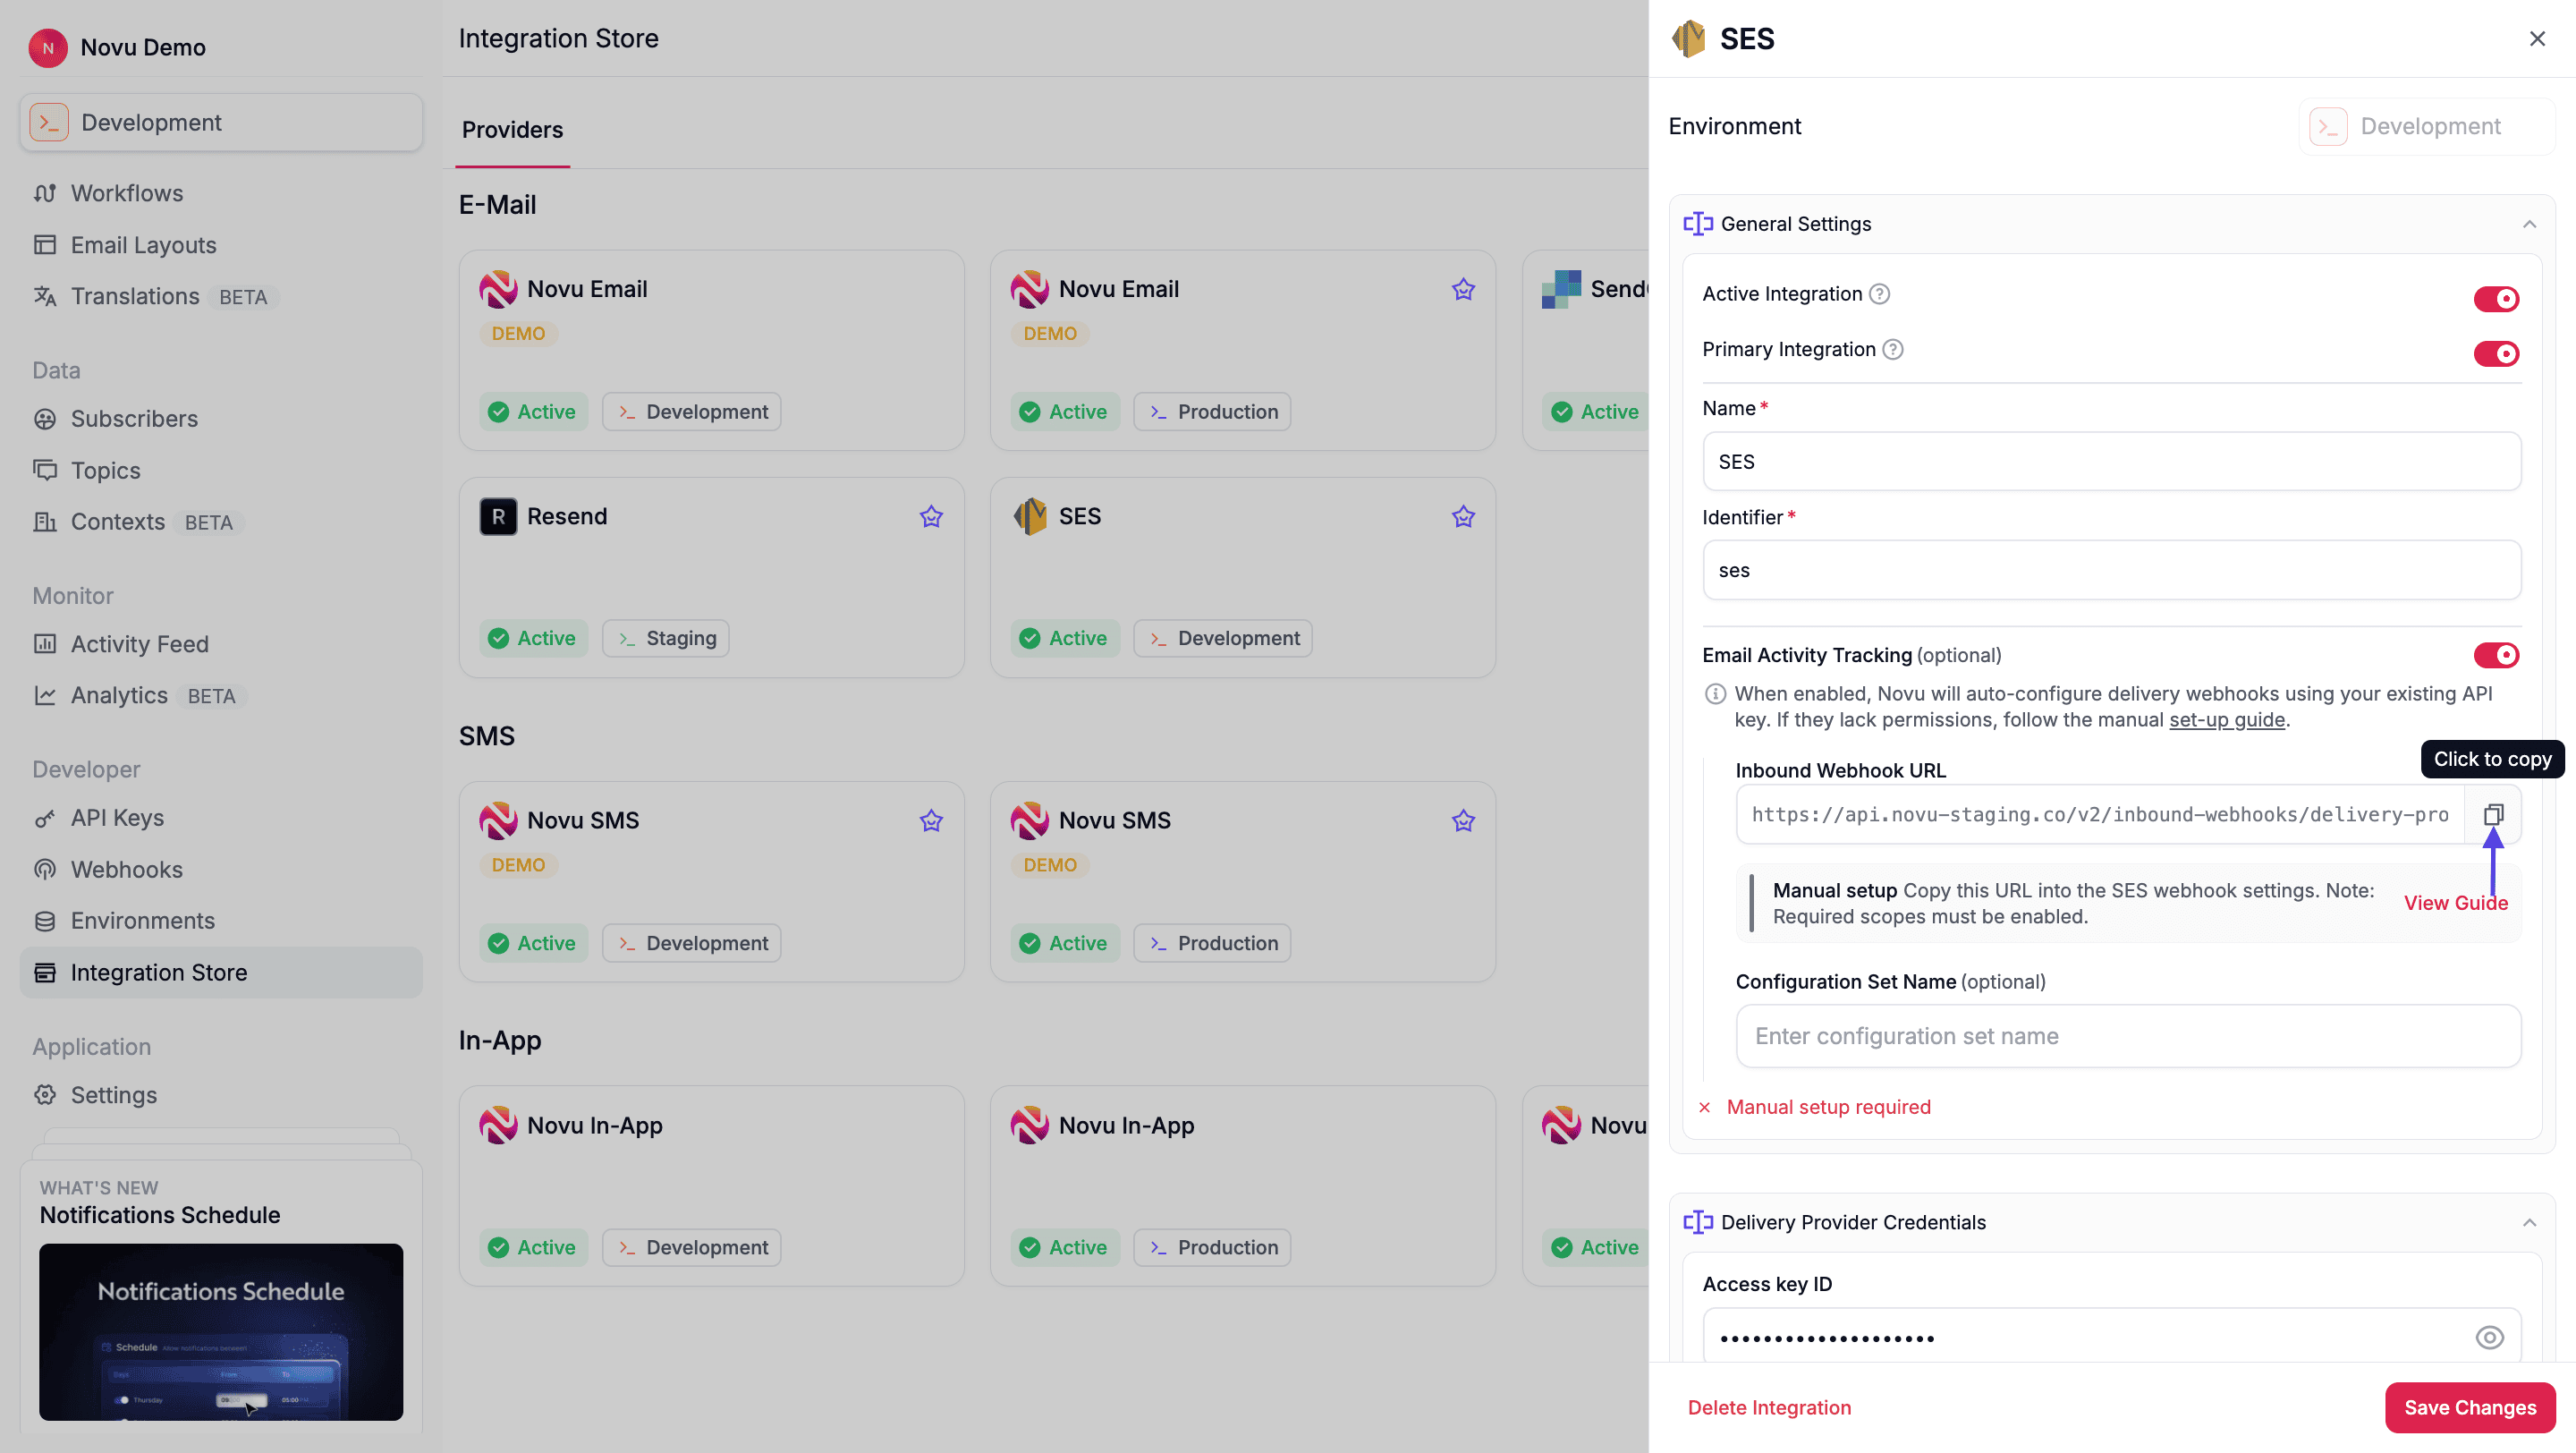
 2. In another browser tab, return to your **SES integration settings in Novu**. Enable the **Email Activity Tracking** toggle.
3. Copy the **Inbound Webhook URL** it provides.
2. In another browser tab, return to your **SES integration settings in Novu**. Enable the **Email Activity Tracking** toggle.
3. Copy the **Inbound Webhook URL** it provides.
 4. Go back to your AWS SNS subscription page.
* For **Protocol**, select **HTTPS**.
* For **Endpoint**, paste the **Inbound Webhook URL** you copied from Novu.
4. Go back to your AWS SNS subscription page.
* For **Protocol**, select **HTTPS**.
* For **Endpoint**, paste the **Inbound Webhook URL** you copied from Novu.
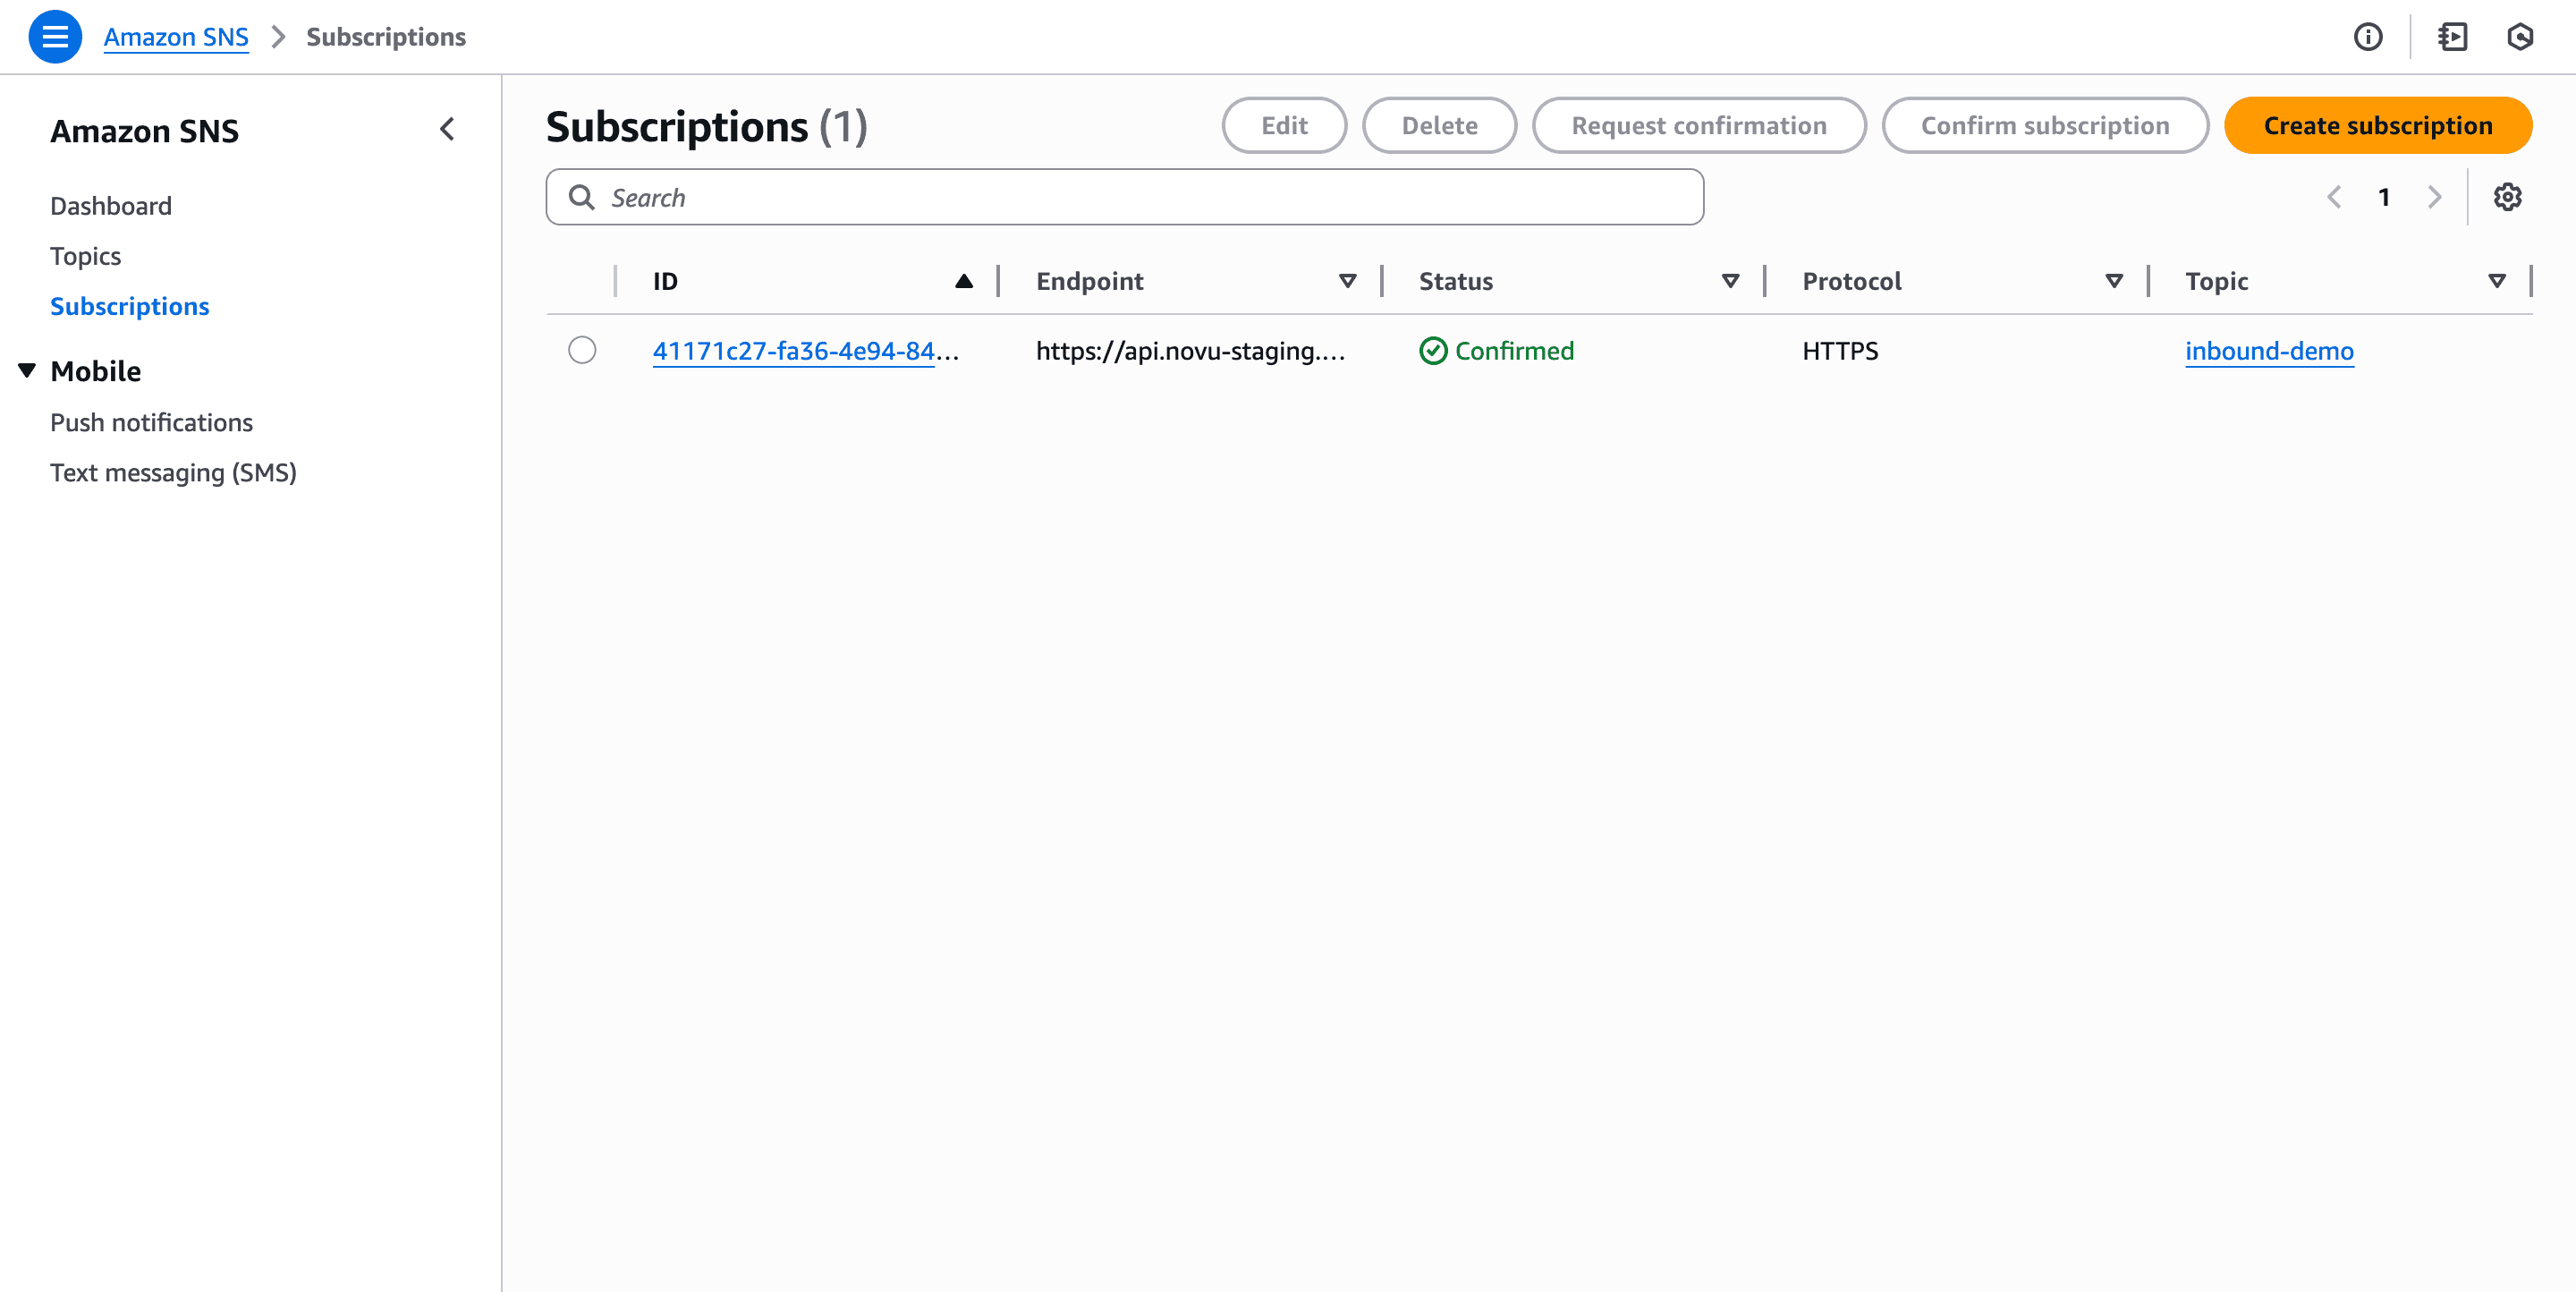
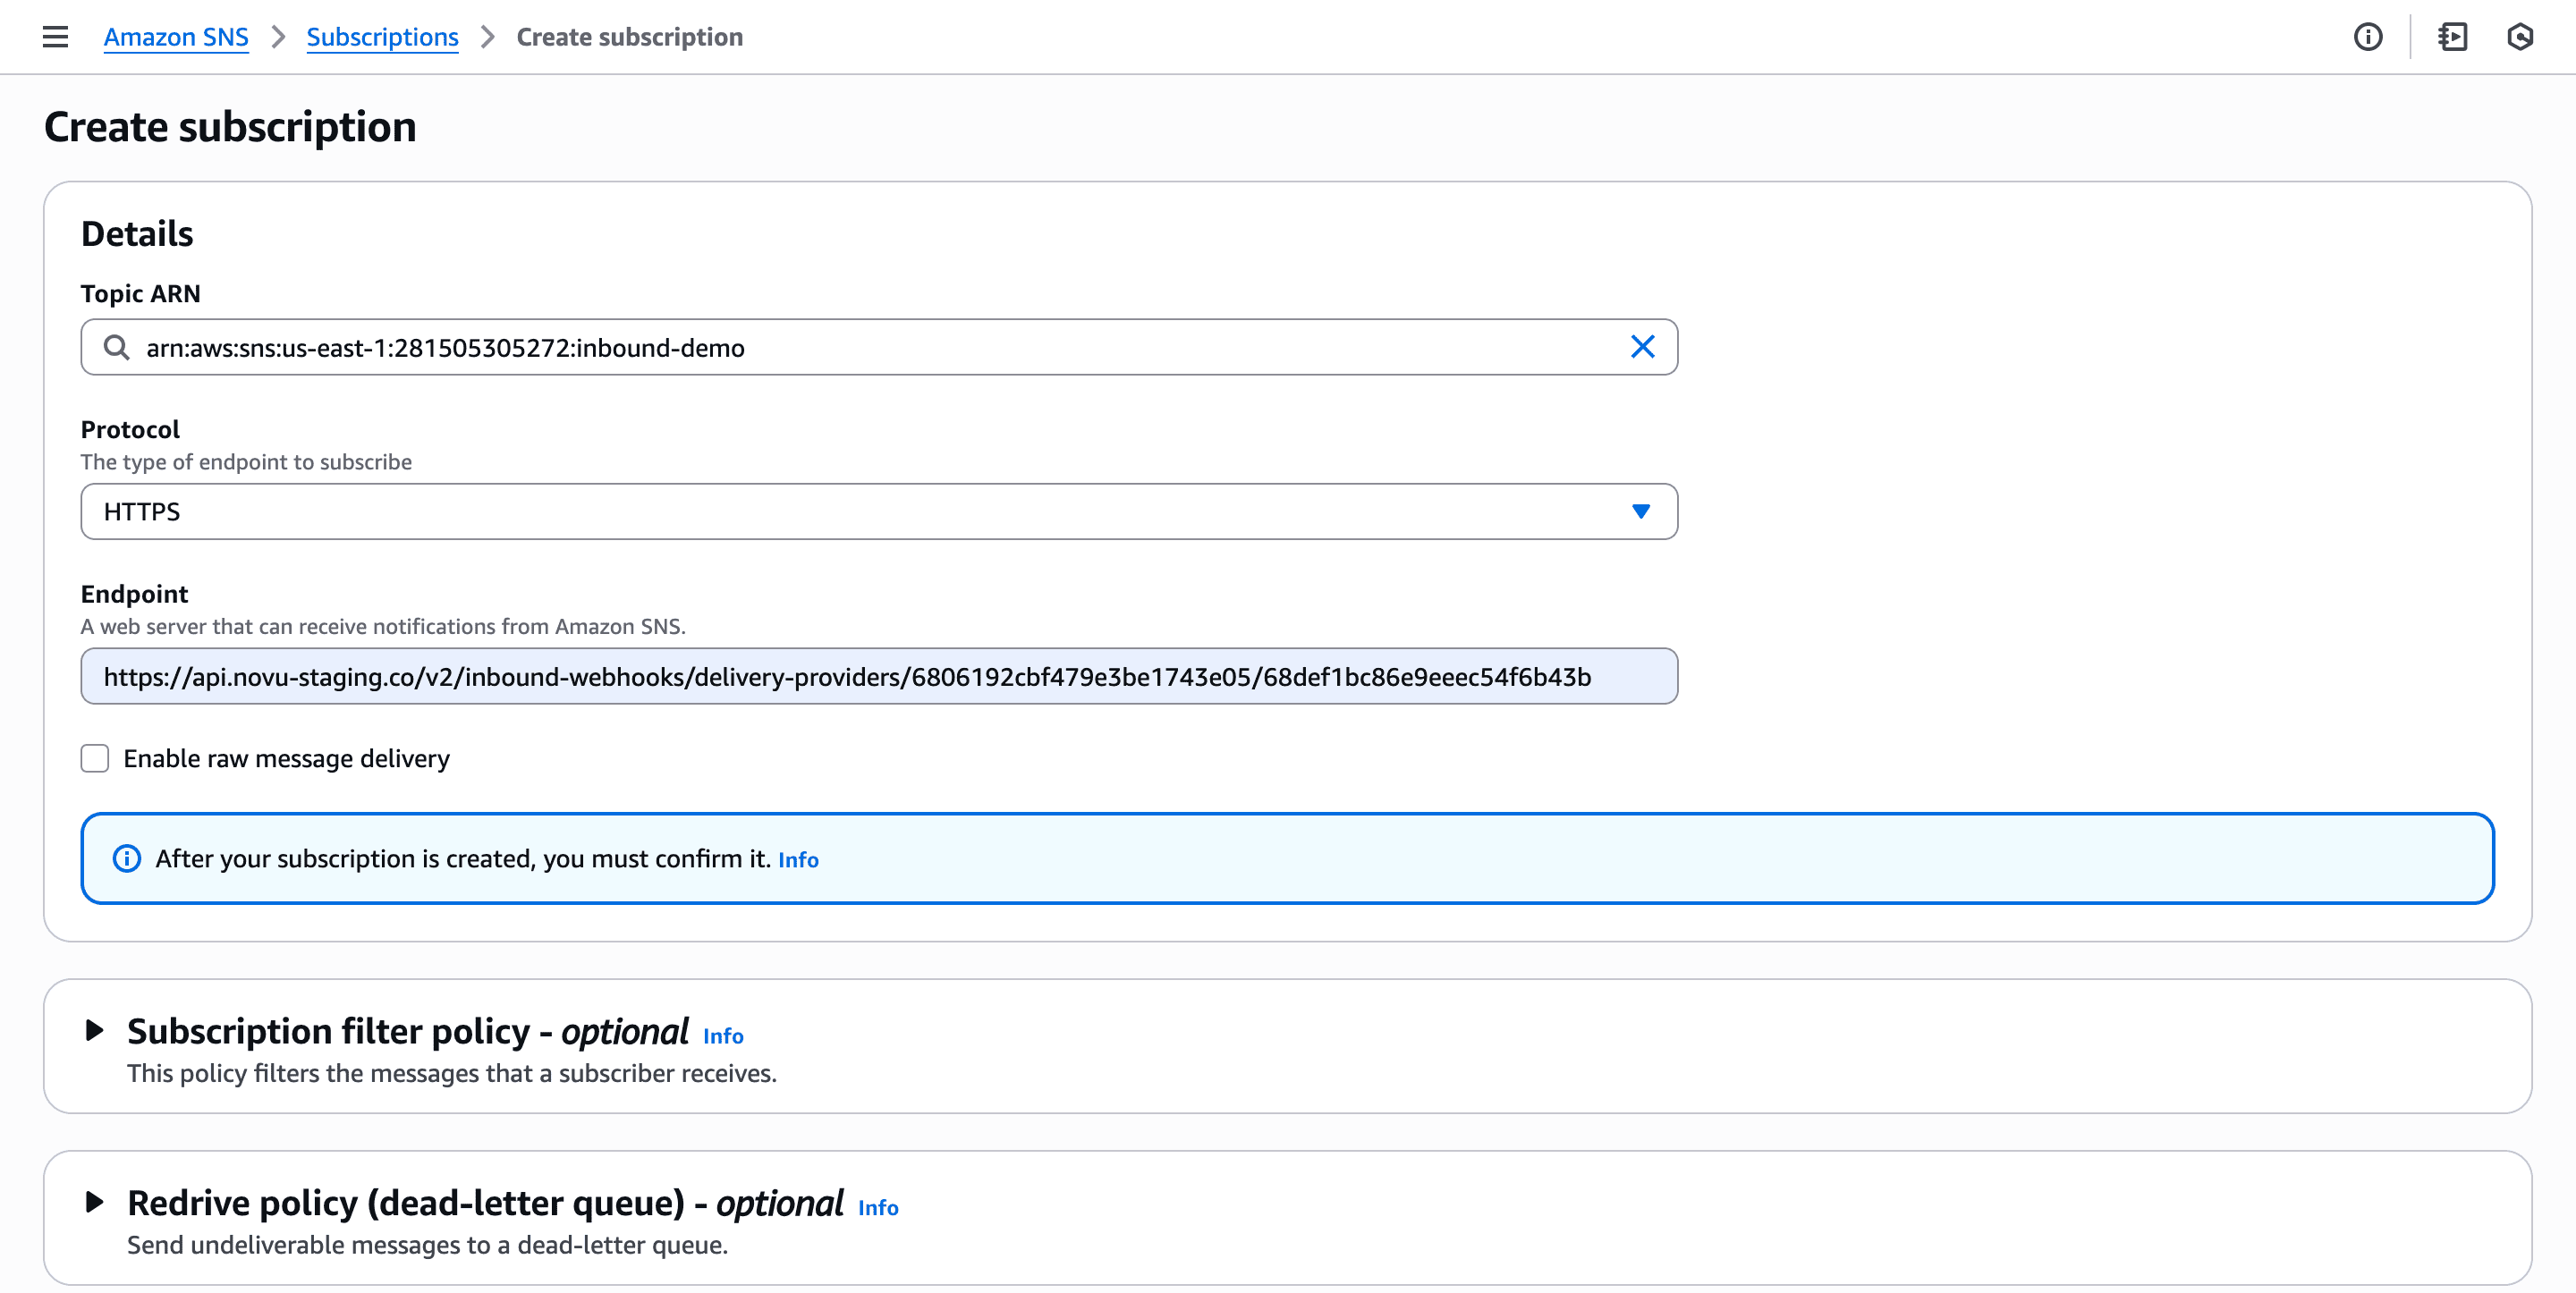 5. Click **Create subscription**
6. In the sidebar, click **Subscriptions** to confirm that the subscription status is “Confirmed.”
5. Click **Create subscription**
6. In the sidebar, click **Subscriptions** to confirm that the subscription status is “Confirmed.”
 ## Step 6: Create SES Configuration set
Create a Configuration set in SES to tie everything together.
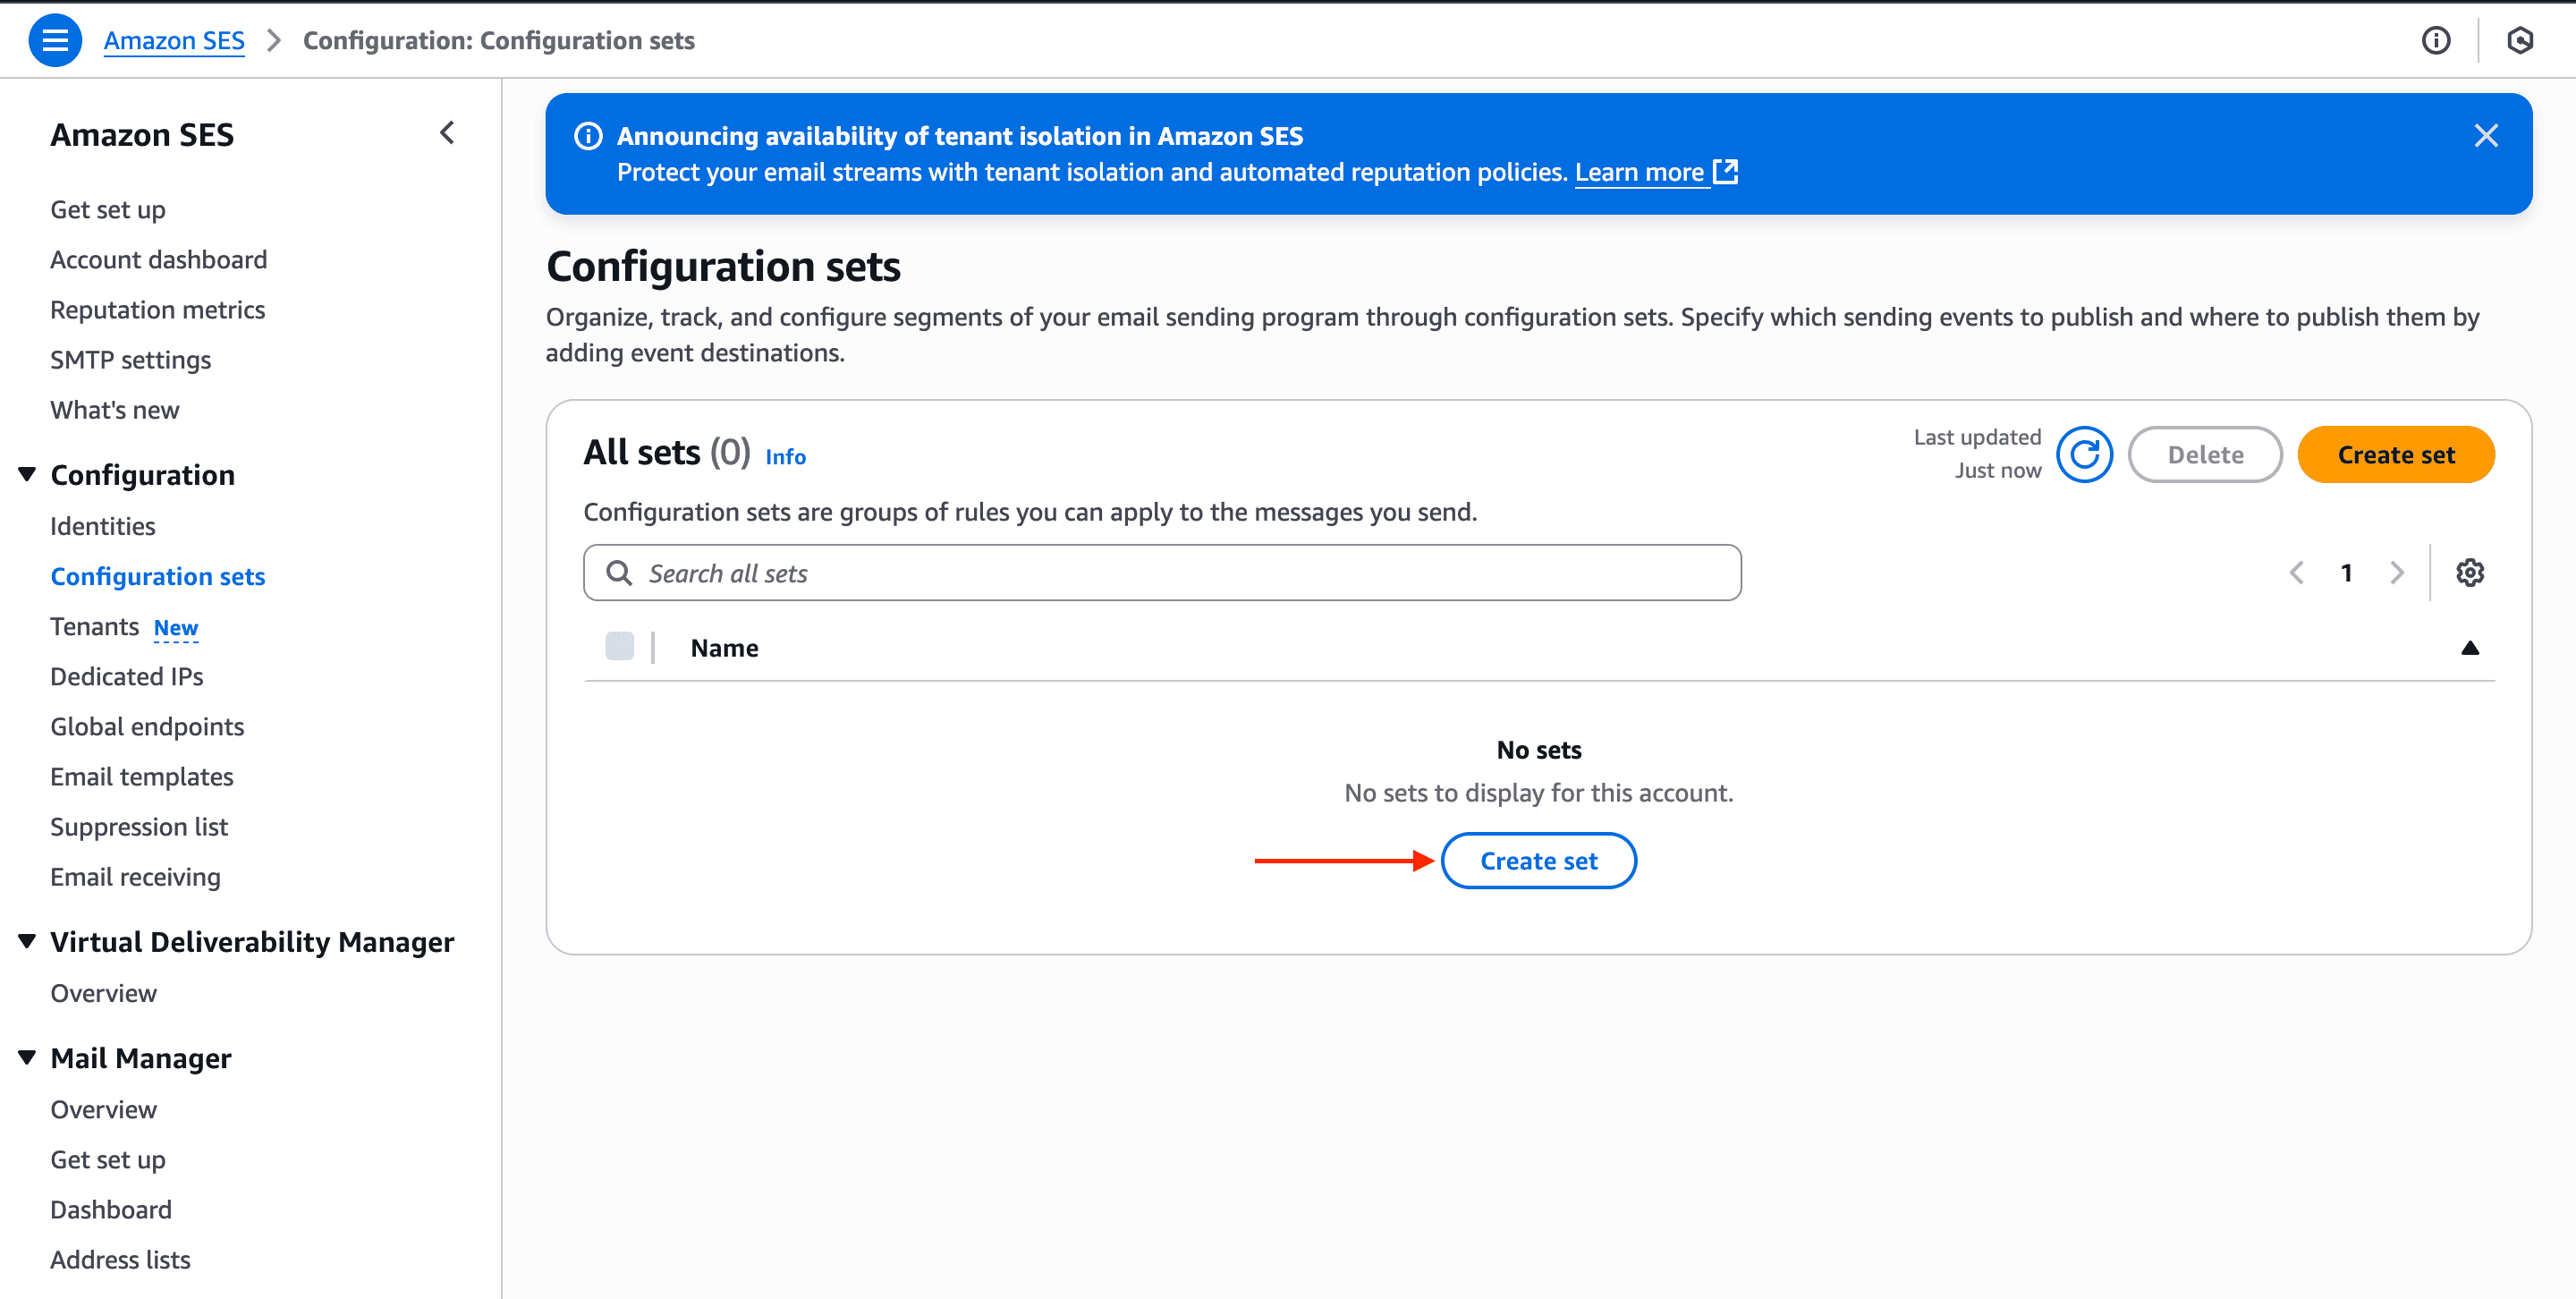
1. In the AWS console, search for SES (Simple Email Service). This opens the Amazon SES dashboard.
2. In the sidebar, under Configuration section, click **Configuration sets**
3. Click **Create set**.
## Step 6: Create SES Configuration set
Create a Configuration set in SES to tie everything together.
1. In the AWS console, search for SES (Simple Email Service). This opens the Amazon SES dashboard.
2. In the sidebar, under Configuration section, click **Configuration sets**
3. Click **Create set**.
 4. Enter a configuration set name, then click **Create set**.
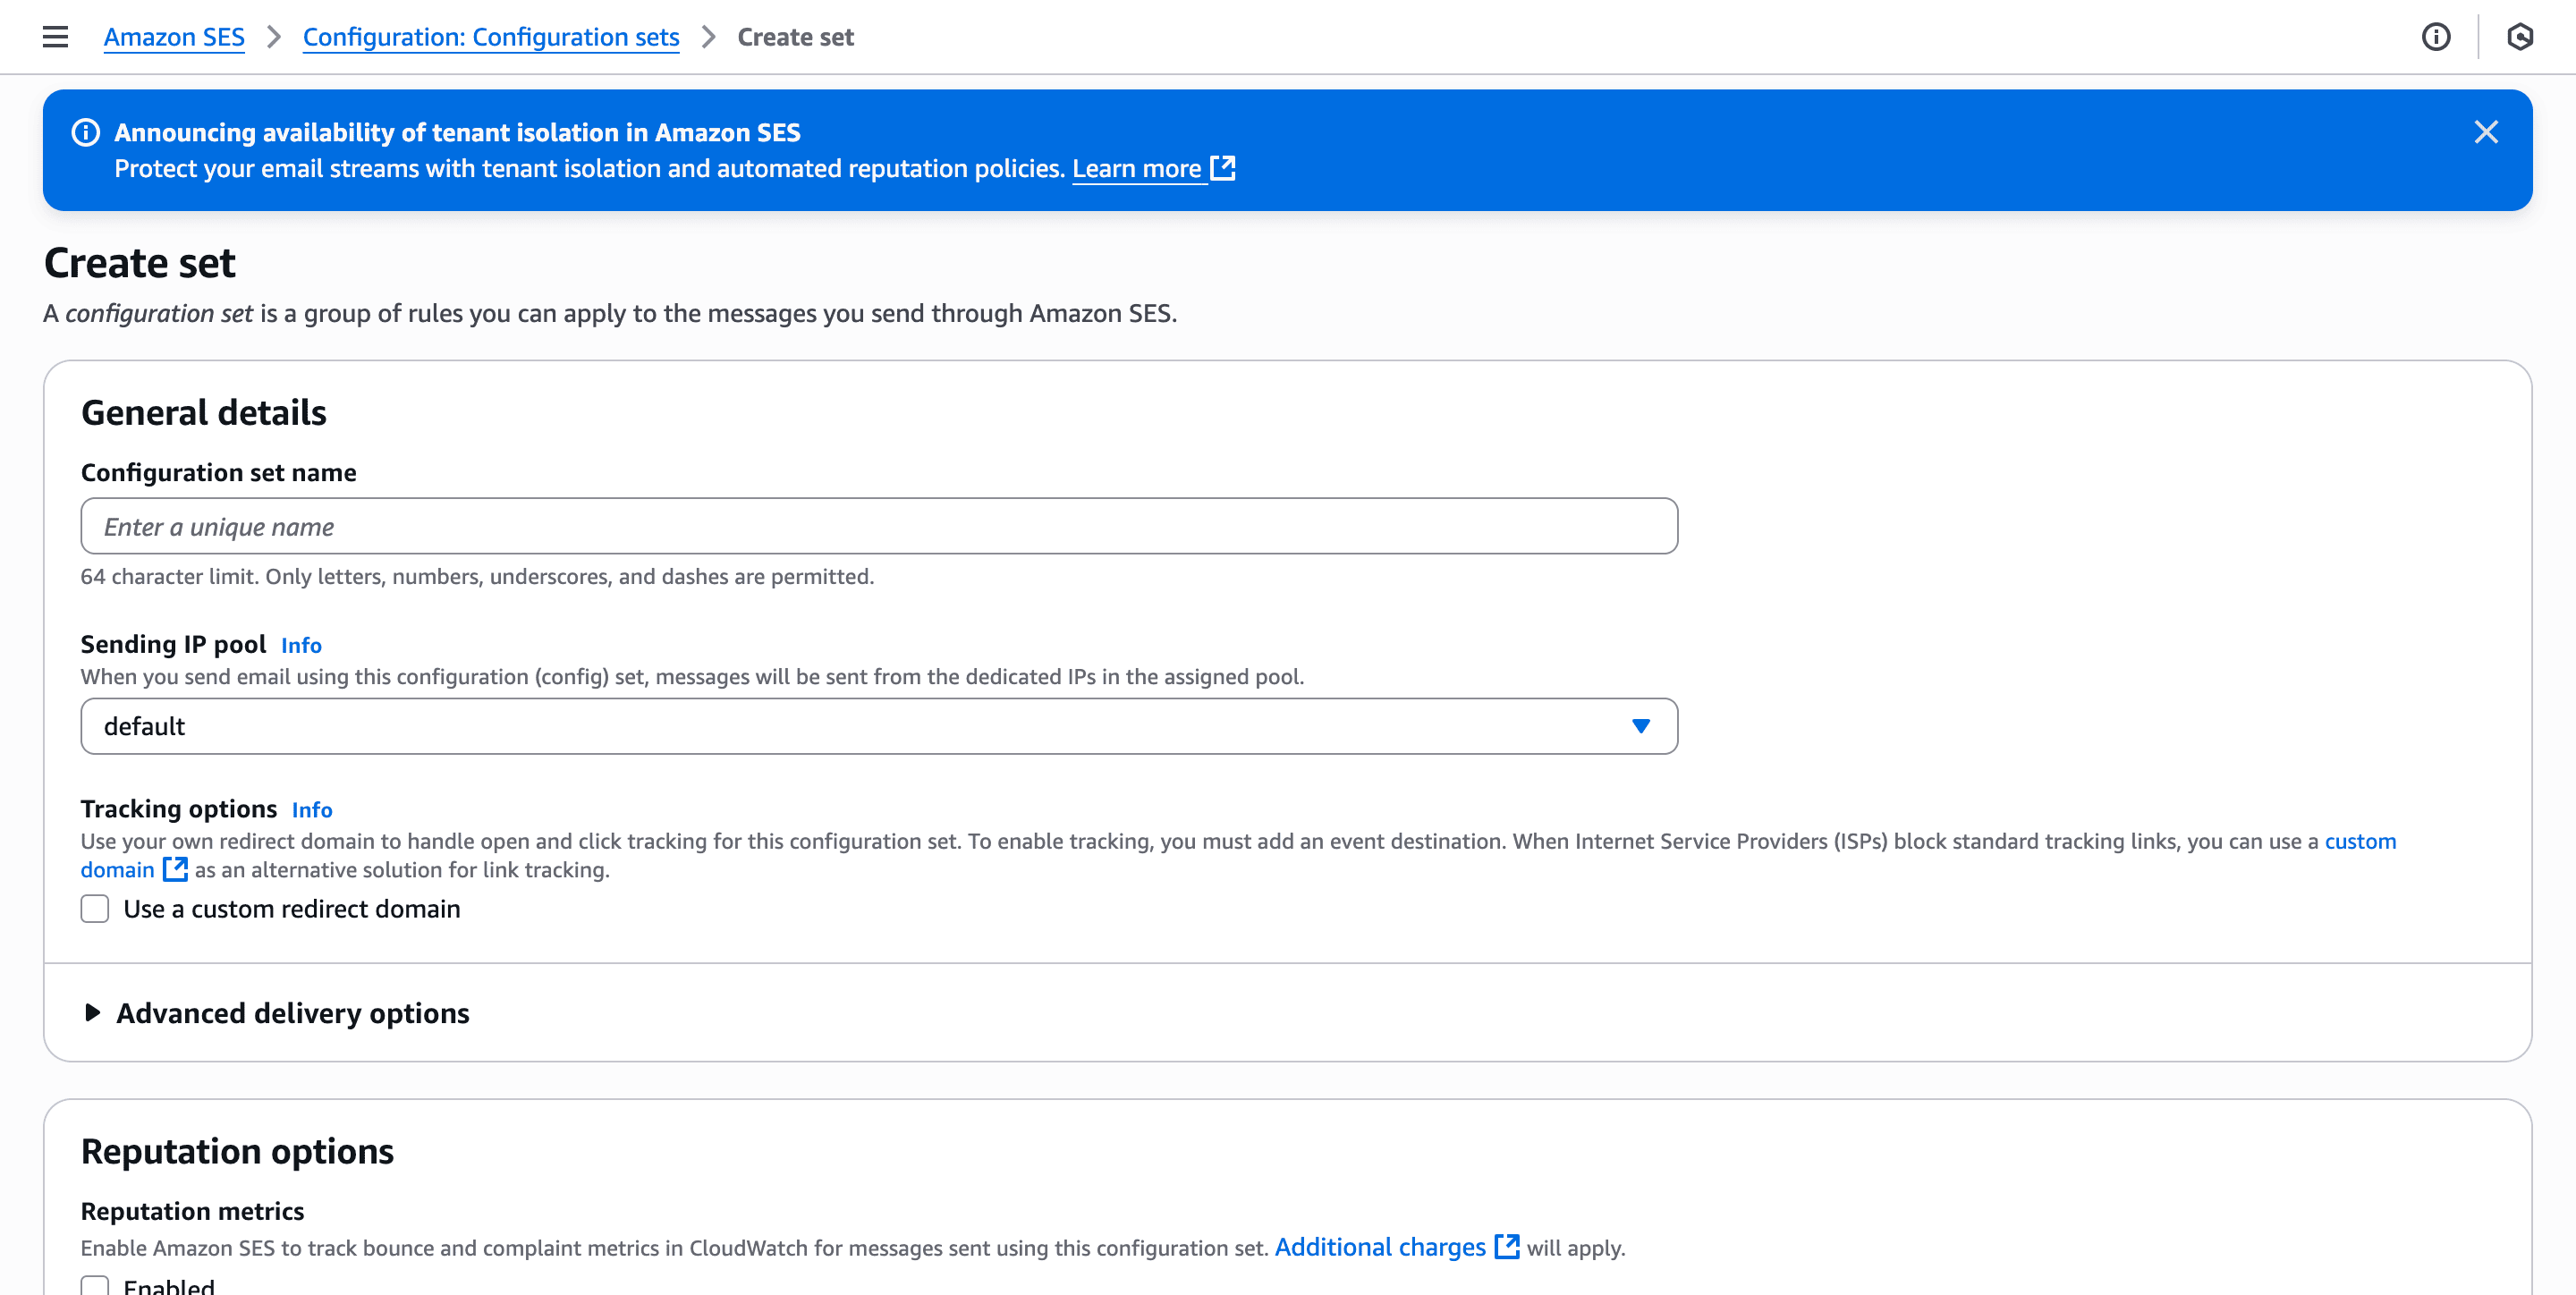 5. Copy the **Configuration set name**.
6. Go back to your SES integration settings in Novu.
7. Paste the name into the **Configuration Set Name** field under the **Email Activity Tracking** section.
5. Copy the **Configuration set name**.
6. Go back to your SES integration settings in Novu.
7. Paste the name into the **Configuration Set Name** field under the **Email Activity Tracking** section.
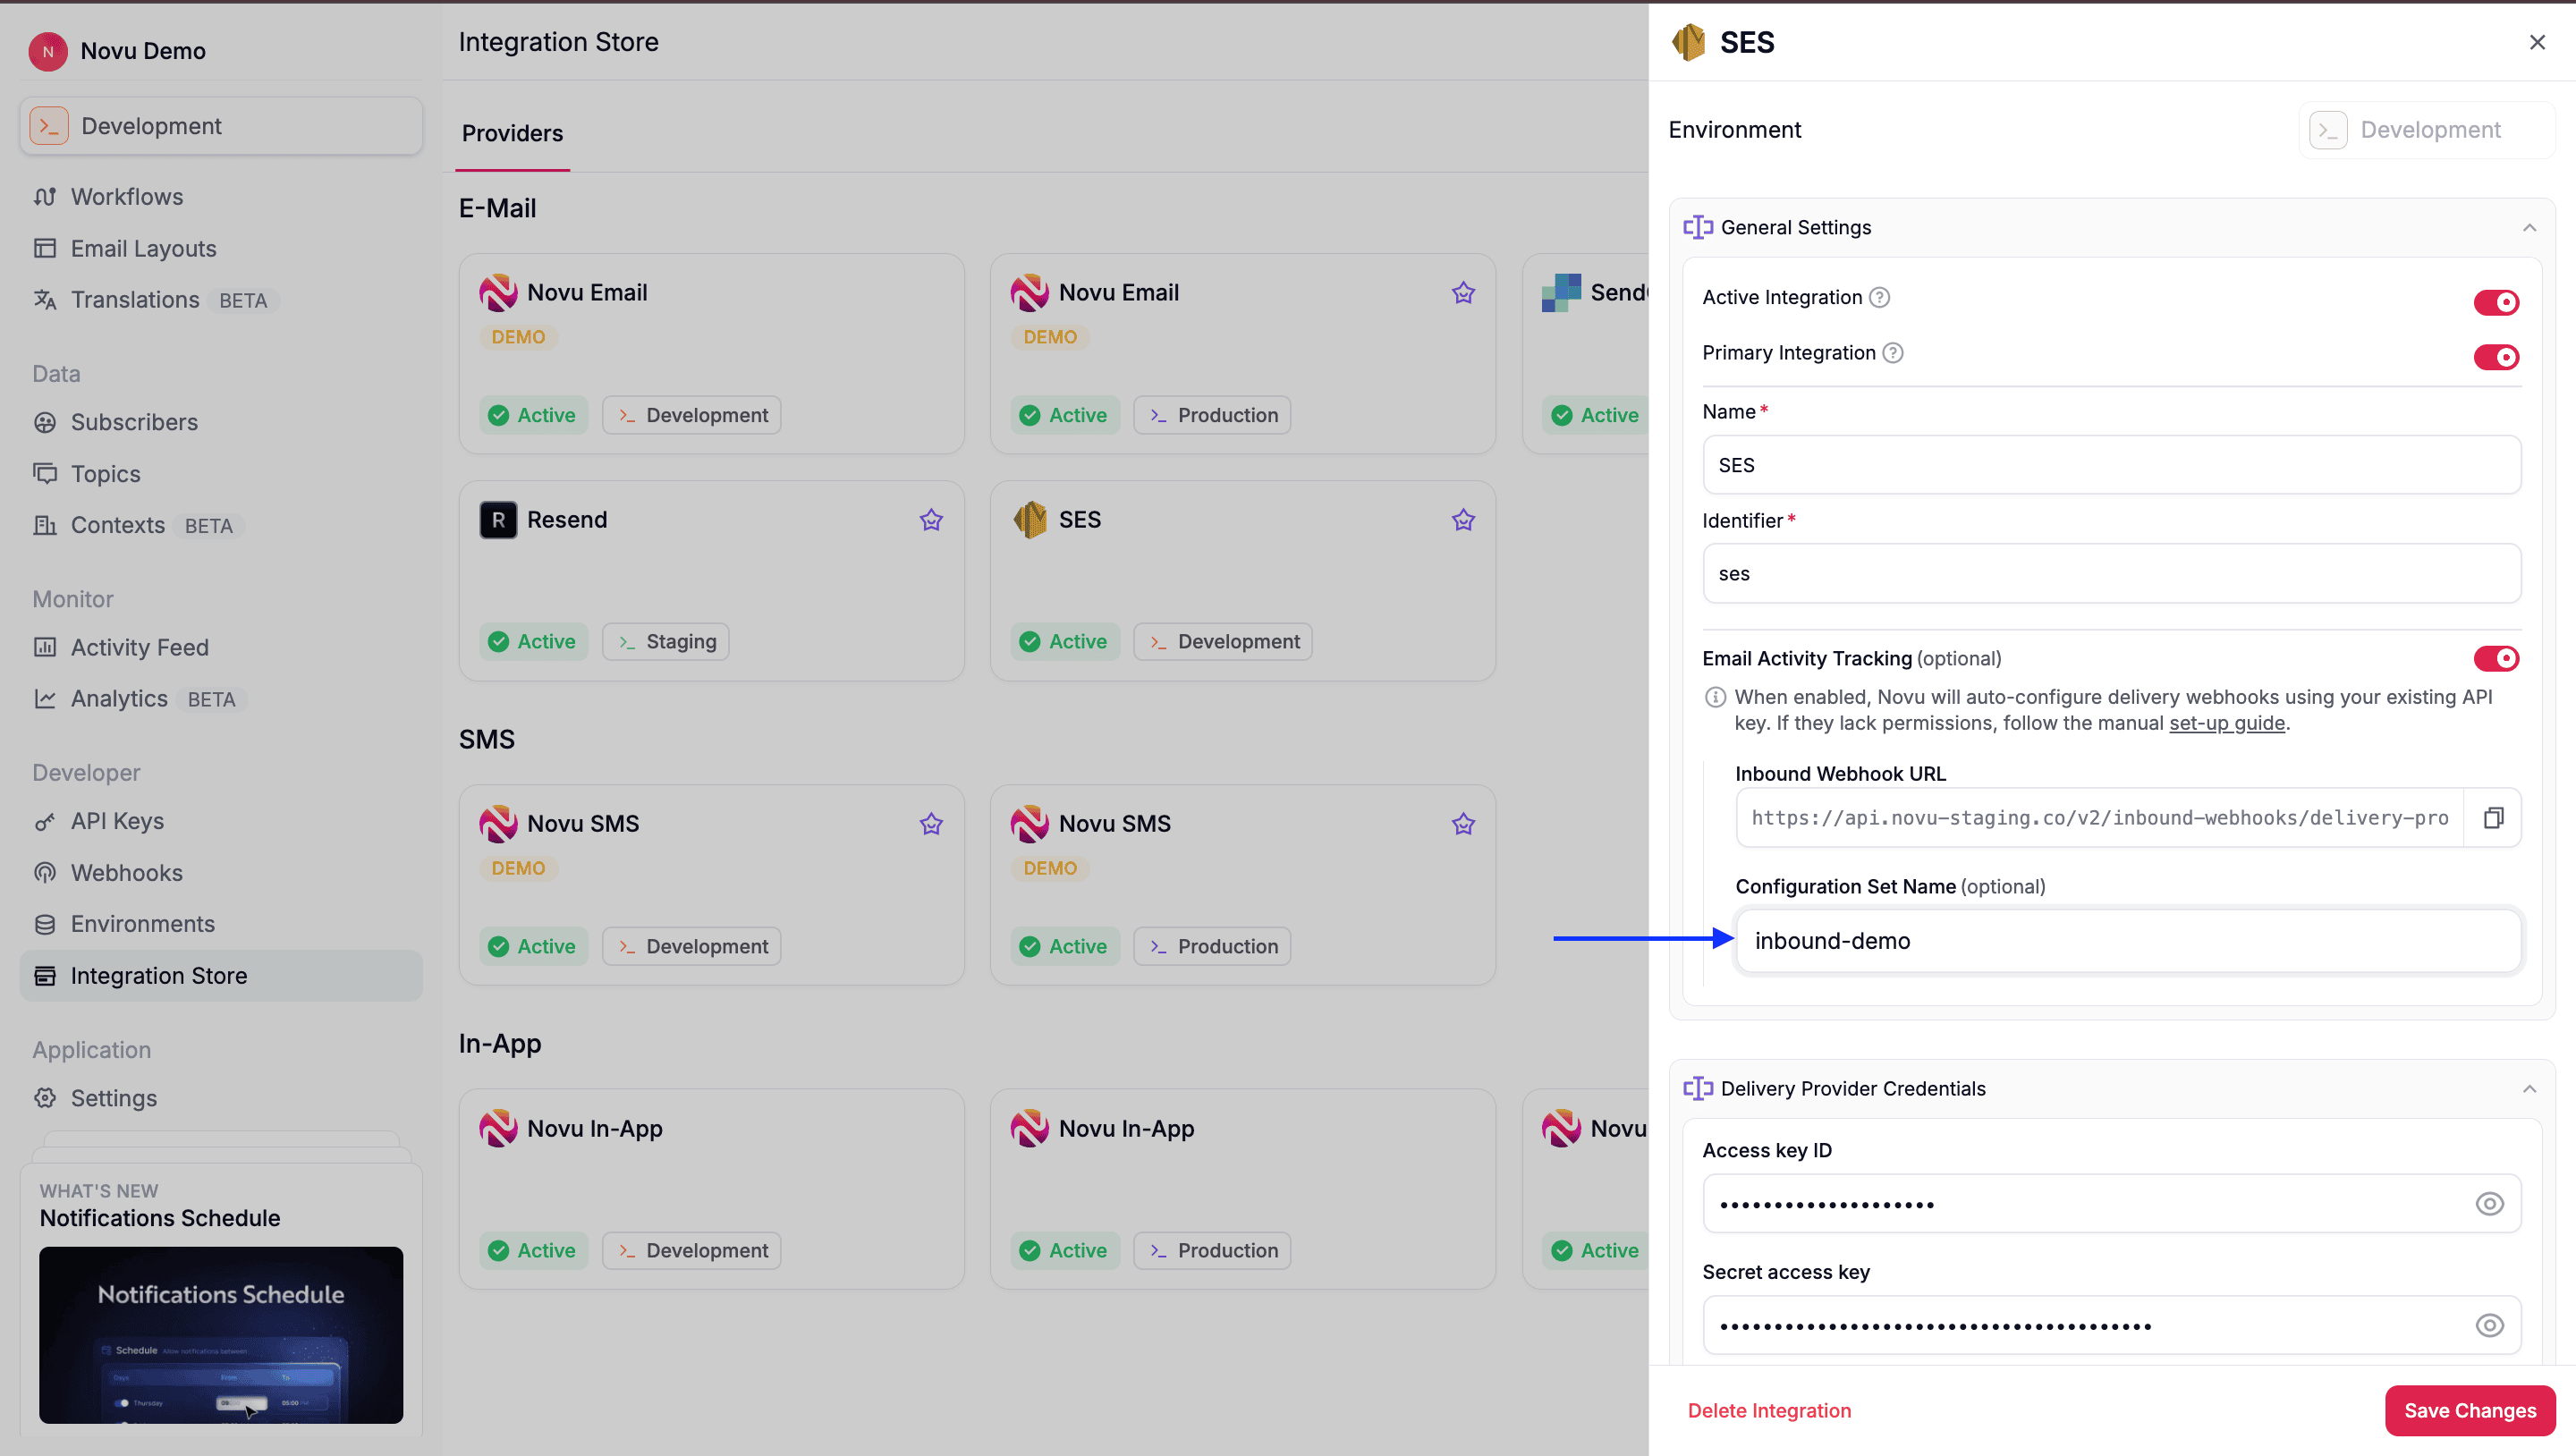 8. Click **Save changes**.
## Step 7: Add event destination
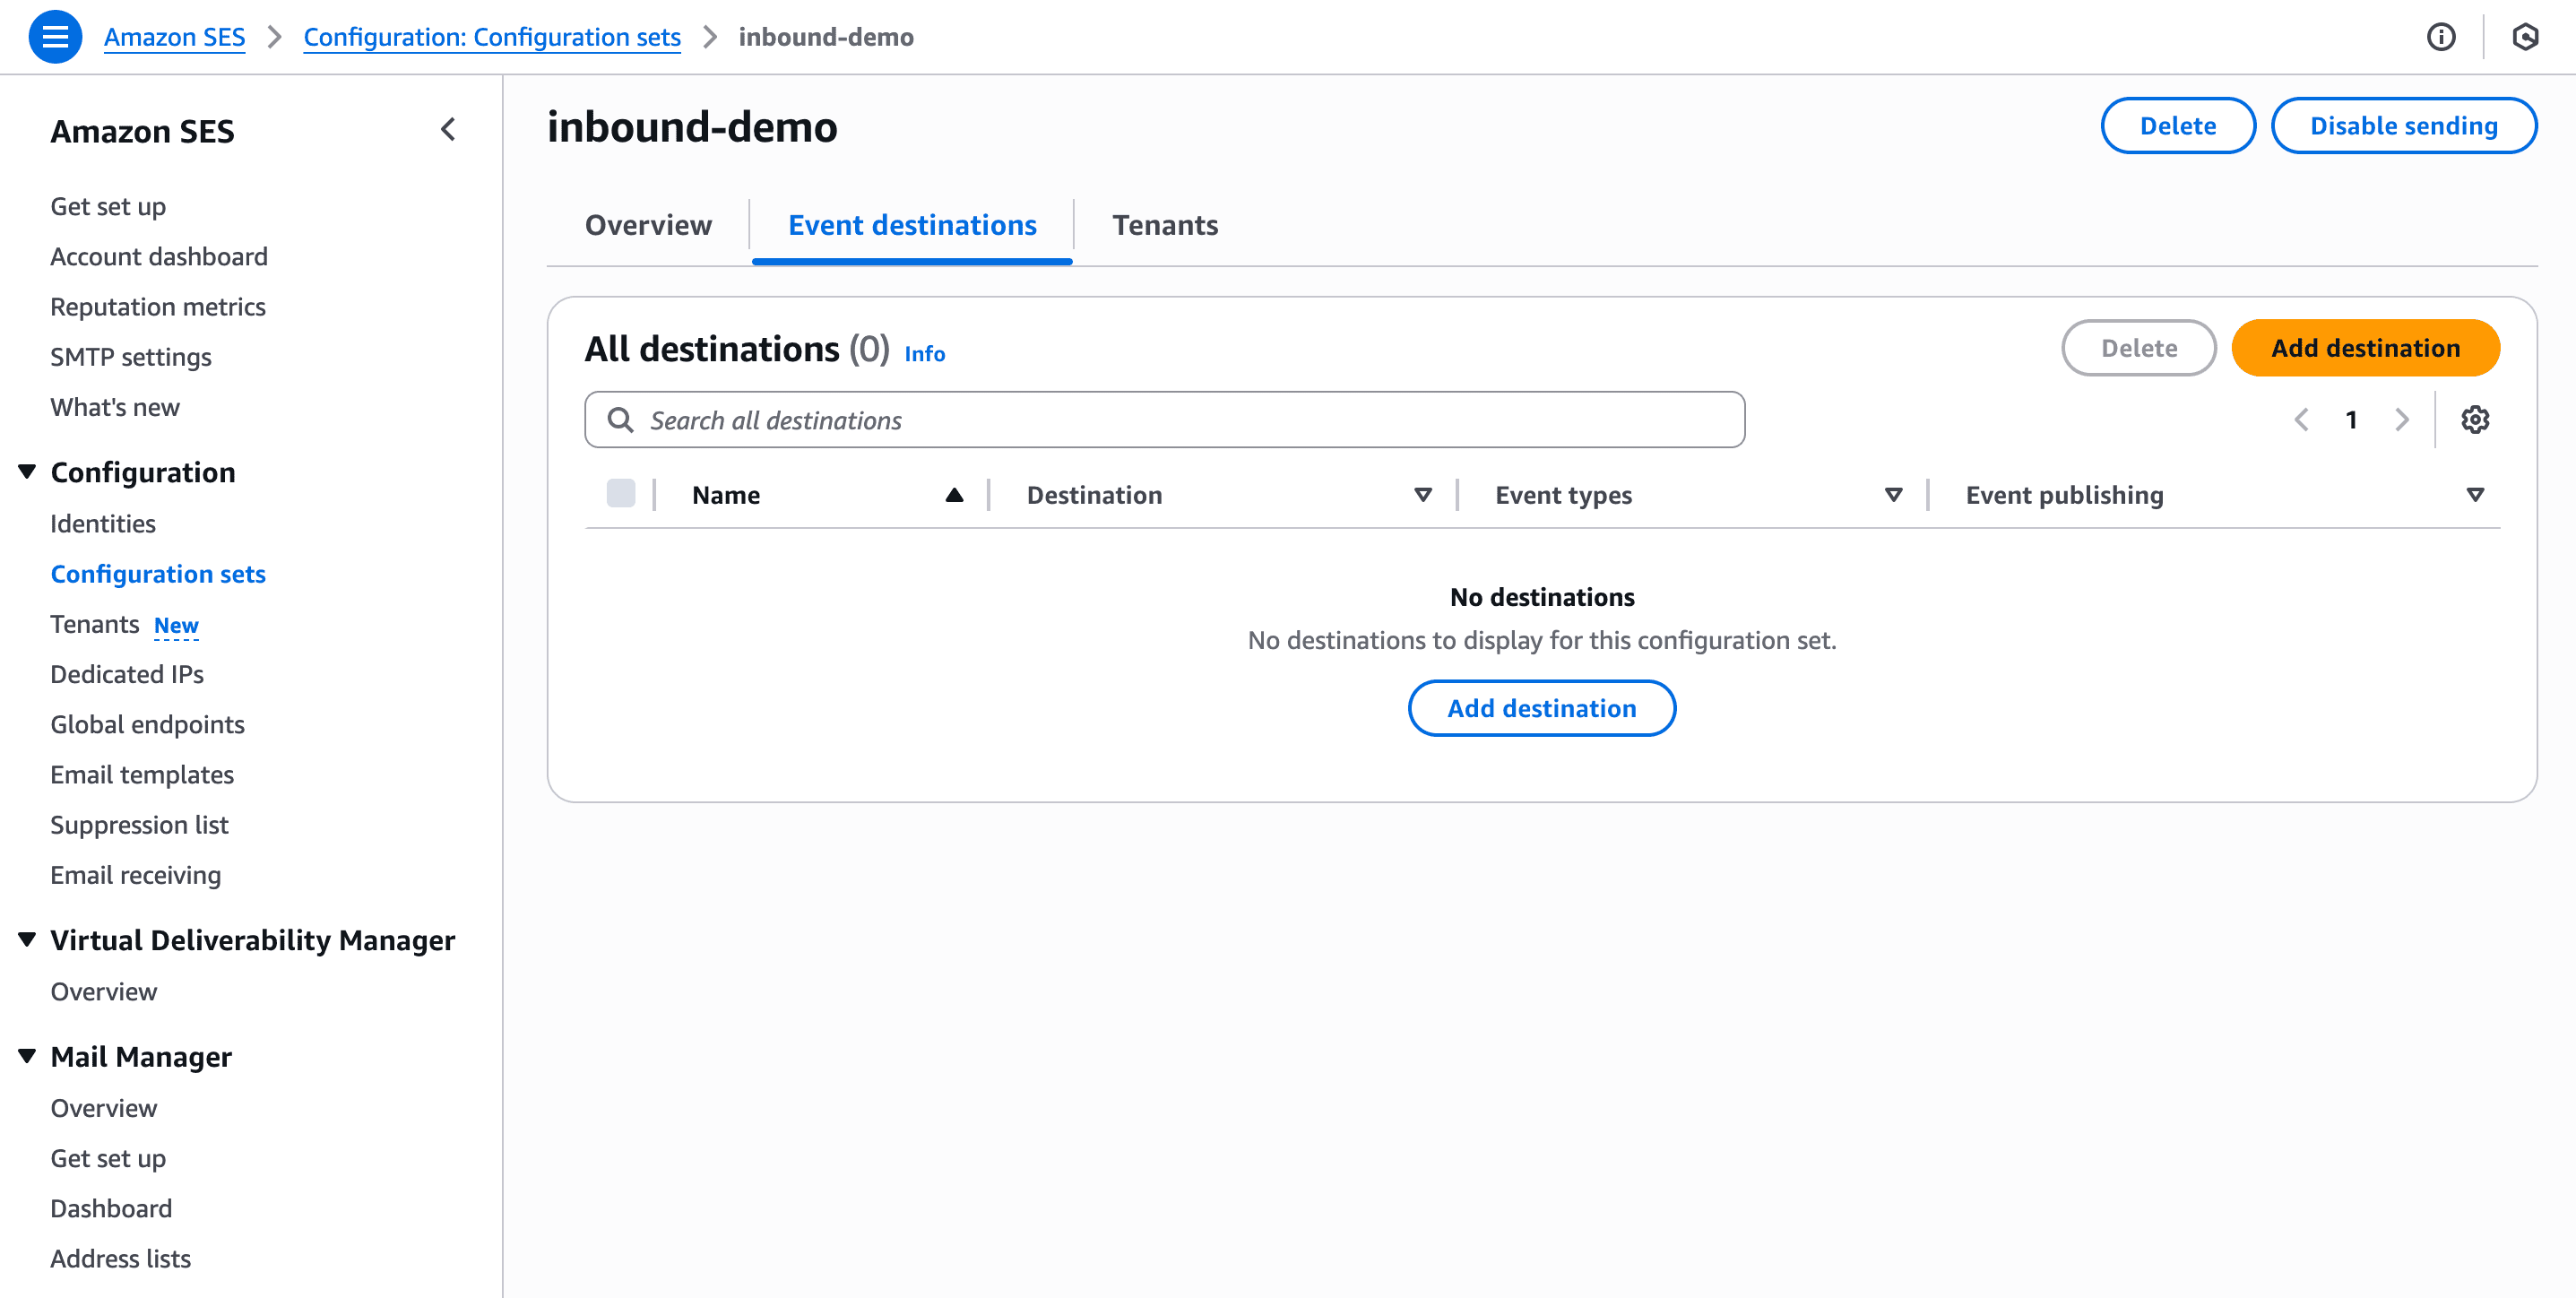
1. Return to the Configuration set page in your **AWS SES dashboard** and click on the set you just created.
2. Click the **Event destinations** tab and then **Add event destination**.
8. Click **Save changes**.
## Step 7: Add event destination
1. Return to the Configuration set page in your **AWS SES dashboard** and click on the set you just created.
2. Click the **Event destinations** tab and then **Add event destination**.
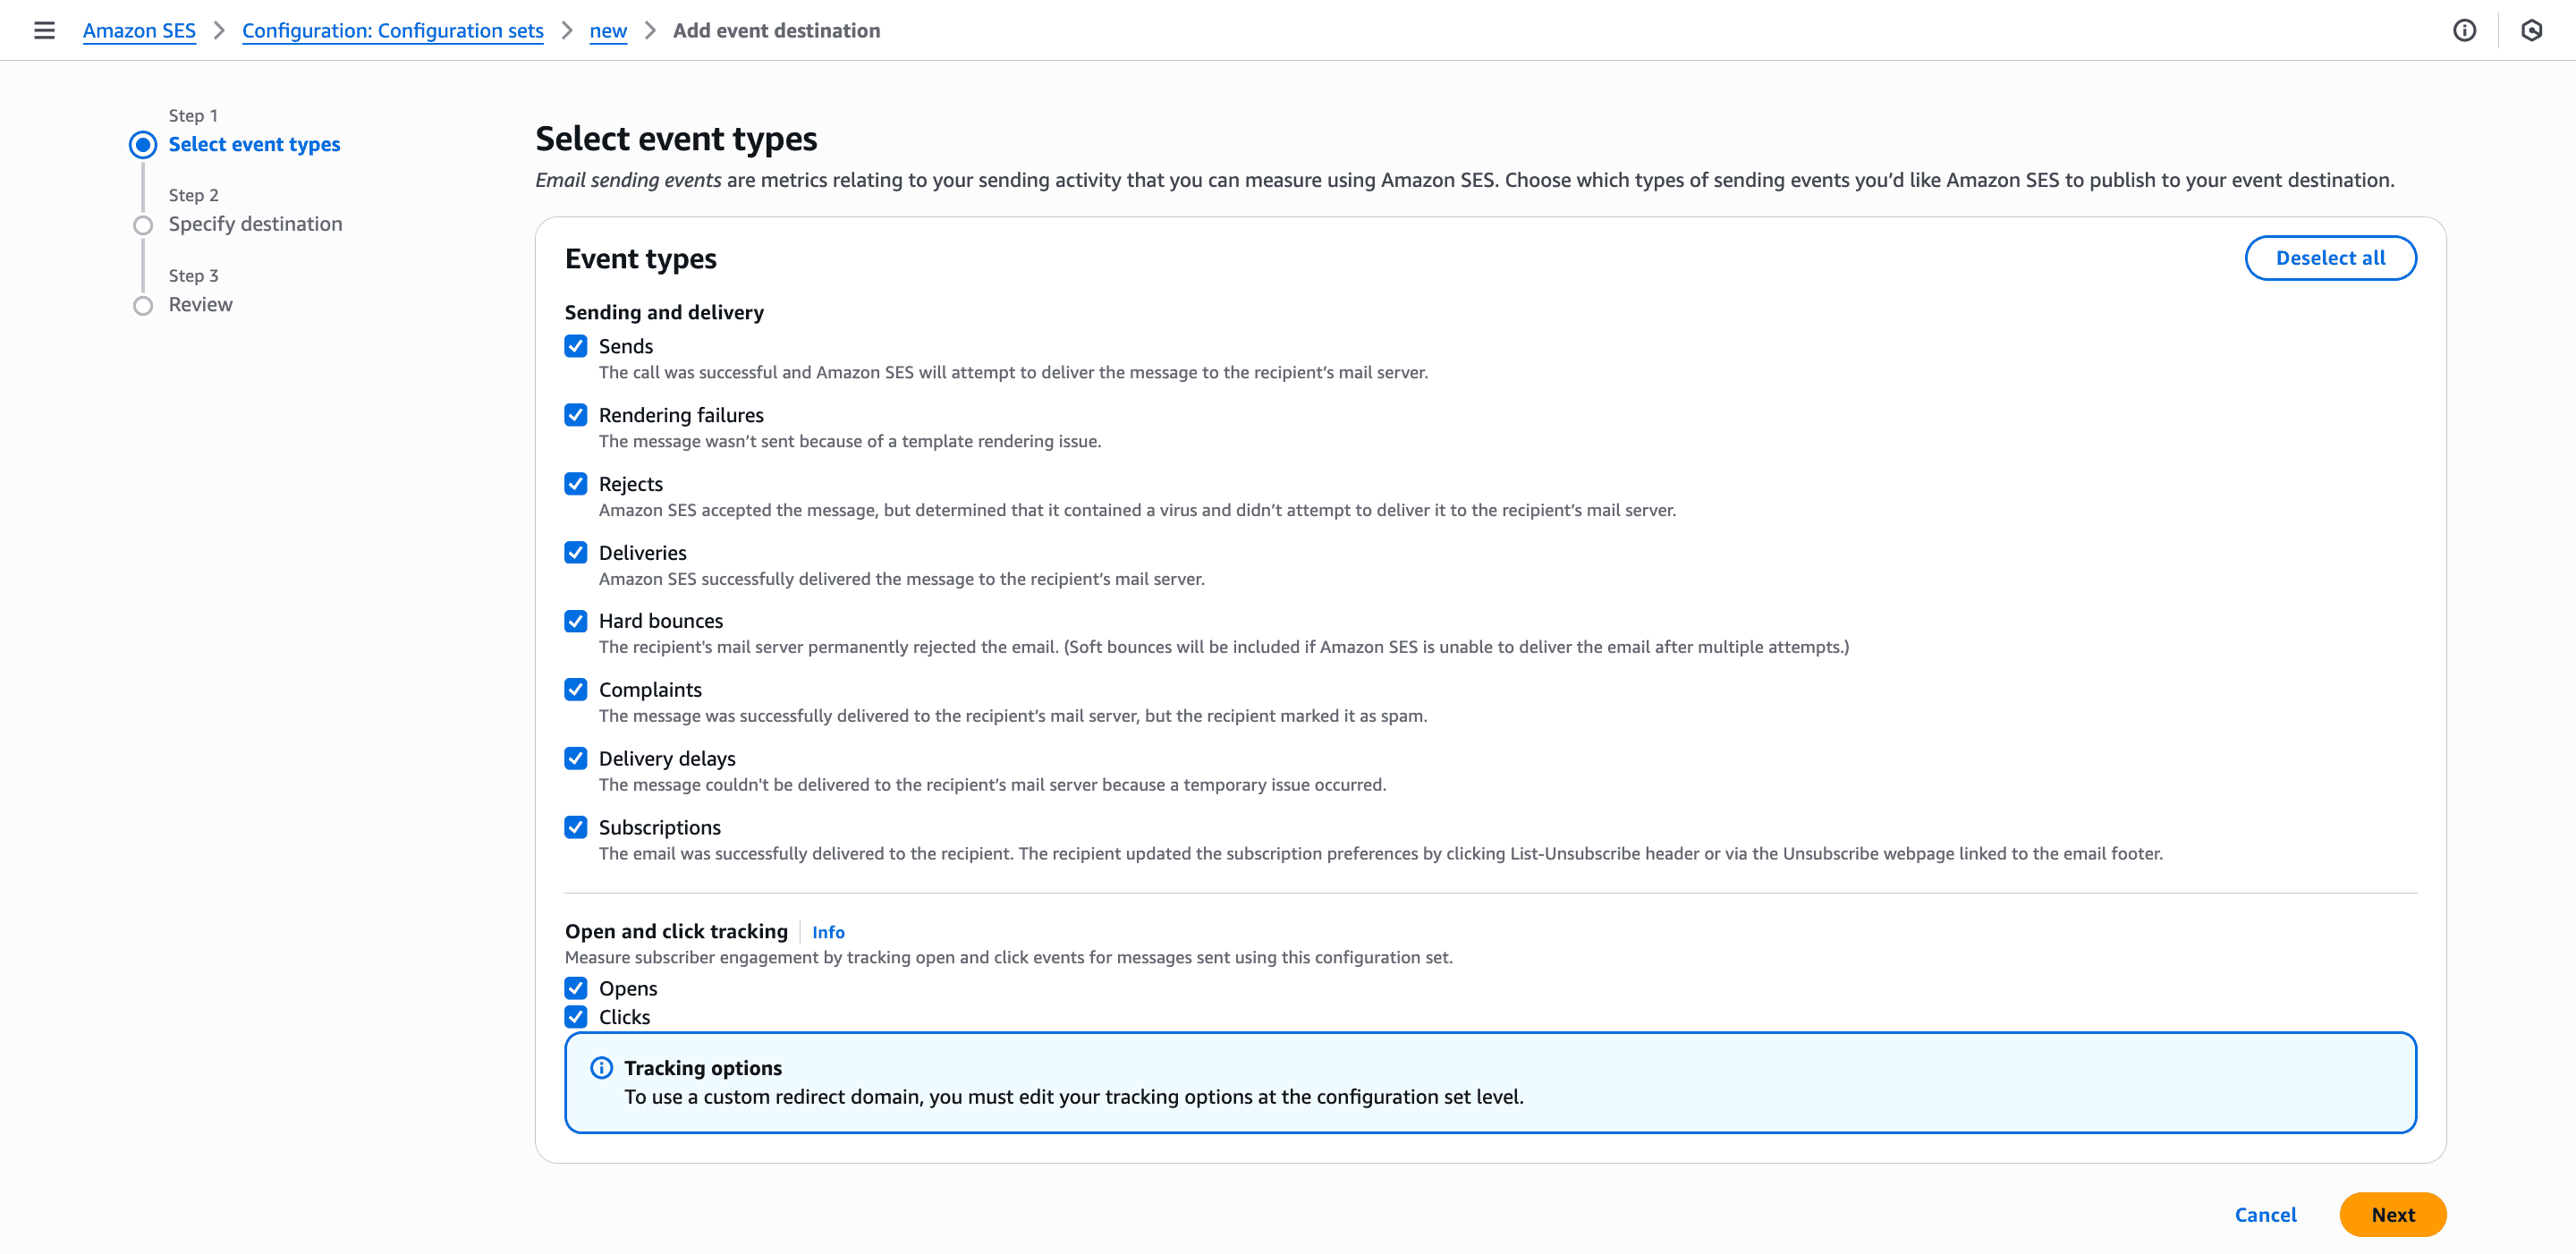
 3. Select all available **Event types** and click **Next**.
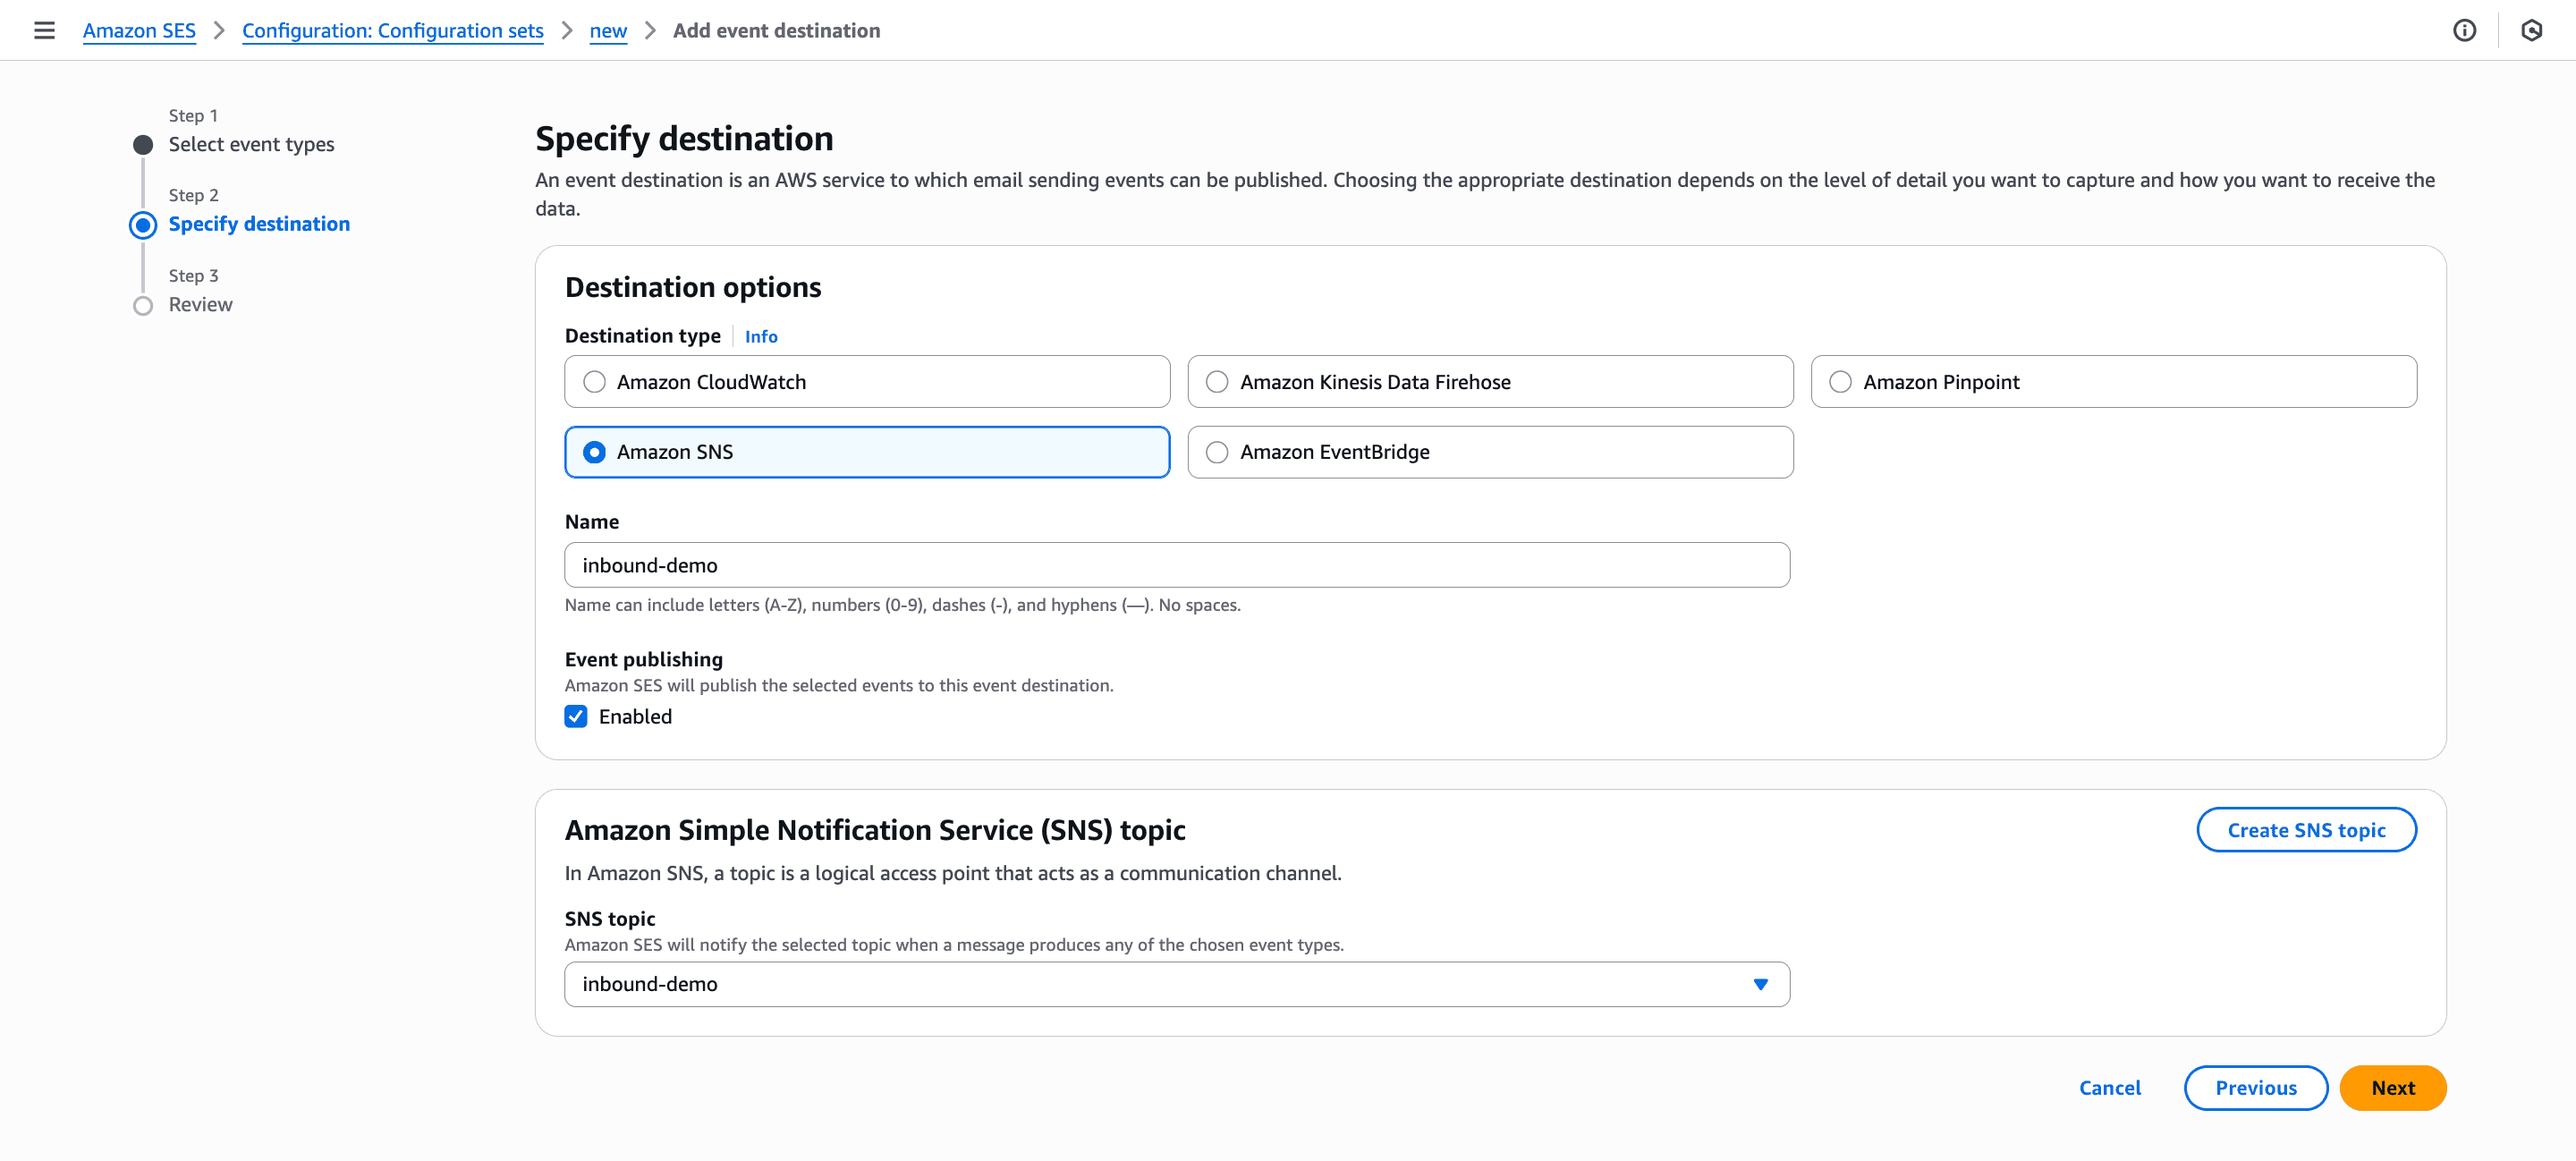
 4. For the destination, select **Amazon SNS topic** and then enter a destination name.
5. Under SNS topic, select the topic you created in [Step 4](/platform/integrations/email/activity-tracking/manual-configuration/ses#step-4-create-an-sns-topic).
4. For the destination, select **Amazon SNS topic** and then enter a destination name.
5. Under SNS topic, select the topic you created in [Step 4](/platform/integrations/email/activity-tracking/manual-configuration/ses#step-4-create-an-sns-topic).
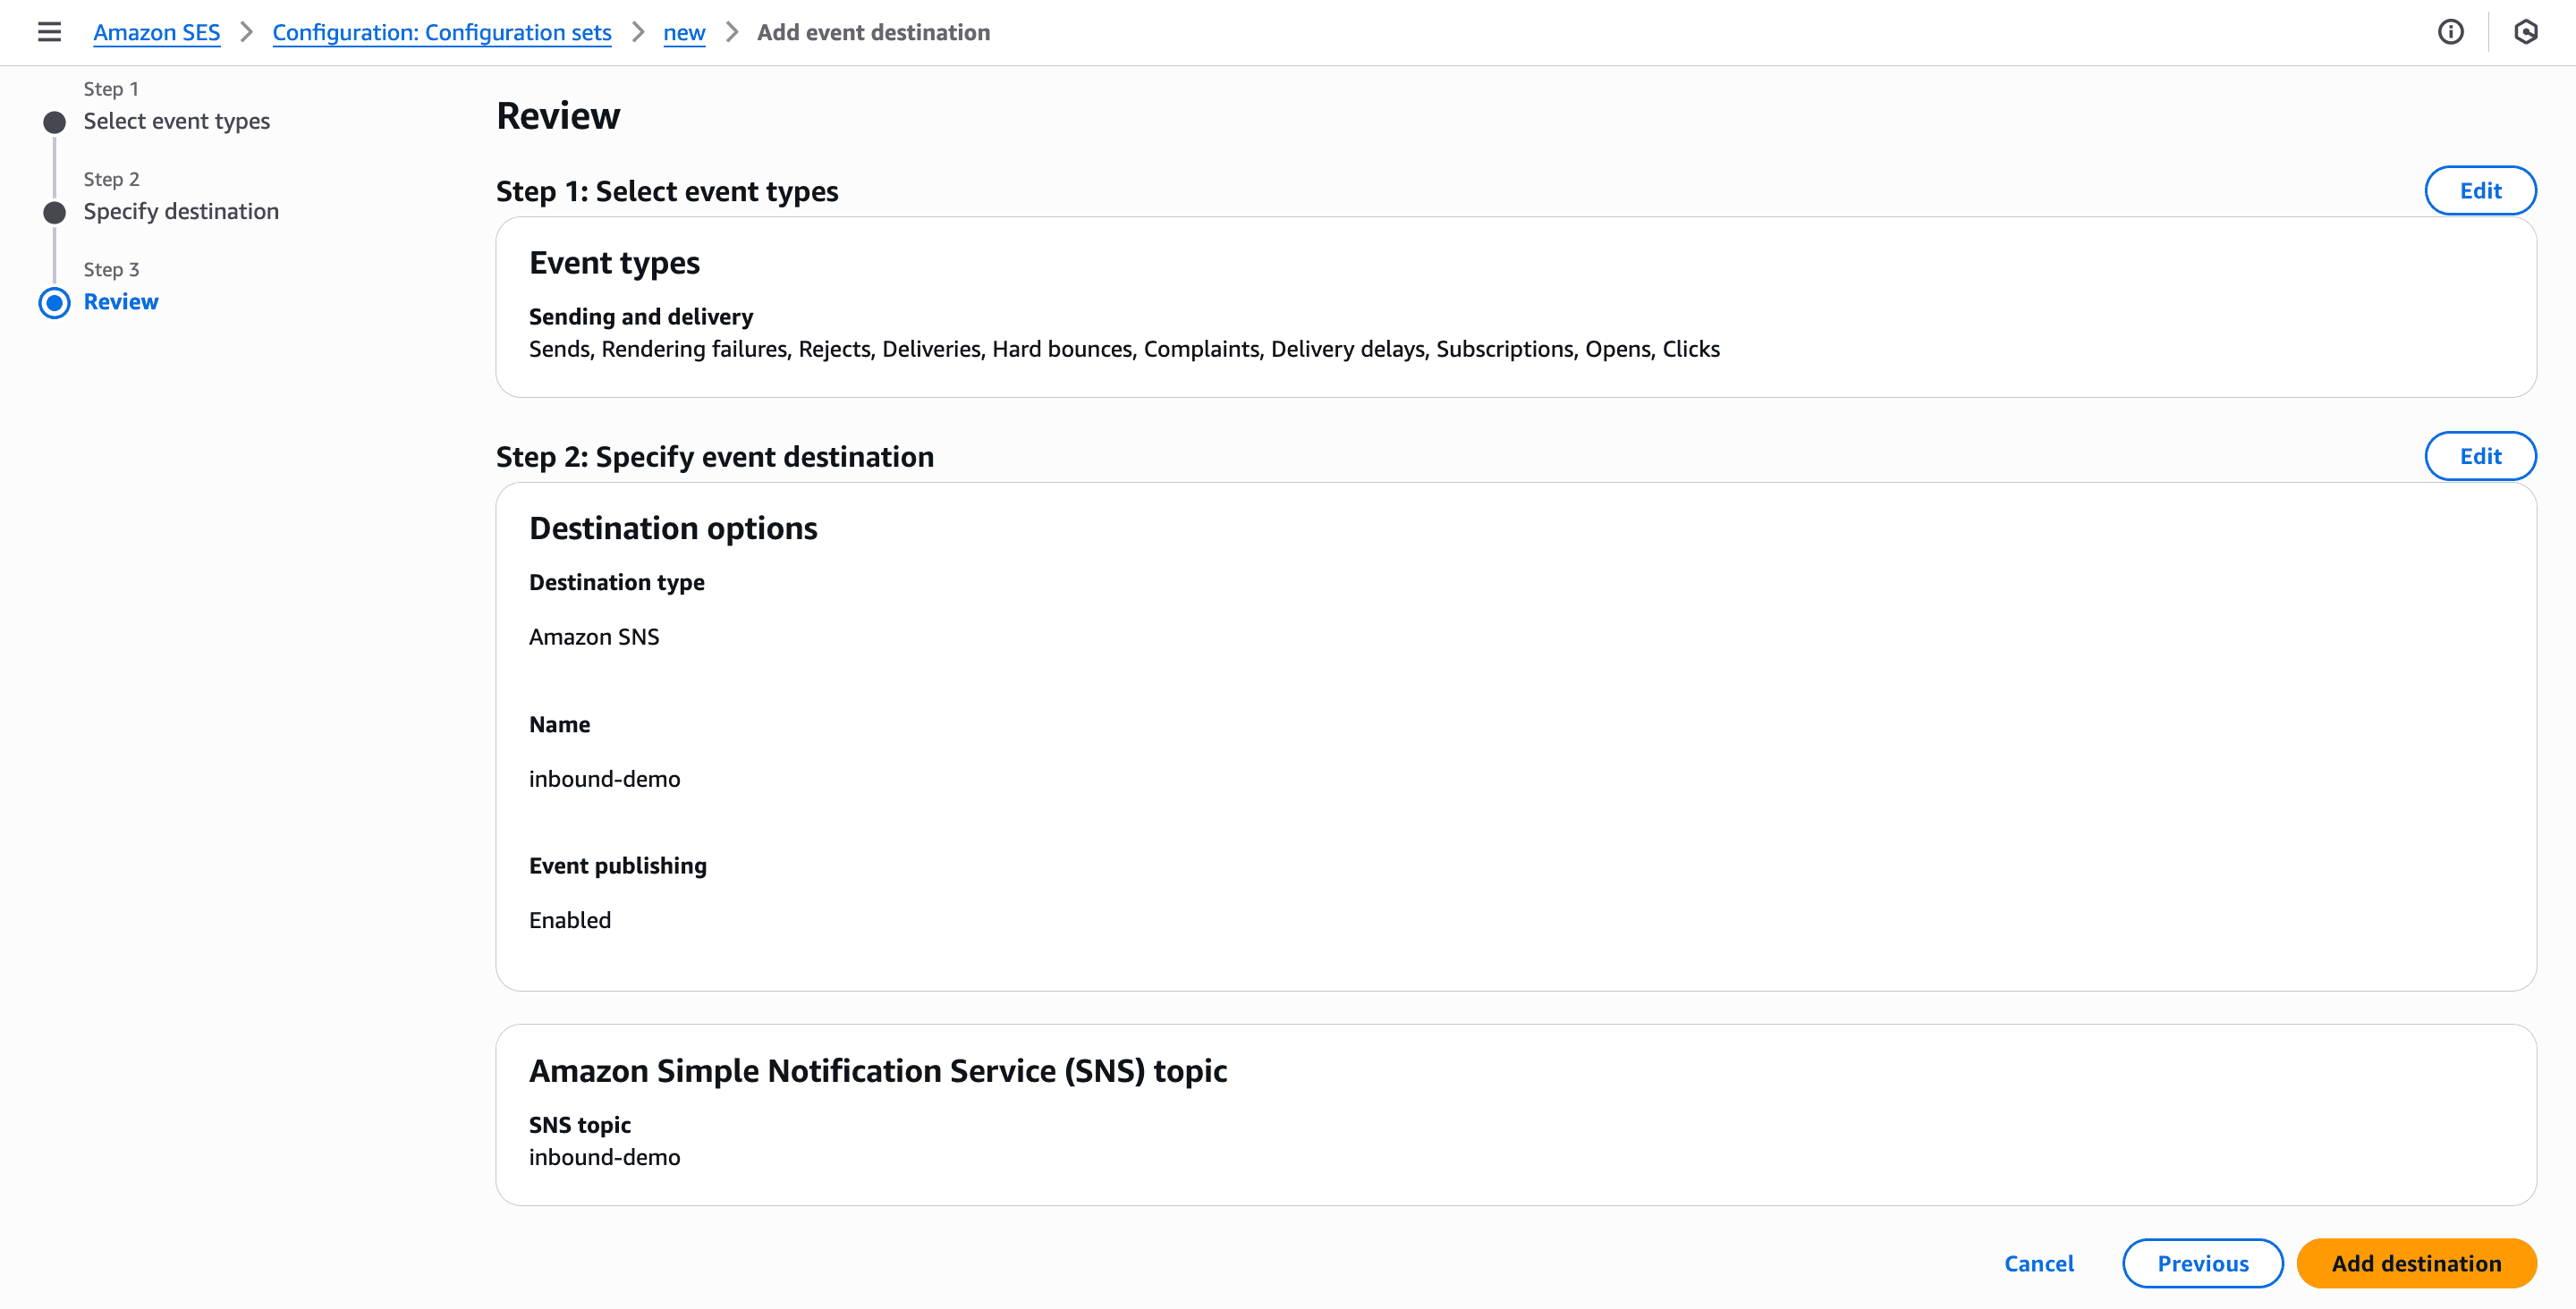
 6. Click **Next**, review the details, and then click **Add destination**.
 Your Amazon SES integration is now fully configured for activity tracking. Events will begin appearing in your Novu **Activity Feed** as you send notifications.
## Troubleshooting
### Email address is not verified
If you get "MessageRejected: Email address is not verified" error when you trigger a workflow in Novu. This error means that the sender email address you are trying to use has not been verified in SES.
To fix this:
1. Go to the SES console.
2. In the sidebar, click **Account dashboard**.
Your Amazon SES integration is now fully configured for activity tracking. Events will begin appearing in your Novu **Activity Feed** as you send notifications.
## Troubleshooting
### Email address is not verified
If you get "MessageRejected: Email address is not verified" error when you trigger a workflow in Novu. This error means that the sender email address you are trying to use has not been verified in SES.
To fix this:
1. Go to the SES console.
2. In the sidebar, click **Account dashboard**.
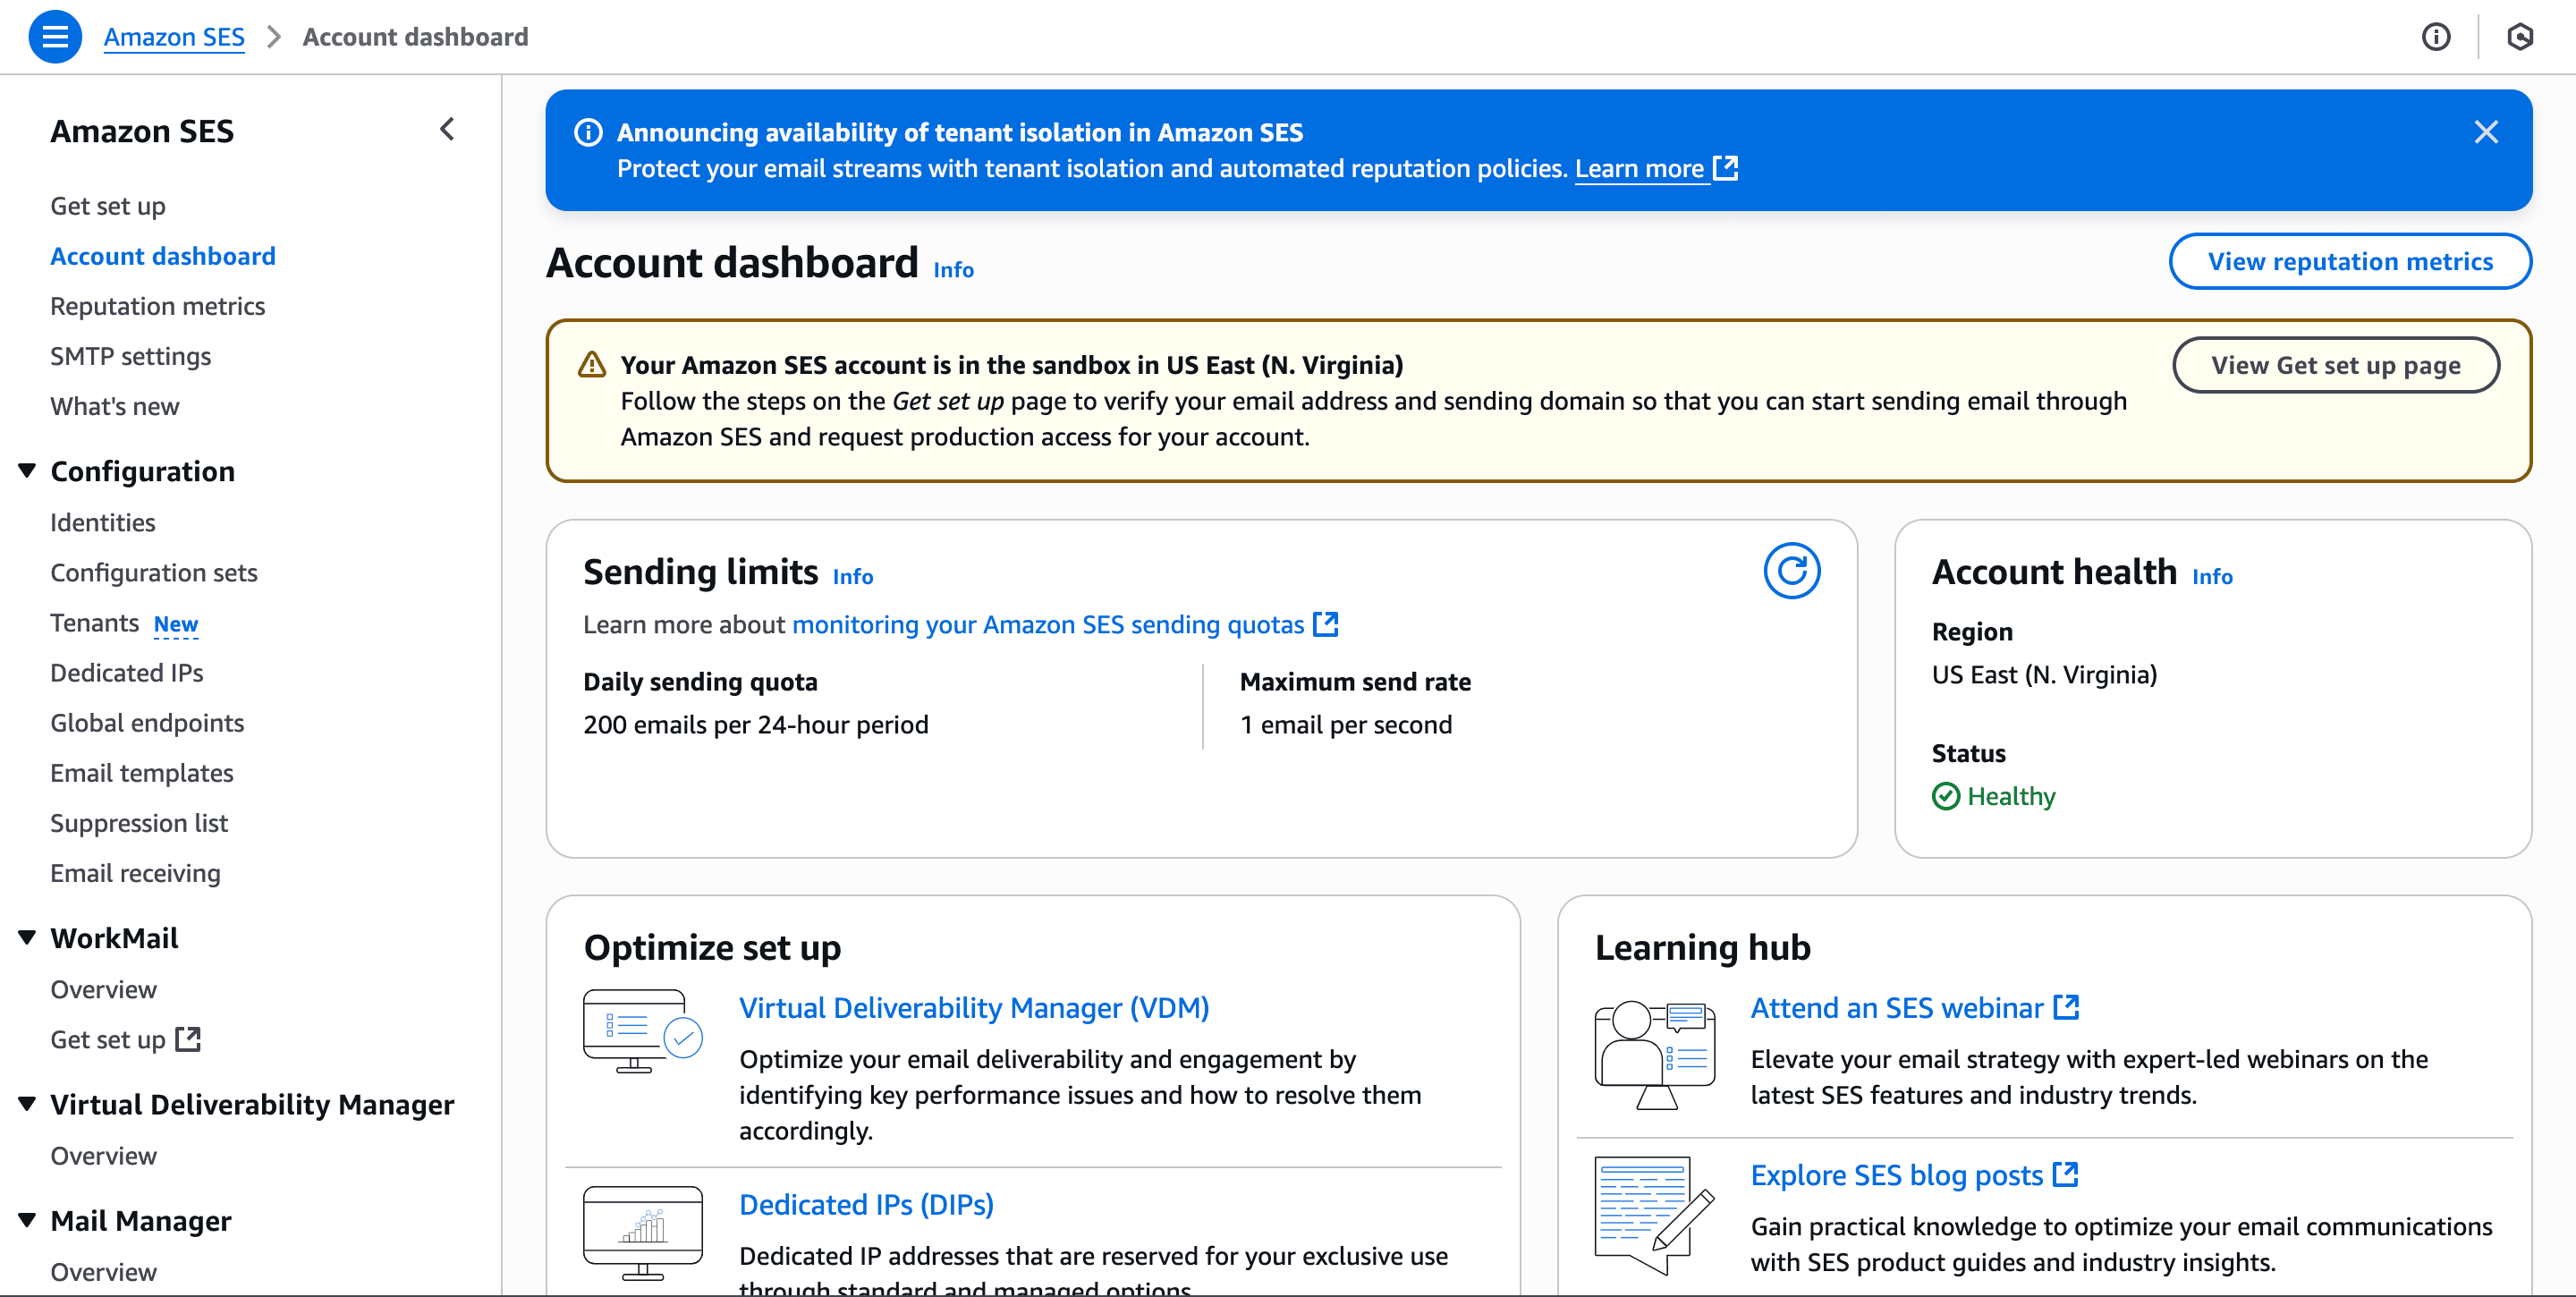 3. Click **View Get set up page** and follow the steps in the **Get set up page** to verify your email address and sending domain.