> ## Documentation Index
> Fetch the complete documentation index at: https://novu-c5de82d9-docs-homepage-redesign.mintlify.site/llms.txt
> Use this file to discover all available pages before exploring further.
# Expo Push Push Integration with Novu
> Connect Expo Push to Novu to send push notifications through notification workflows. Step-by-step credential setup.
This guide explains the process of configuring and using Expo Push with Novu, from getting your credentials to sending your first notification.
## How to configure Expo with Novu
Before you can send notifications, you must connect your Expo project to Novu by generating an access token and adding it to your integration settings.
### Step 1: Generate your access token from Expo Push
Generate an access token from your dashboard. This token authorizes Novu to send notifications on behalf of your project.
Log in to the [Expo console](https://expo.dev/).
Navigate to the **Credentials** section in the project settings sidebar.
Click [**Access Token**](https://expo.dev/settings/access-tokens).
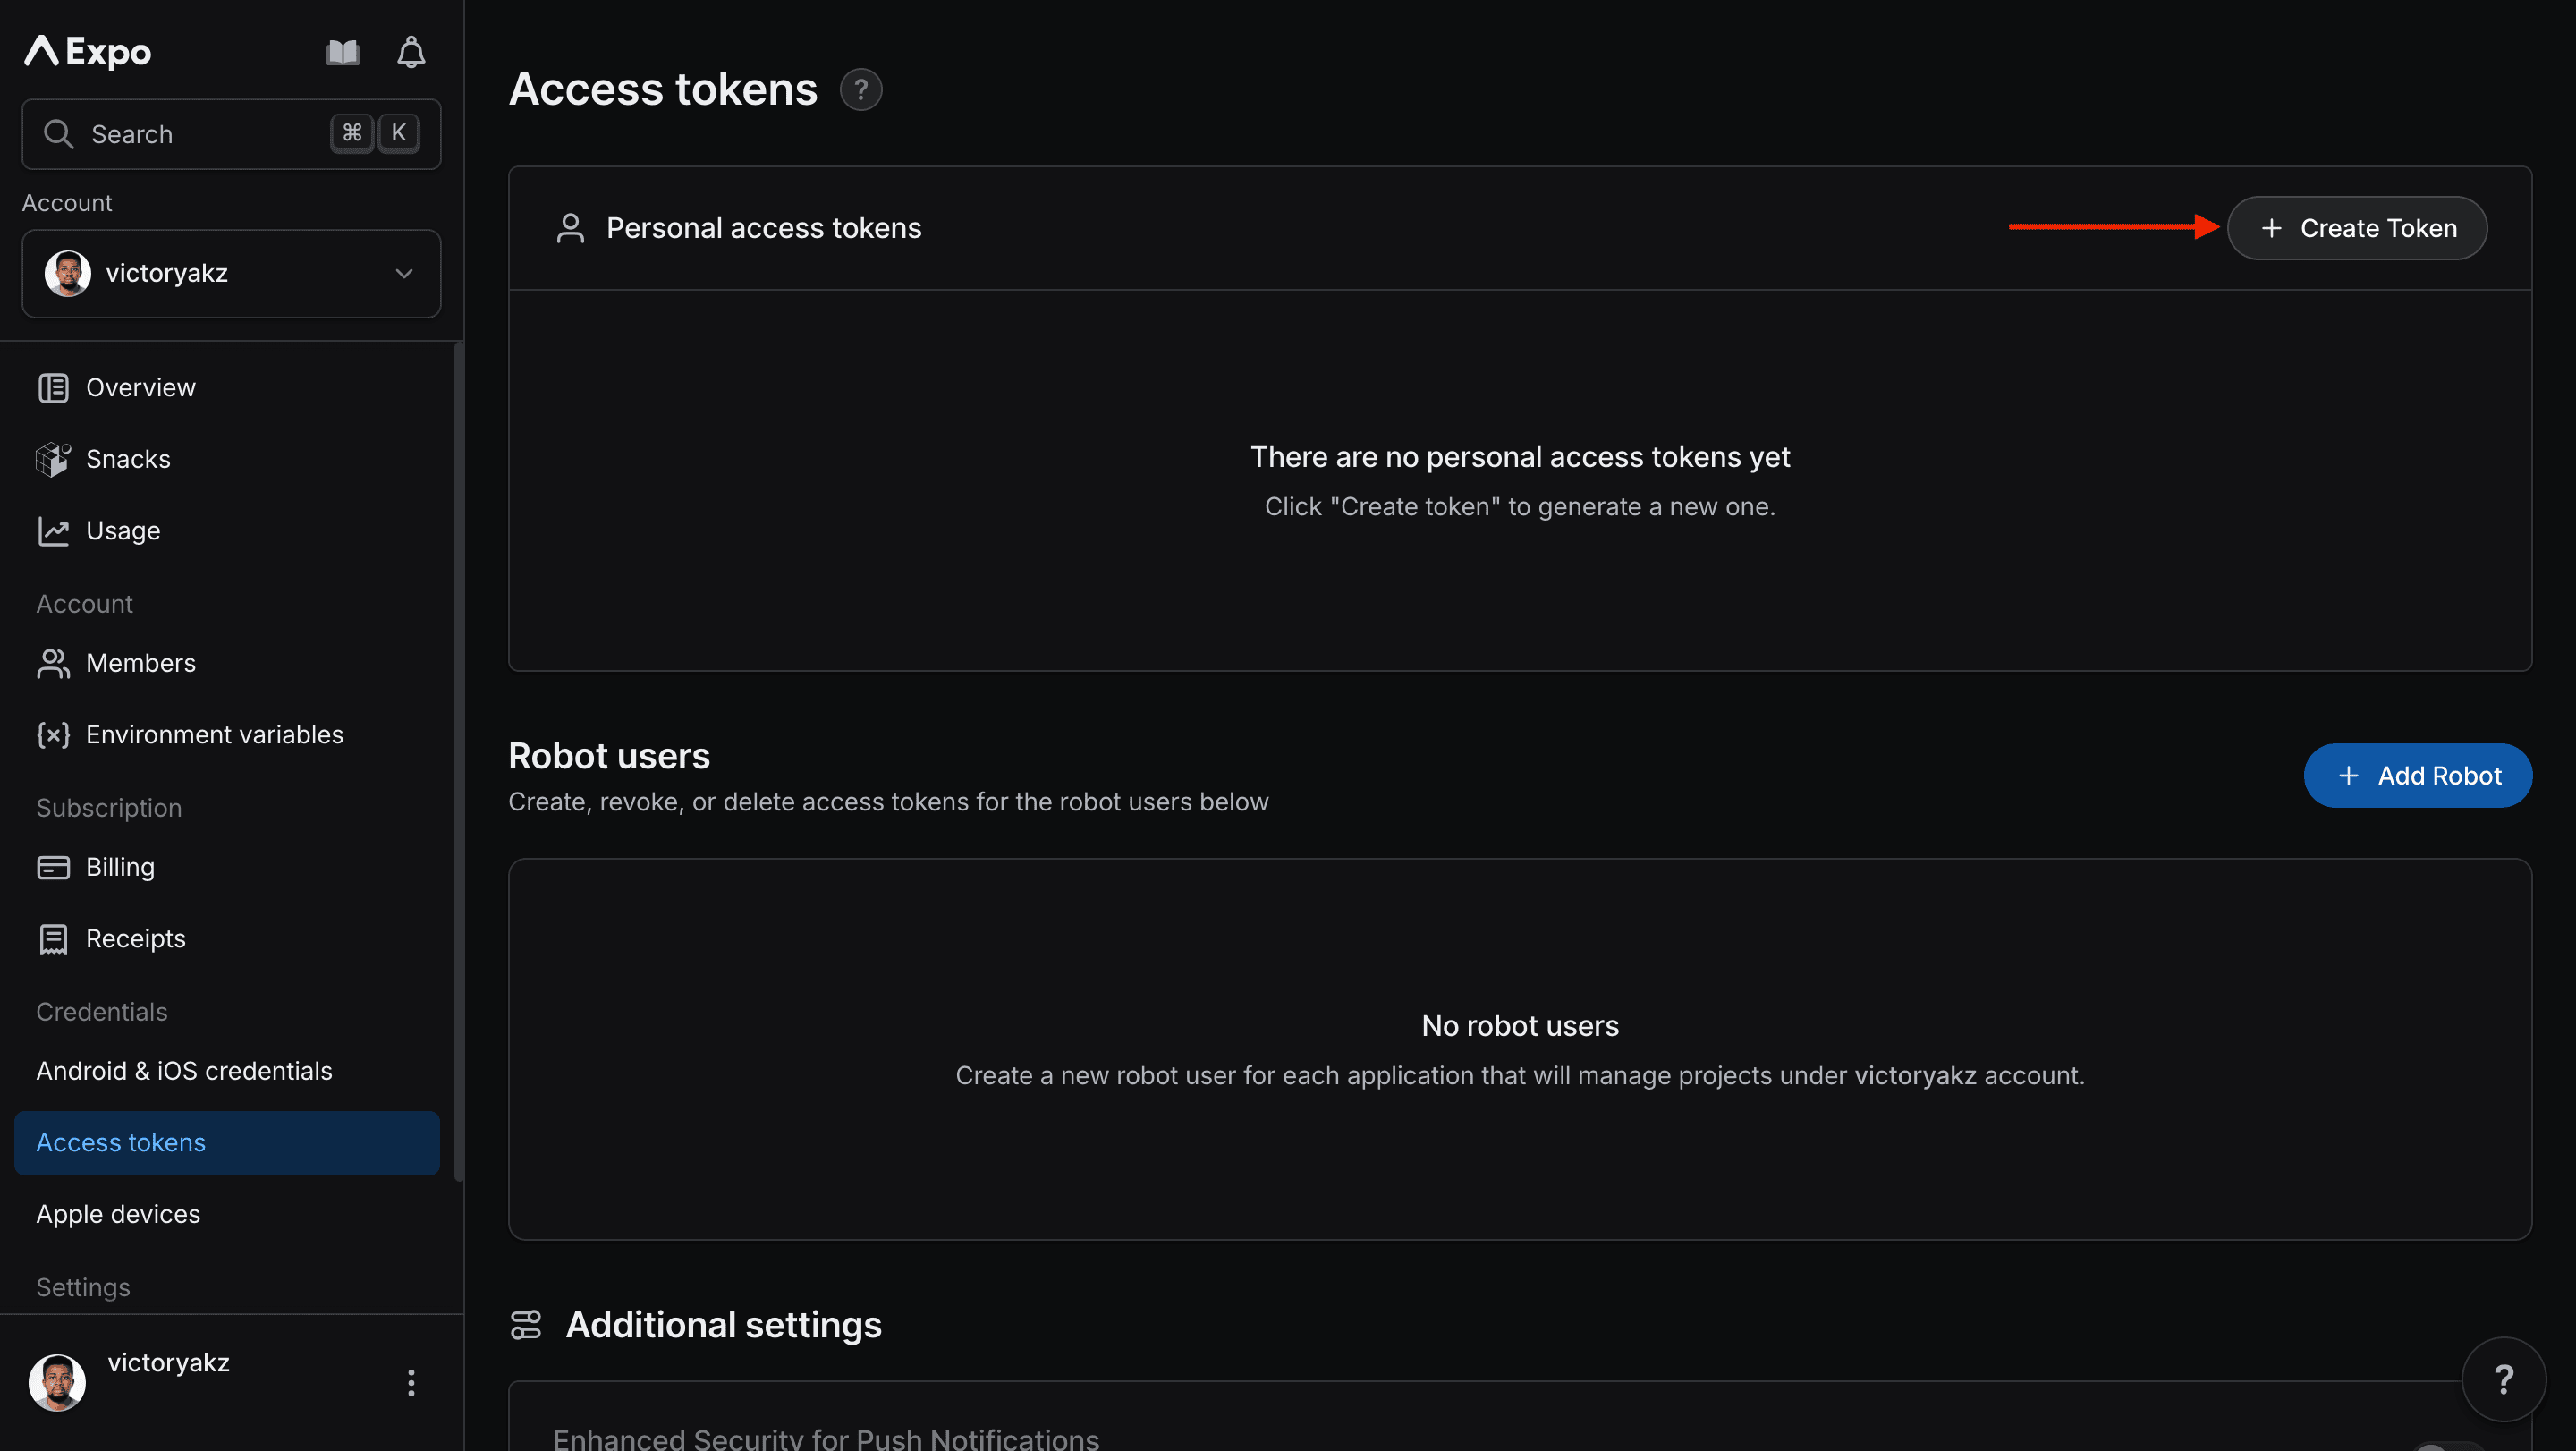 Click **Create Token**. A menu appears.
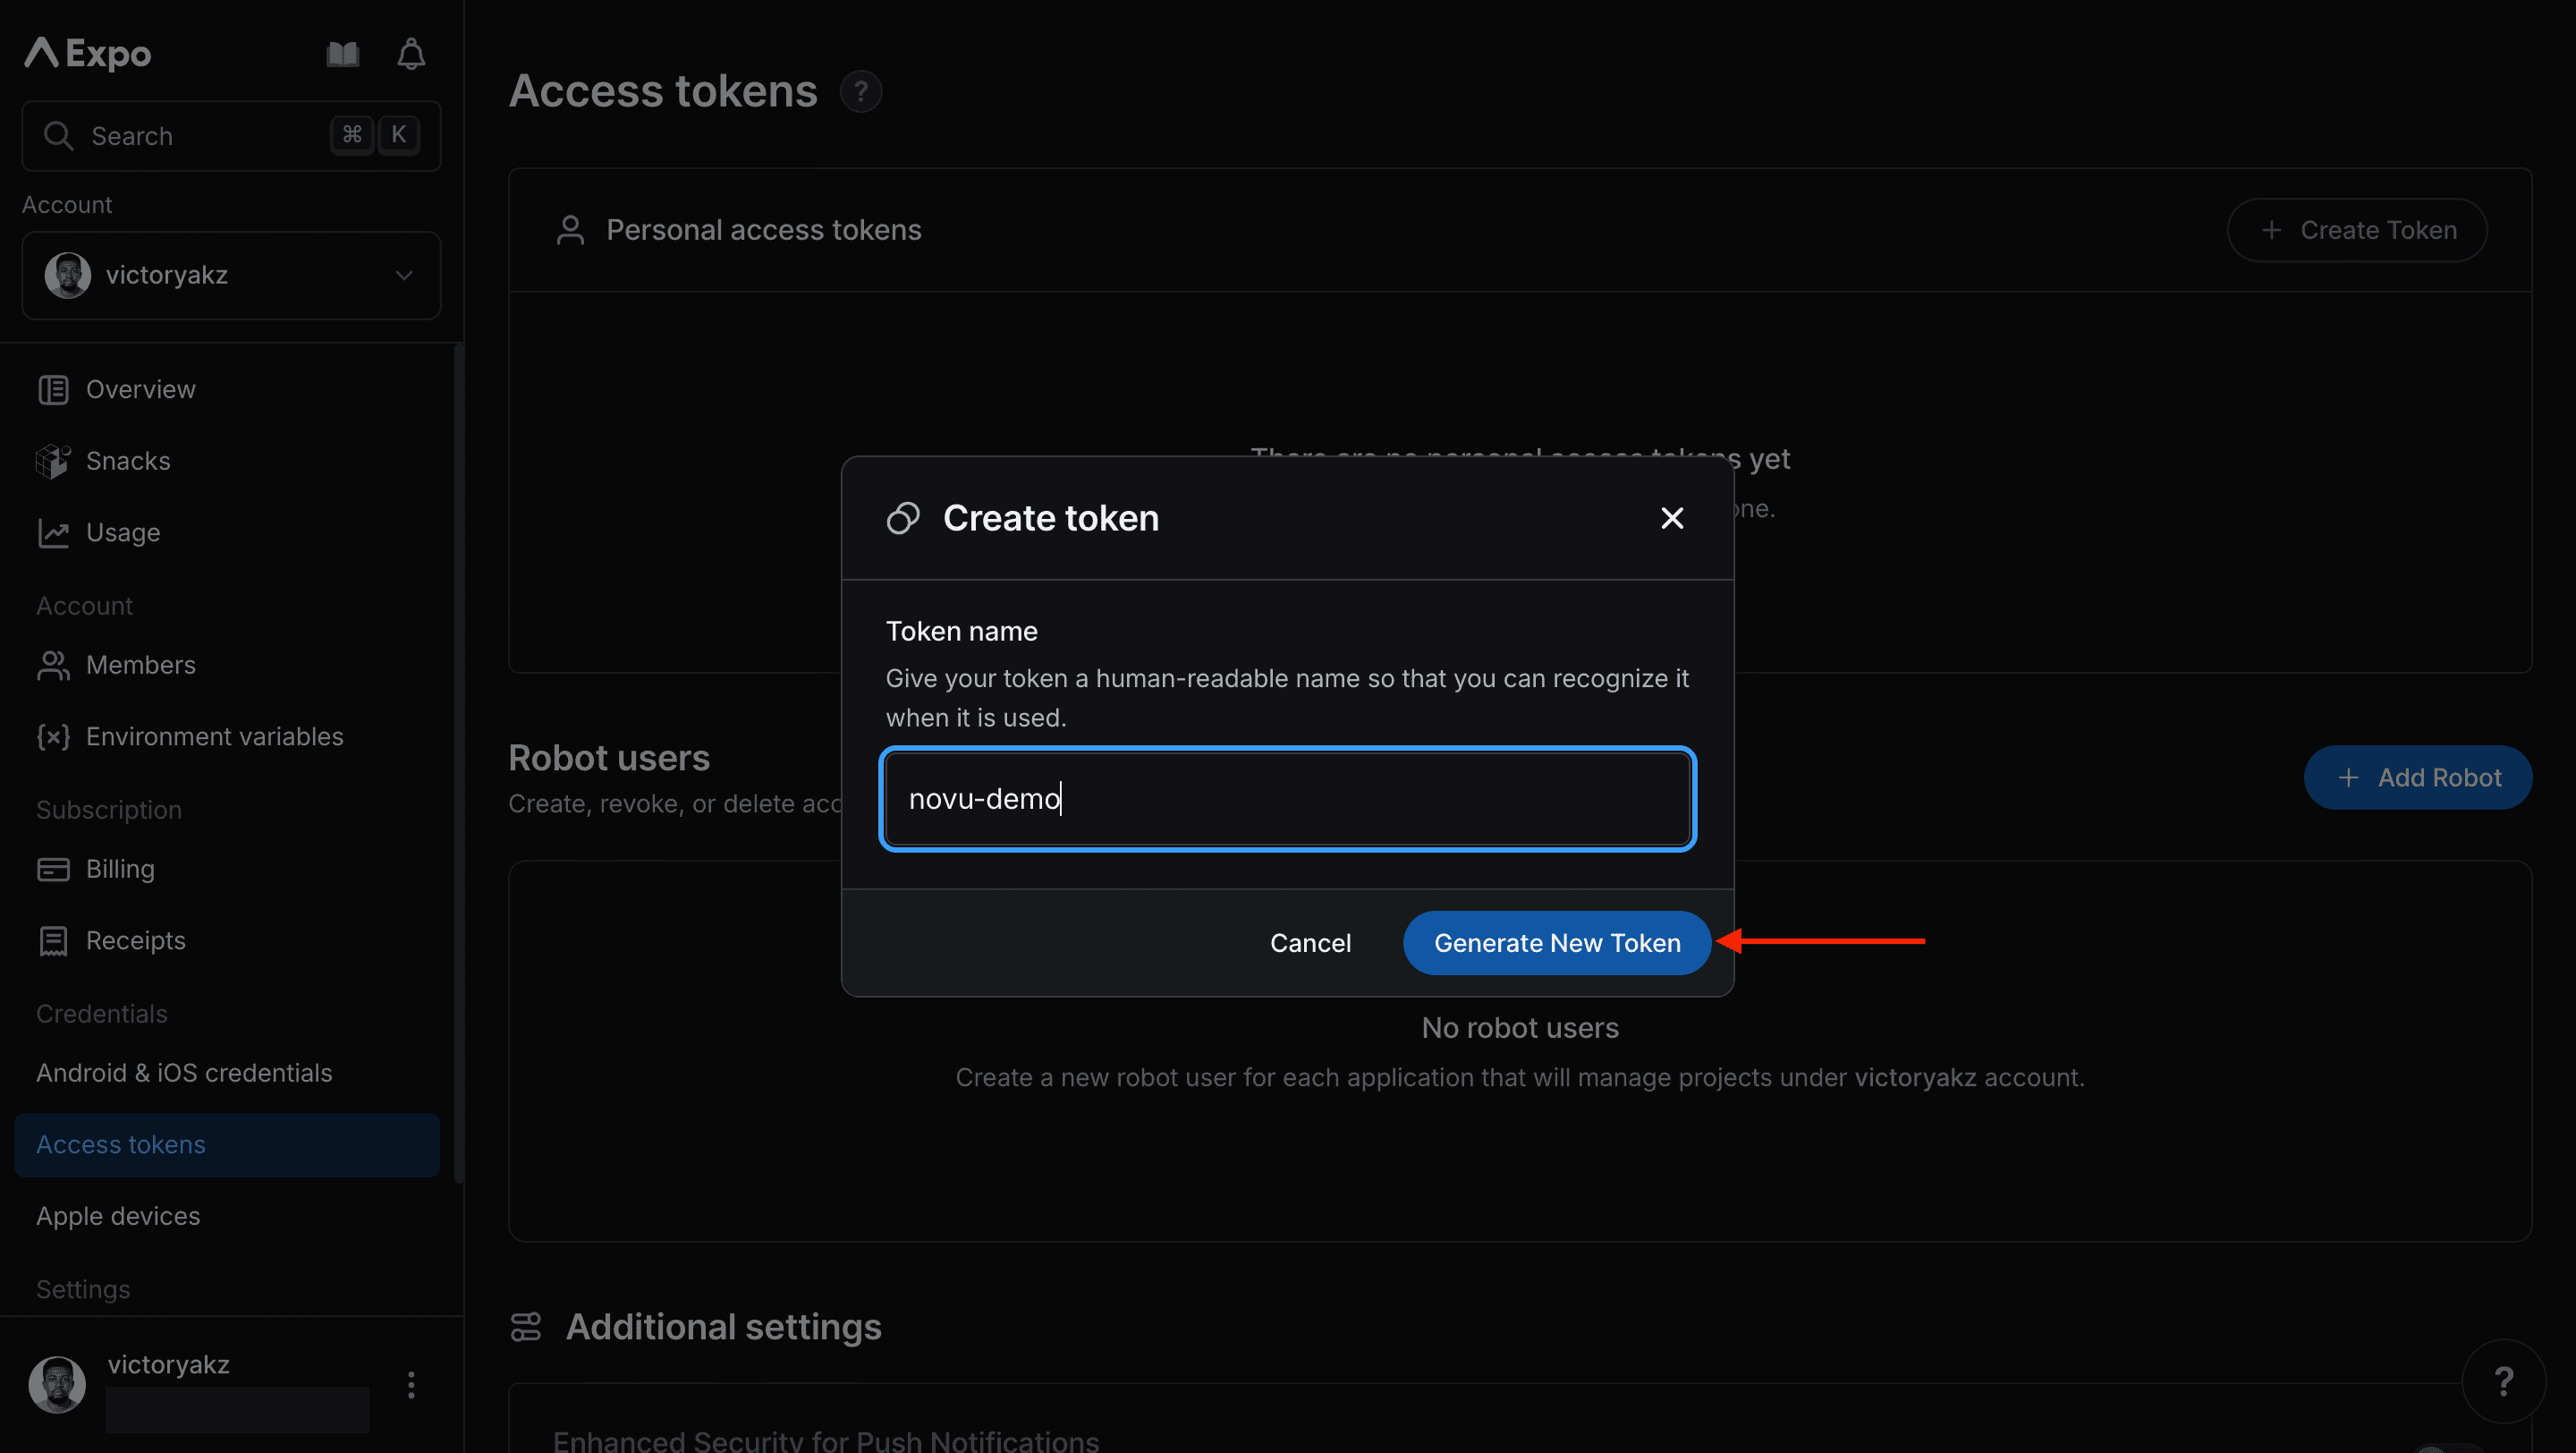
Give it a descriptive name, and then click **Generate New Token**.
Click **Create Token**. A menu appears.
Give it a descriptive name, and then click **Generate New Token**.
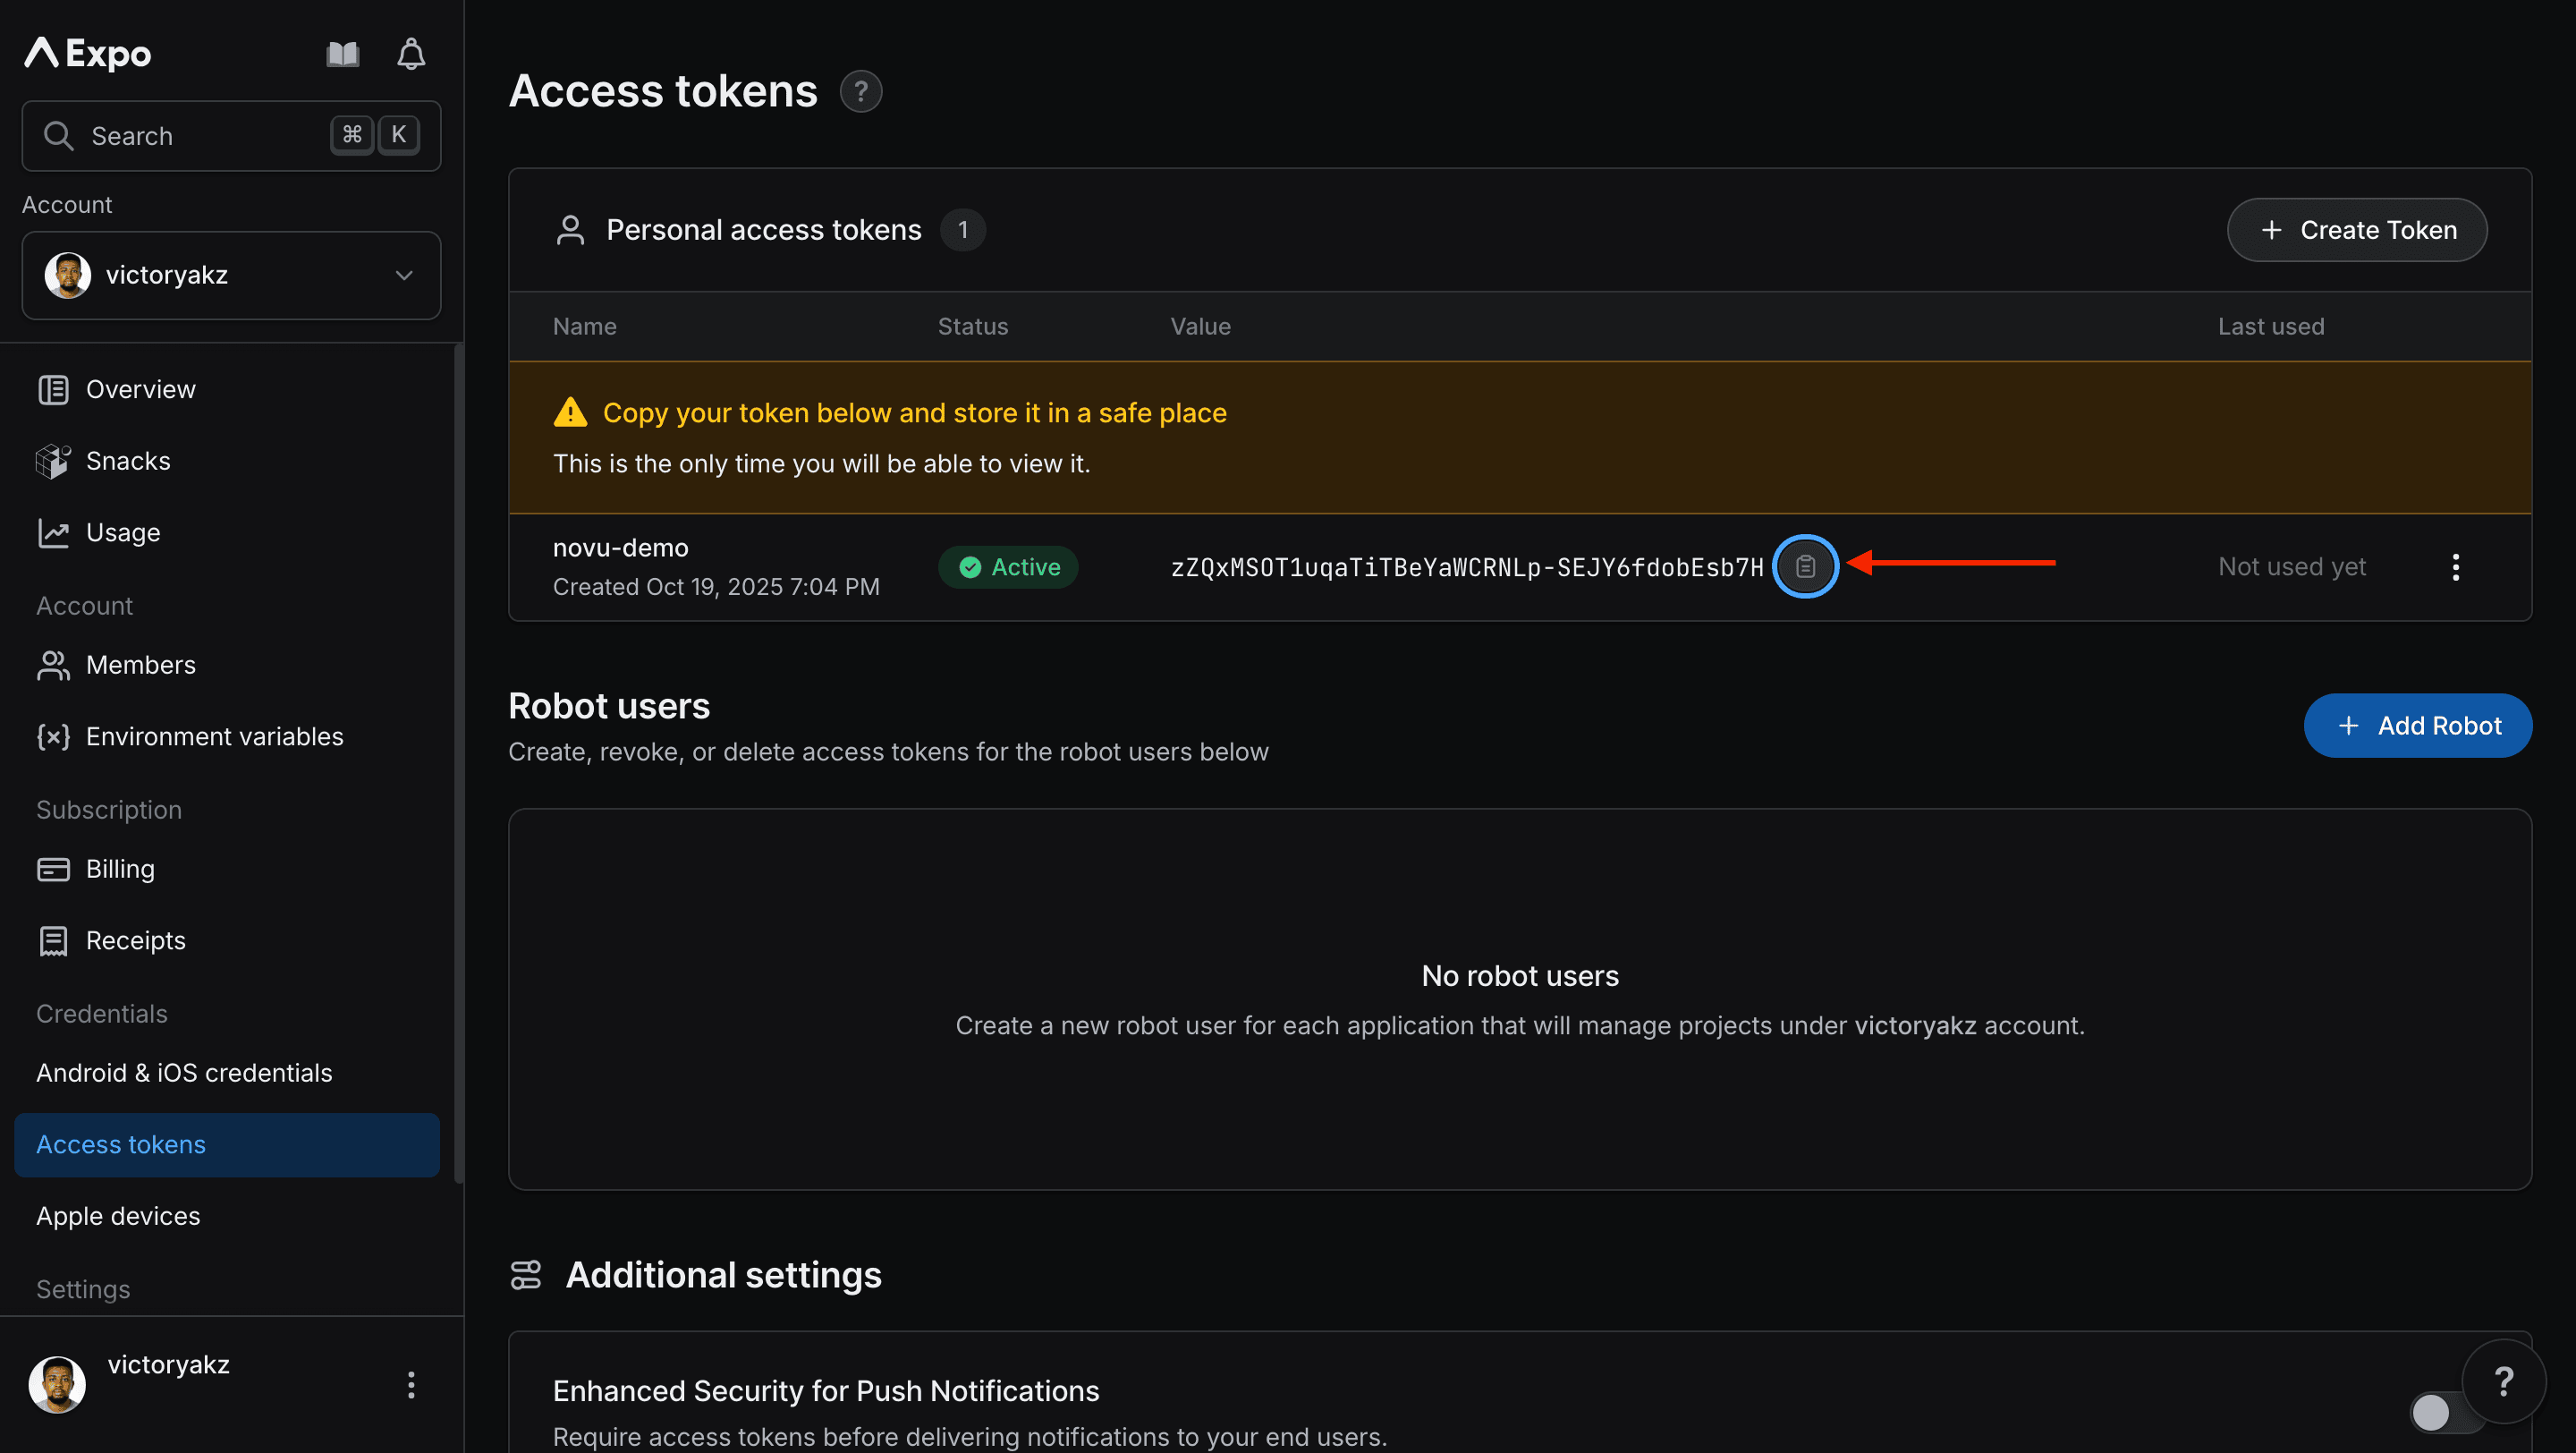
 Copy and save the generated access token. You need it in the next step.
 ### Step 2: Connect Expo Push to Novu
Next, add the access token to your Expo integration in the Novu dashboard.
Log in to the Novu dashboard.
On the Novu dashboard, navigate to the **Integration Store**.
Click **Connect provider**.
In the **Push** tab, select **Expo Push**.
In the Expo integration form, paste the access token that you copied from Expo into the **Access Token** field.
### Step 2: Connect Expo Push to Novu
Next, add the access token to your Expo integration in the Novu dashboard.
Log in to the Novu dashboard.
On the Novu dashboard, navigate to the **Integration Store**.
Click **Connect provider**.
In the **Push** tab, select **Expo Push**.
In the Expo integration form, paste the access token that you copied from Expo into the **Access Token** field.
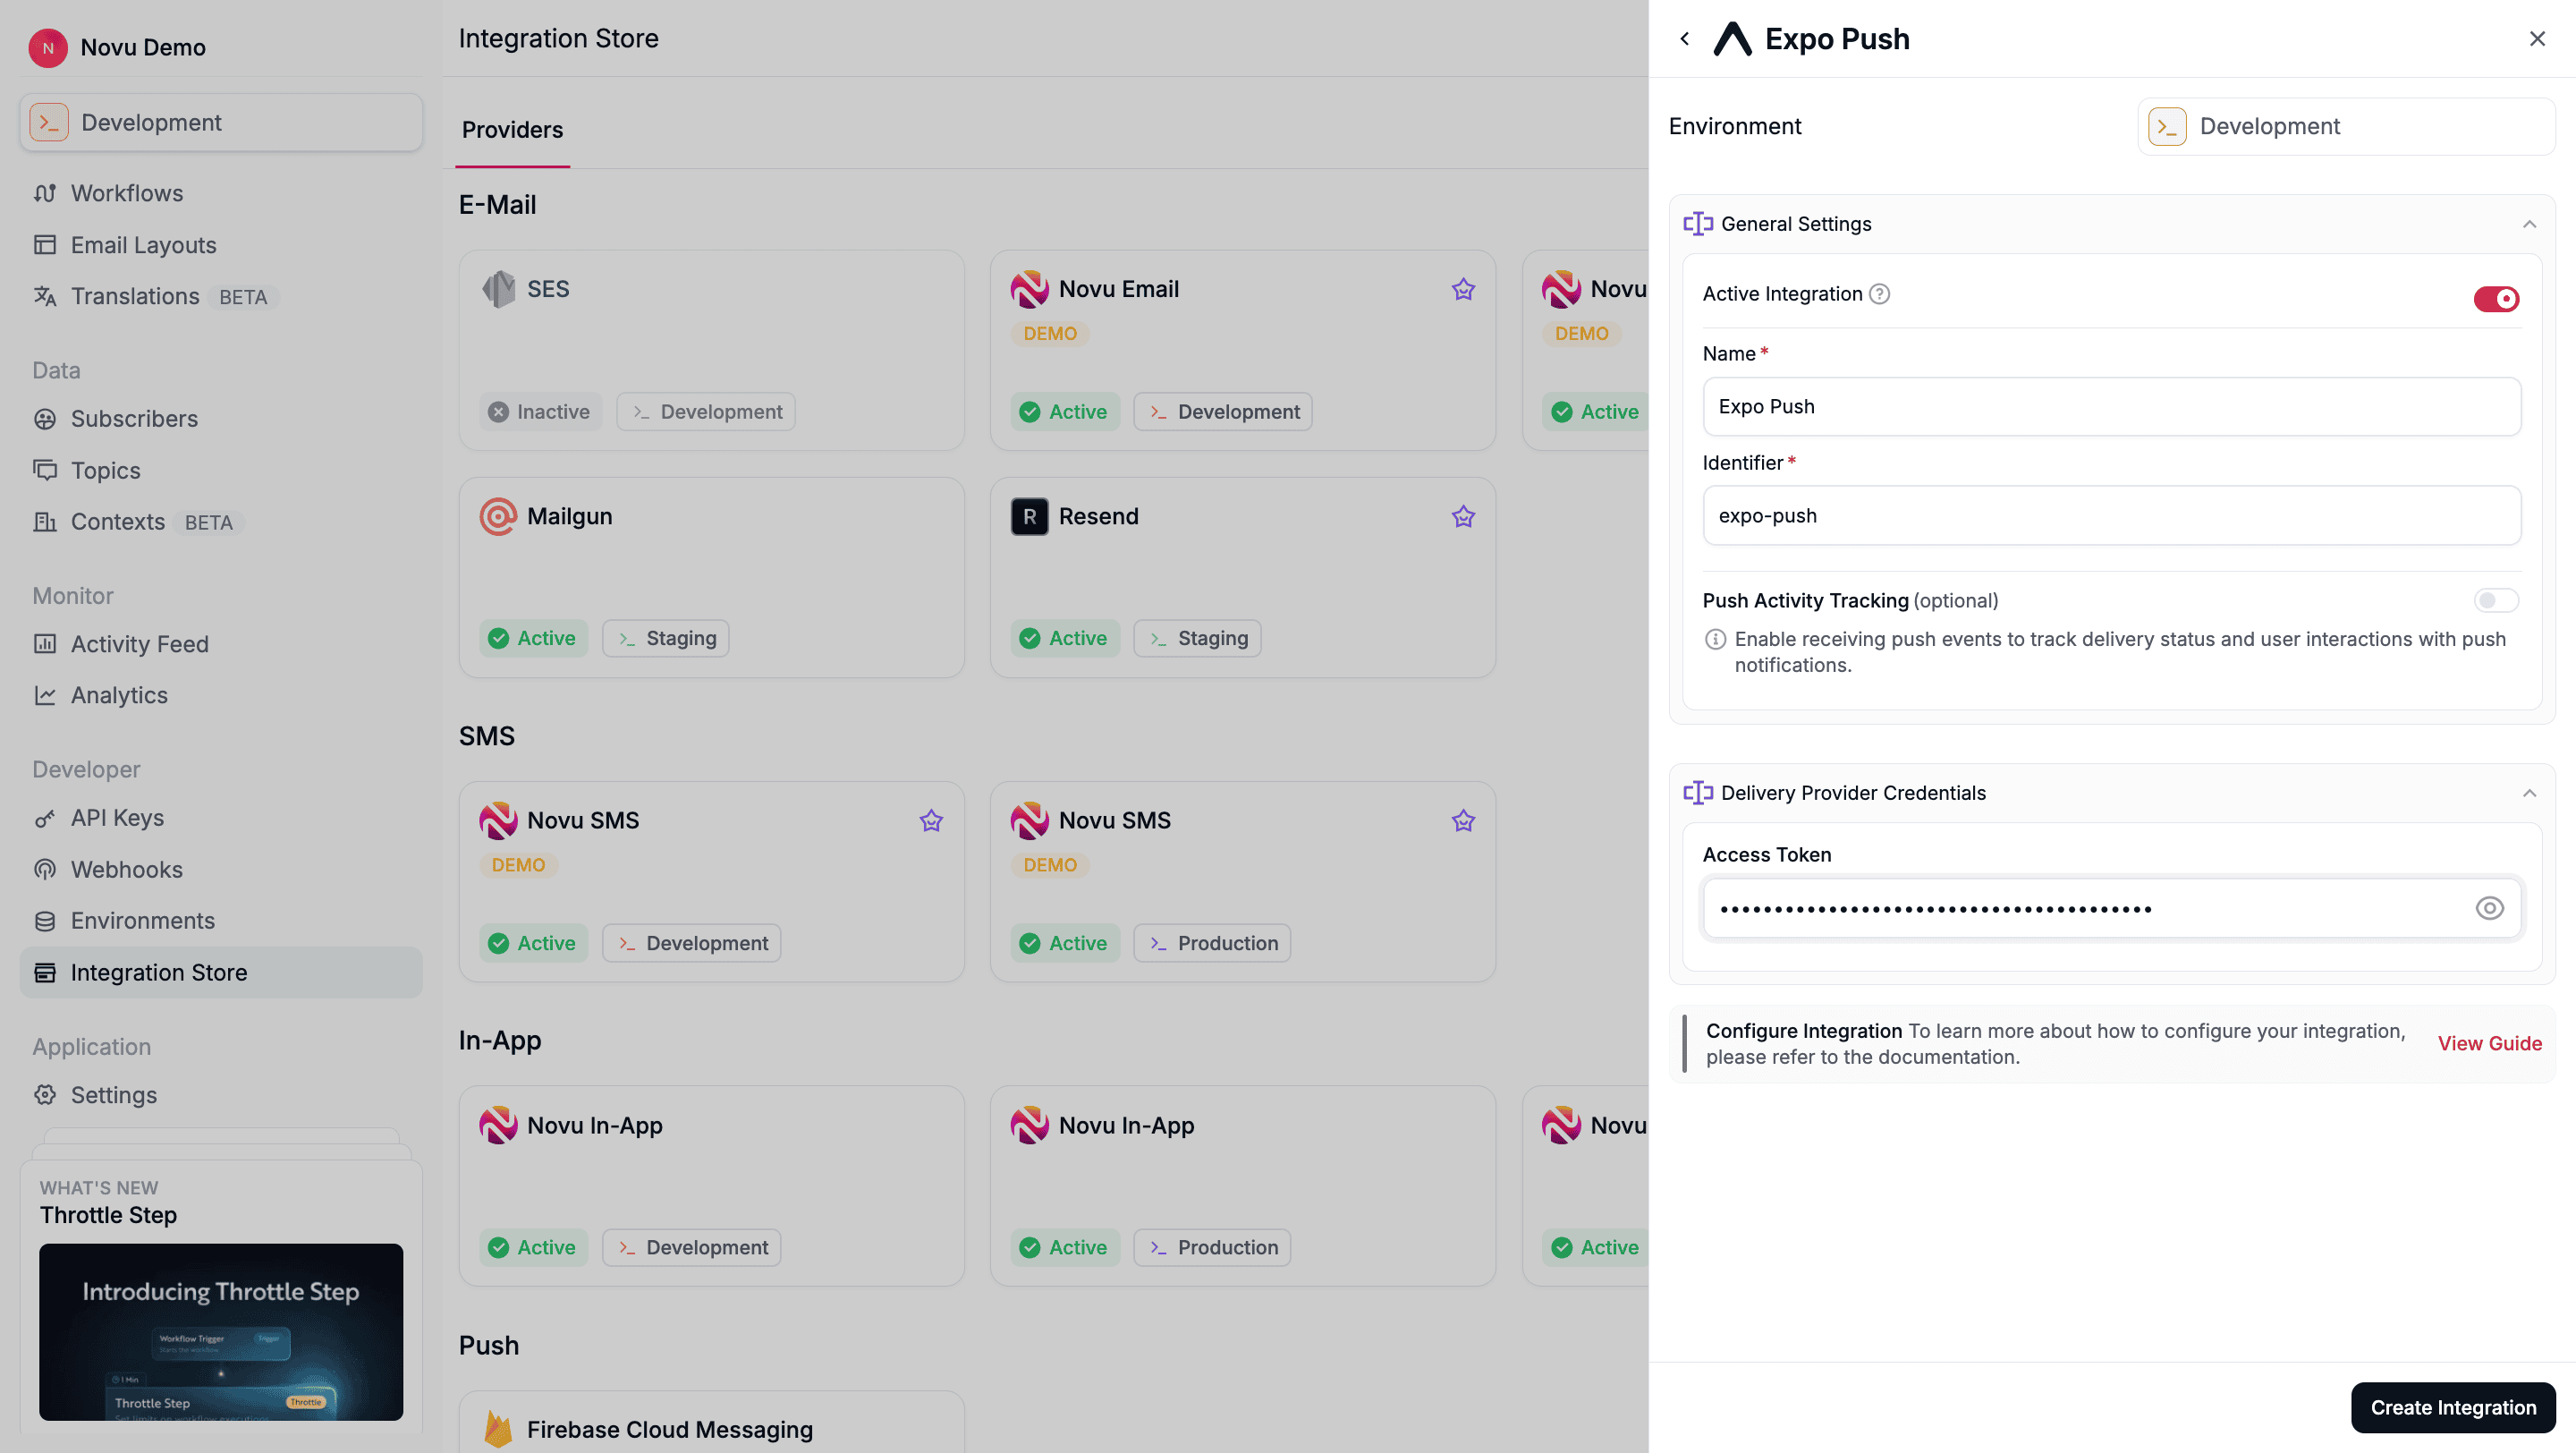 Click **Create Integration**.
## Using Expo Push with Novu
Once your integration is configured, you can start sending push notifications by registering your subscribers' device tokens and triggering a workflow.
### Step 1: Add subscriber device token
Before Novu can send a push notification to a subscriber (user), you must associate their device's unique push token with their Novu subscriber profile.
You can do this by making an API call to [update the subscriber's credentials](/api-reference/subscribers/update-provider-credentials).
```typescript theme={null}
import { Novu } from '@novu/api';
import { ChatOrPushProviderEnum } from "@novu/api/models/components";
const novu = new Novu({
secretKey: "",
// Required if using EU region
// serverURL: "https://eu.api.novu.co",
});
await novu.subscribers.credentials.update(
{
providerId: ChatOrPushProviderEnum.Expo,
// Use integrationIdentifier to store device tokens for a specific integration
integrationIdentifier: "string",
credentials: {
deviceTokens: [
"token1",
"token2"
]
},
},
"subscriberId"
);
```
```bash theme={null}
curl -L -X PUT 'https://api.novu.co/v1/subscribers//credentials' \
-H 'Content-Type: application/json' \
-H 'Accept: application/json' \
-H 'Authorization: ApiKey ' \
-d '{
"providerId": "expo",
"deviceTokens": ["token1", "token2"],
"integrationIdentifier": "string"
}'
```
Novu automatically removes invalid device tokens from a subscribers' profile and then sends the failure details to the `MESSAGE_FAILED` webhook.
### Step 2: Send a notification
Now you're ready to send a push notification. [Create a workflow with a Push step](/platform/workflow/create-a-workflow) and trigger it. Novu sends the notification to all devices associated with the subscriber.
The example below demonstrates a simple trigger using Novu’s SDK.
```typescript theme={null}
import { Novu } from '@novu/api';
const novu = new Novu({
secretKey: "",
});
await novu.trigger({
workflowId: "workflowId",
to: {
subscriberId: 'SUBSCRIBER_ID',
},
payload: {
// Your payload data
},
});
```
## Using overrides to customize notifications
Novu provides an overrides field that let you send additional Expo-specific message fields. You can use this to control how messages are displayed or to attach custom payloads.
The overrides field supports all [Expo Message Request](https://docs.expo.dev/push-notifications/sending-notifications/#message-request-format) values. Here is an example:
```typescript theme={null}
import { Novu } from '@novu/api';
const novu = new Novu({
secretKey: "",
// Required if using EU region
// serverURL: "https://eu.api.novu.co",
});
await novu.trigger({
workflowId: "workflowId",
to: { subscriberId: "subscriber-id-123" },
payload: {
orderId: "12345",
},
overrides: {
providers: {
expo: {
title: "Order Update",
body: "Your order #12345 has been shipped!",
data: {
deepLink: "myapp://orders/12345",
orderId: "12345",
},
sound: "default",
priority: "high",
ttl: 3600,
},
},
},
});
```
Click **Create Integration**.
## Using Expo Push with Novu
Once your integration is configured, you can start sending push notifications by registering your subscribers' device tokens and triggering a workflow.
### Step 1: Add subscriber device token
Before Novu can send a push notification to a subscriber (user), you must associate their device's unique push token with their Novu subscriber profile.
You can do this by making an API call to [update the subscriber's credentials](/api-reference/subscribers/update-provider-credentials).
```typescript theme={null}
import { Novu } from '@novu/api';
import { ChatOrPushProviderEnum } from "@novu/api/models/components";
const novu = new Novu({
secretKey: "",
// Required if using EU region
// serverURL: "https://eu.api.novu.co",
});
await novu.subscribers.credentials.update(
{
providerId: ChatOrPushProviderEnum.Expo,
// Use integrationIdentifier to store device tokens for a specific integration
integrationIdentifier: "string",
credentials: {
deviceTokens: [
"token1",
"token2"
]
},
},
"subscriberId"
);
```
```bash theme={null}
curl -L -X PUT 'https://api.novu.co/v1/subscribers//credentials' \
-H 'Content-Type: application/json' \
-H 'Accept: application/json' \
-H 'Authorization: ApiKey ' \
-d '{
"providerId": "expo",
"deviceTokens": ["token1", "token2"],
"integrationIdentifier": "string"
}'
```
Novu automatically removes invalid device tokens from a subscribers' profile and then sends the failure details to the `MESSAGE_FAILED` webhook.
### Step 2: Send a notification
Now you're ready to send a push notification. [Create a workflow with a Push step](/platform/workflow/create-a-workflow) and trigger it. Novu sends the notification to all devices associated with the subscriber.
The example below demonstrates a simple trigger using Novu’s SDK.
```typescript theme={null}
import { Novu } from '@novu/api';
const novu = new Novu({
secretKey: "",
});
await novu.trigger({
workflowId: "workflowId",
to: {
subscriberId: 'SUBSCRIBER_ID',
},
payload: {
// Your payload data
},
});
```
## Using overrides to customize notifications
Novu provides an overrides field that let you send additional Expo-specific message fields. You can use this to control how messages are displayed or to attach custom payloads.
The overrides field supports all [Expo Message Request](https://docs.expo.dev/push-notifications/sending-notifications/#message-request-format) values. Here is an example:
```typescript theme={null}
import { Novu } from '@novu/api';
const novu = new Novu({
secretKey: "",
// Required if using EU region
// serverURL: "https://eu.api.novu.co",
});
await novu.trigger({
workflowId: "workflowId",
to: { subscriberId: "subscriber-id-123" },
payload: {
orderId: "12345",
},
overrides: {
providers: {
expo: {
title: "Order Update",
body: "Your order #12345 has been shipped!",
data: {
deepLink: "myapp://orders/12345",
orderId: "12345",
},
sound: "default",
priority: "high",
ttl: 3600,
},
},
},
});
```