> ## Documentation Index
> Fetch the complete documentation index at: https://novu-c5de82d9-docs-homepage-redesign.mintlify.site/llms.txt
> Use this file to discover all available pages before exploring further.
# Delay Step
> Learn how to use delay step to pause workflow execution.
After adding a Delay step to a workflow, it pauses workflow execution for a specified duration or until a scheduled time, then resumes execution with the next step. You can add a Delay step anywhere in a workflow, before or after any other step to control when subsequent steps run.
This page focuses on how to configure the Delay step for your use case.
To learn when to use Delay step in a workflow, refer to the [Delay step overview](/platform/workflow/add-and-configure-steps#delay).
## Delivery behavior and scheduling
Delay supports delivery-aware execution:
* Notifications sent after a delay can respect a subscriber’s delivery schedule.
* Notifications are delivered using the subscriber’s time zone if a `timezone` attribute is set.
* If no time zone is available, UTC is used.
Changing the step content after triggering the workflow with delay step will affect the existing pending delayed notification content.
## Adding a delay step
You can add a delay step anywhere in a workflow, before or after any other step. When the workflow reaches the delay step, execution pauses for the configured duration and then resumes with the next step.
## Delay types
Delay types are used to define how long the workflow execution should be delayed before proceeding. These delay types are:
### Fixed delay
A fixed delay pauses workflow execution for a static duration. Use this when the delay length is known in advance and does not change.
You can specify fixed delays in seconds, minutes, hours, days, weeks, or months.
### Scheduled delay
A scheduled delay pauses workflow execution until a specific date and time, based on the subscriber’s time zone.
You can configure scheduled delays to resume execution:
* **Minute**: Resume at a specific minute.
* **Hour**: Resume at a specific hour and minute.
* **Day**: Resume at a specific time of day.
* **Week**: Resume on specific days of the week at a given time.
* **Month**: Resume on specific days of the month at a given time.
In the example above, the scheduled delay pauses workflow execution until the current day at either 10:00 AM or 11:00 AM, at 23, 24, or 25 minutes past the hour, based on the subscriber’s time zone.
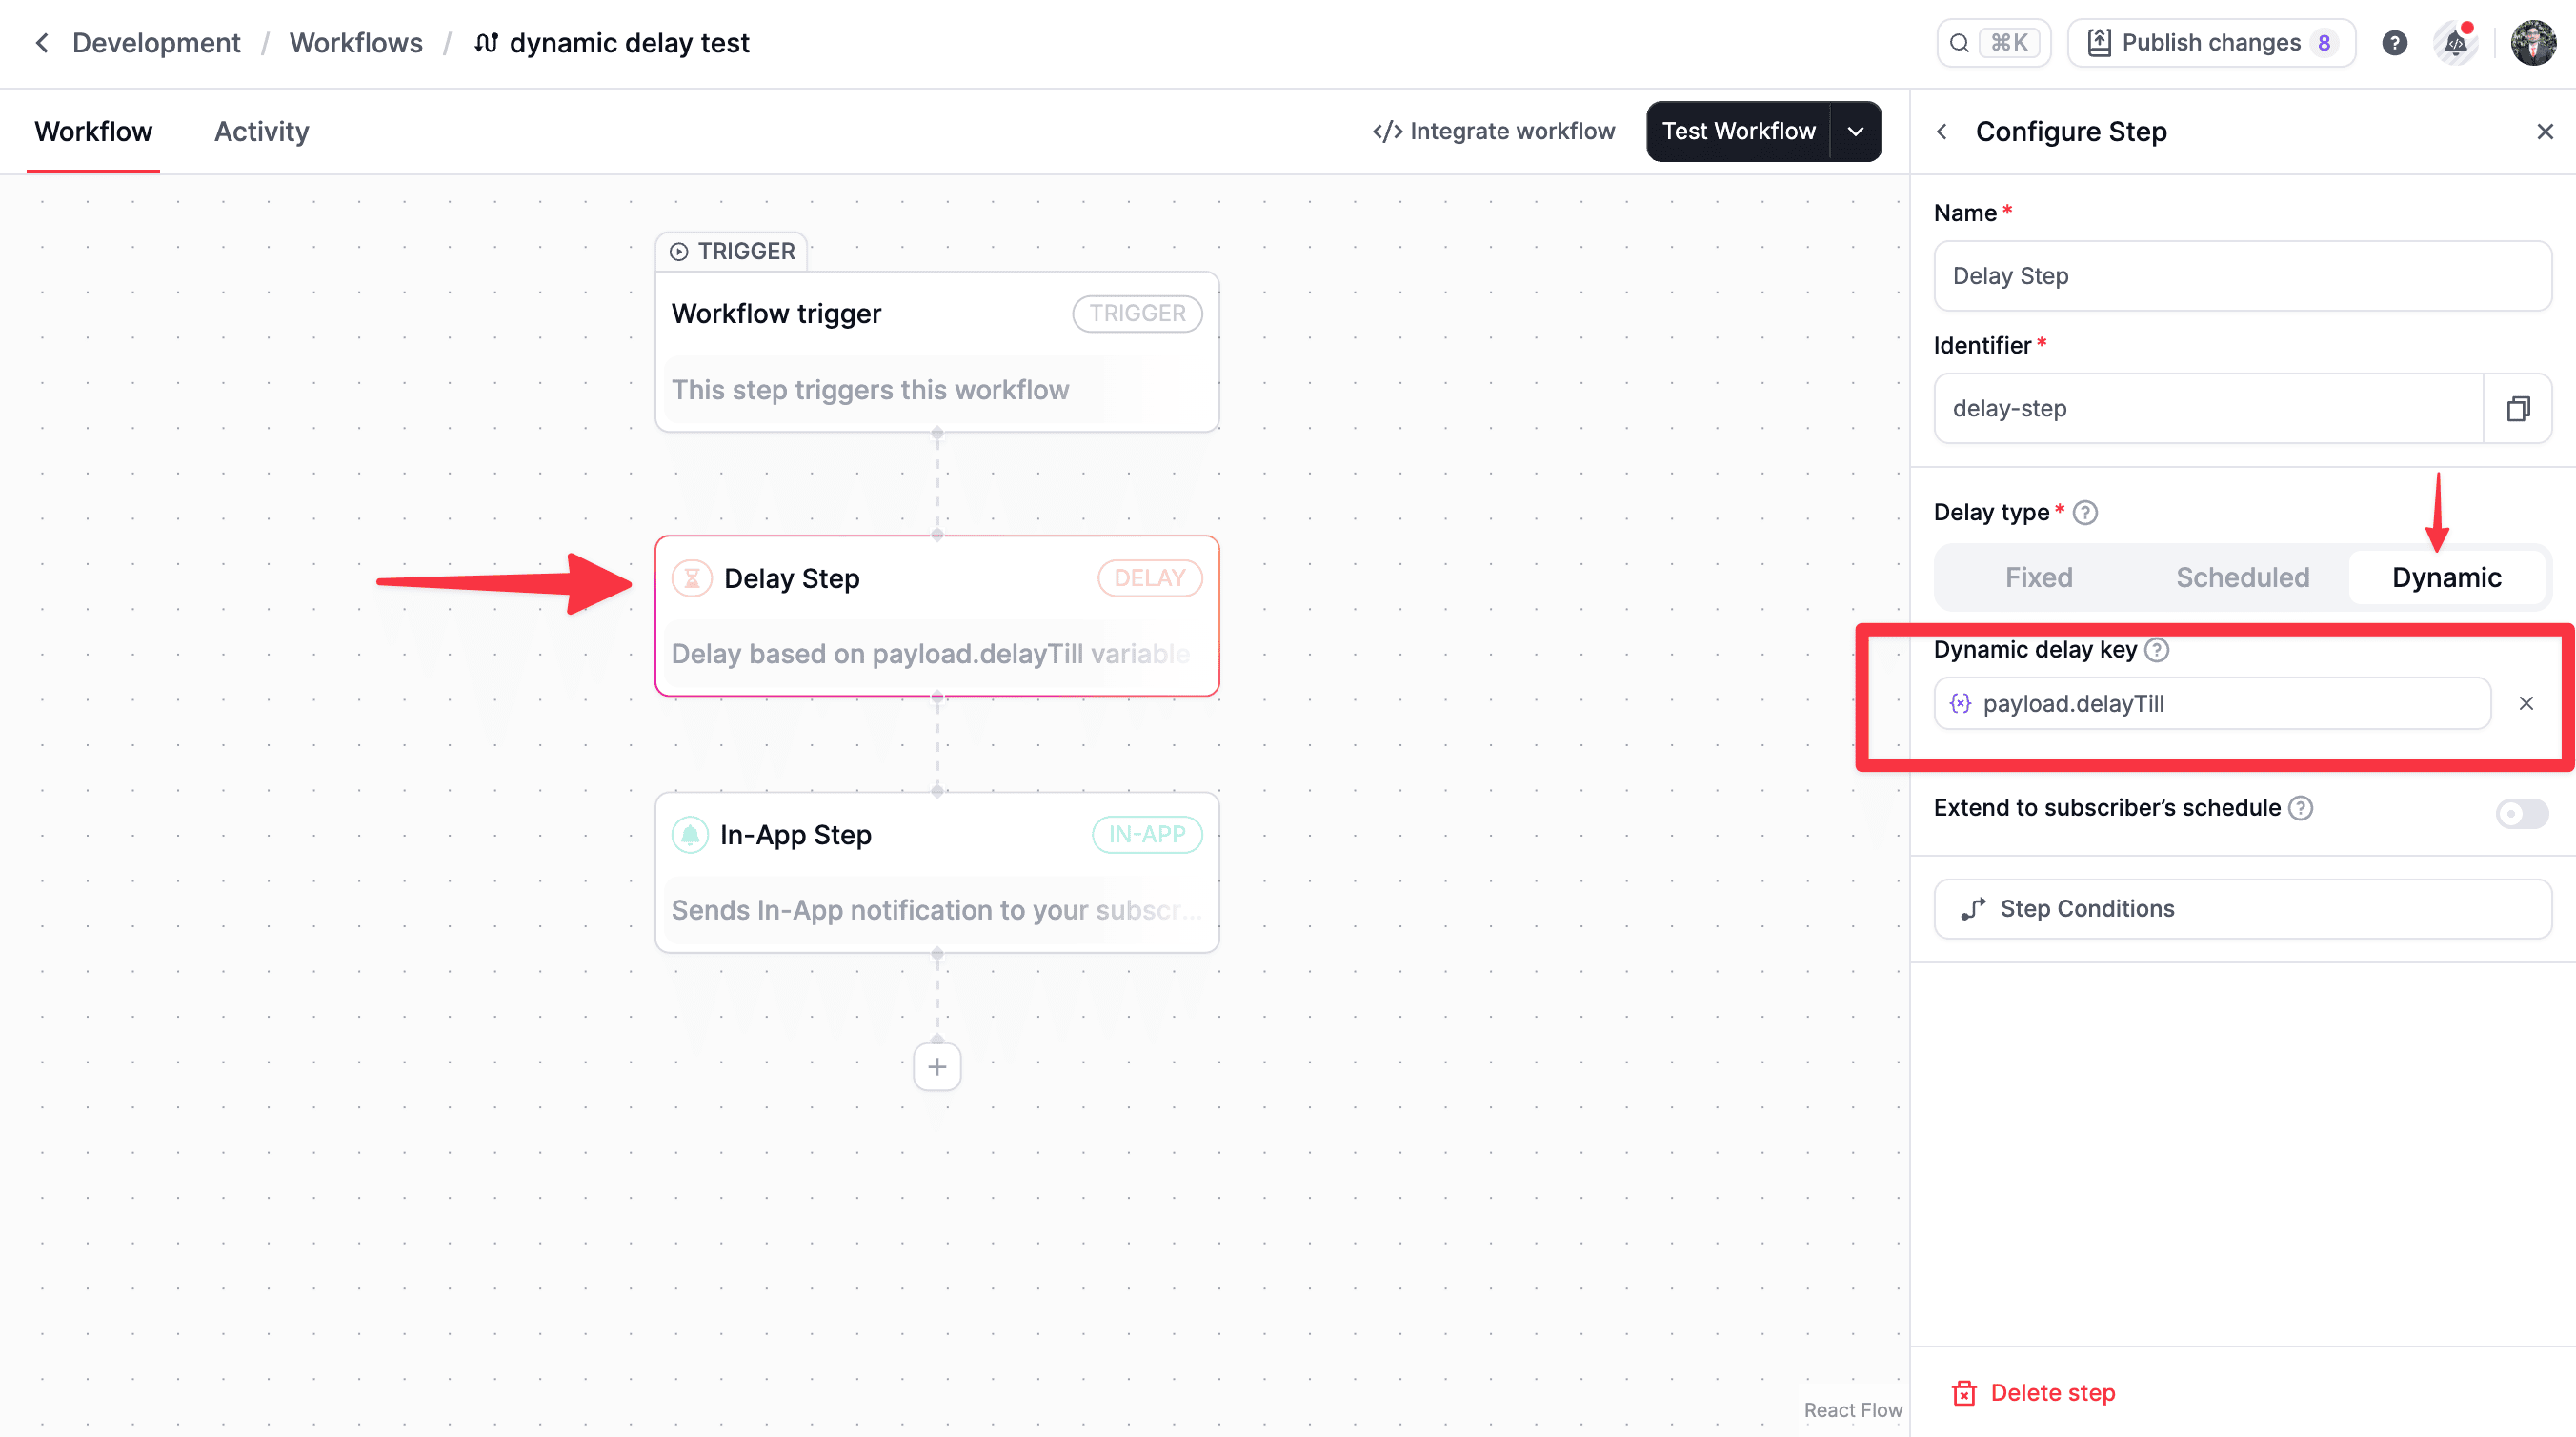
### Dynamic delay
A dynamic delay, also called a variable-based delay, determines the delay duration using a variable from the event payload. This allows the delay to change per workflow execution.
The variable can be defined in one of the following formats:
* **ISO-8601 timestamp**: Example: `2027-01-01T12:00:00Z`. This value should be for future date and time.
* **Duration object**: Example: `{ "amount": 30, "unit": "minutes" }`. This value should be for future date and time. Here *amount* is the number of units to delay and *unit* is the time unit. *unit* can be **seconds**, **minutes**, **hours**, **days**, **weeks**, or **months**.
In this example, the `delayTill` variable is used to pause the workflow until the future date and time specified in the `delayTill` variable.
```json theme={null}
{
"delayTill": "2027-01-01T12:00:00Z"
}
```
```json theme={null}
{
"delayTill": {
"amount": 30,
"unit": "minutes"
}
}
```
If a dynamic delay using an ISO date is added as the first step in a workflow, it effectively schedules the workflow execution to start at the specified time.
## Extend to subscriber’s schedule
When enabled, delayed execution respects the [subscriber’s delivery schedule](/platform/inbox/features/schedule).
If the delay completes outside the subscriber’s available delivery window, execution resumes during the next available time slot. This option is disabled by default.
## FAQs
No, workflow execution will stop immediately if the delay step fails due to an error. Common errors are:
* Invalid ISO date format.
* Invalid duration object format.
* Past datetime is specified.
 In this example, the `delayTill` variable is used to pause the workflow until the future date and time specified in the `delayTill` variable.