How to configure Pusher Beams with Novu
Before you can send notifications, you must get your credentials from a Pusher Beams instance and add them to your Novu integration settings.Step 1: Get your Pusher Beams credentials
To enable Pusher Beams integration, you need to create a Pusher Beams Instance and use bothInstance ID and Secret Key from the Instance dashboard.

Copy credentials
In the instance dashboard, click Keys from the sidebar, then copy and store your Instance ID and Primary key you will need them in Step 2.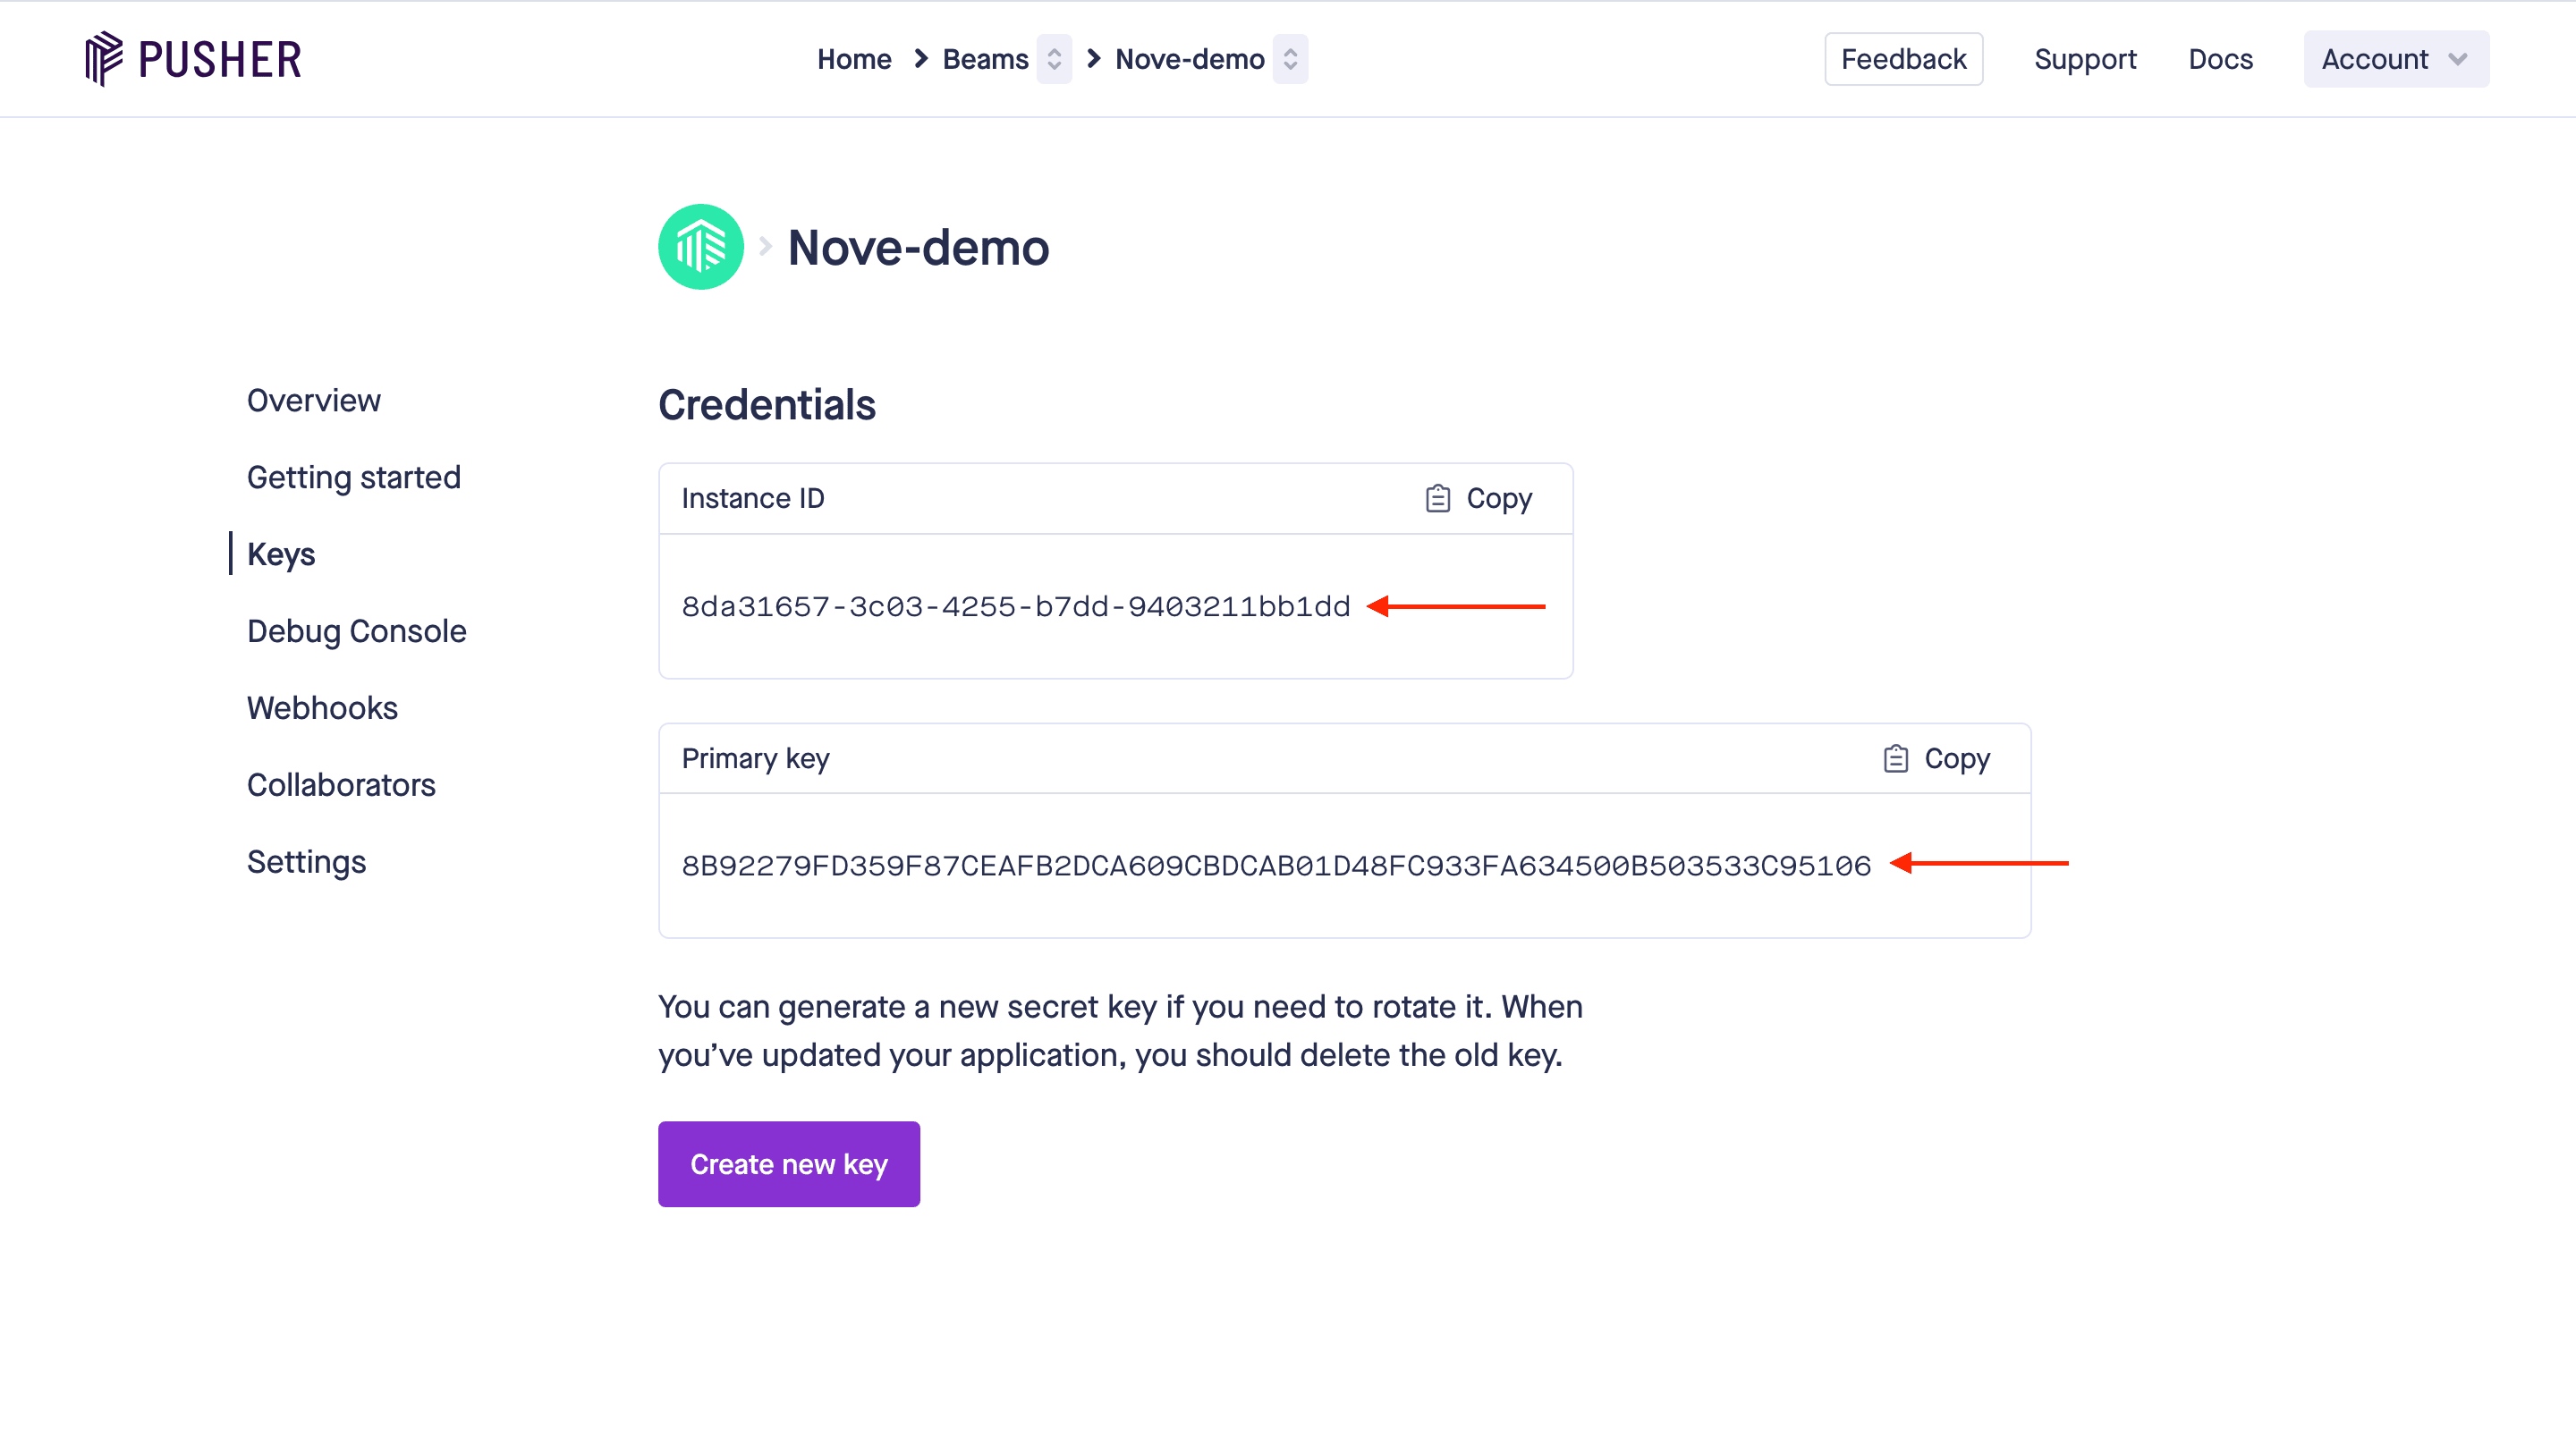
Step 2: Connect Pusher Beams to Novu
Next, add these credentials to your Pusher Beams integration in the Novu dashboard.Paste credentials
In the Pusher Beams integration form, paste your Instance ID and Secret Key into the corresponding fields.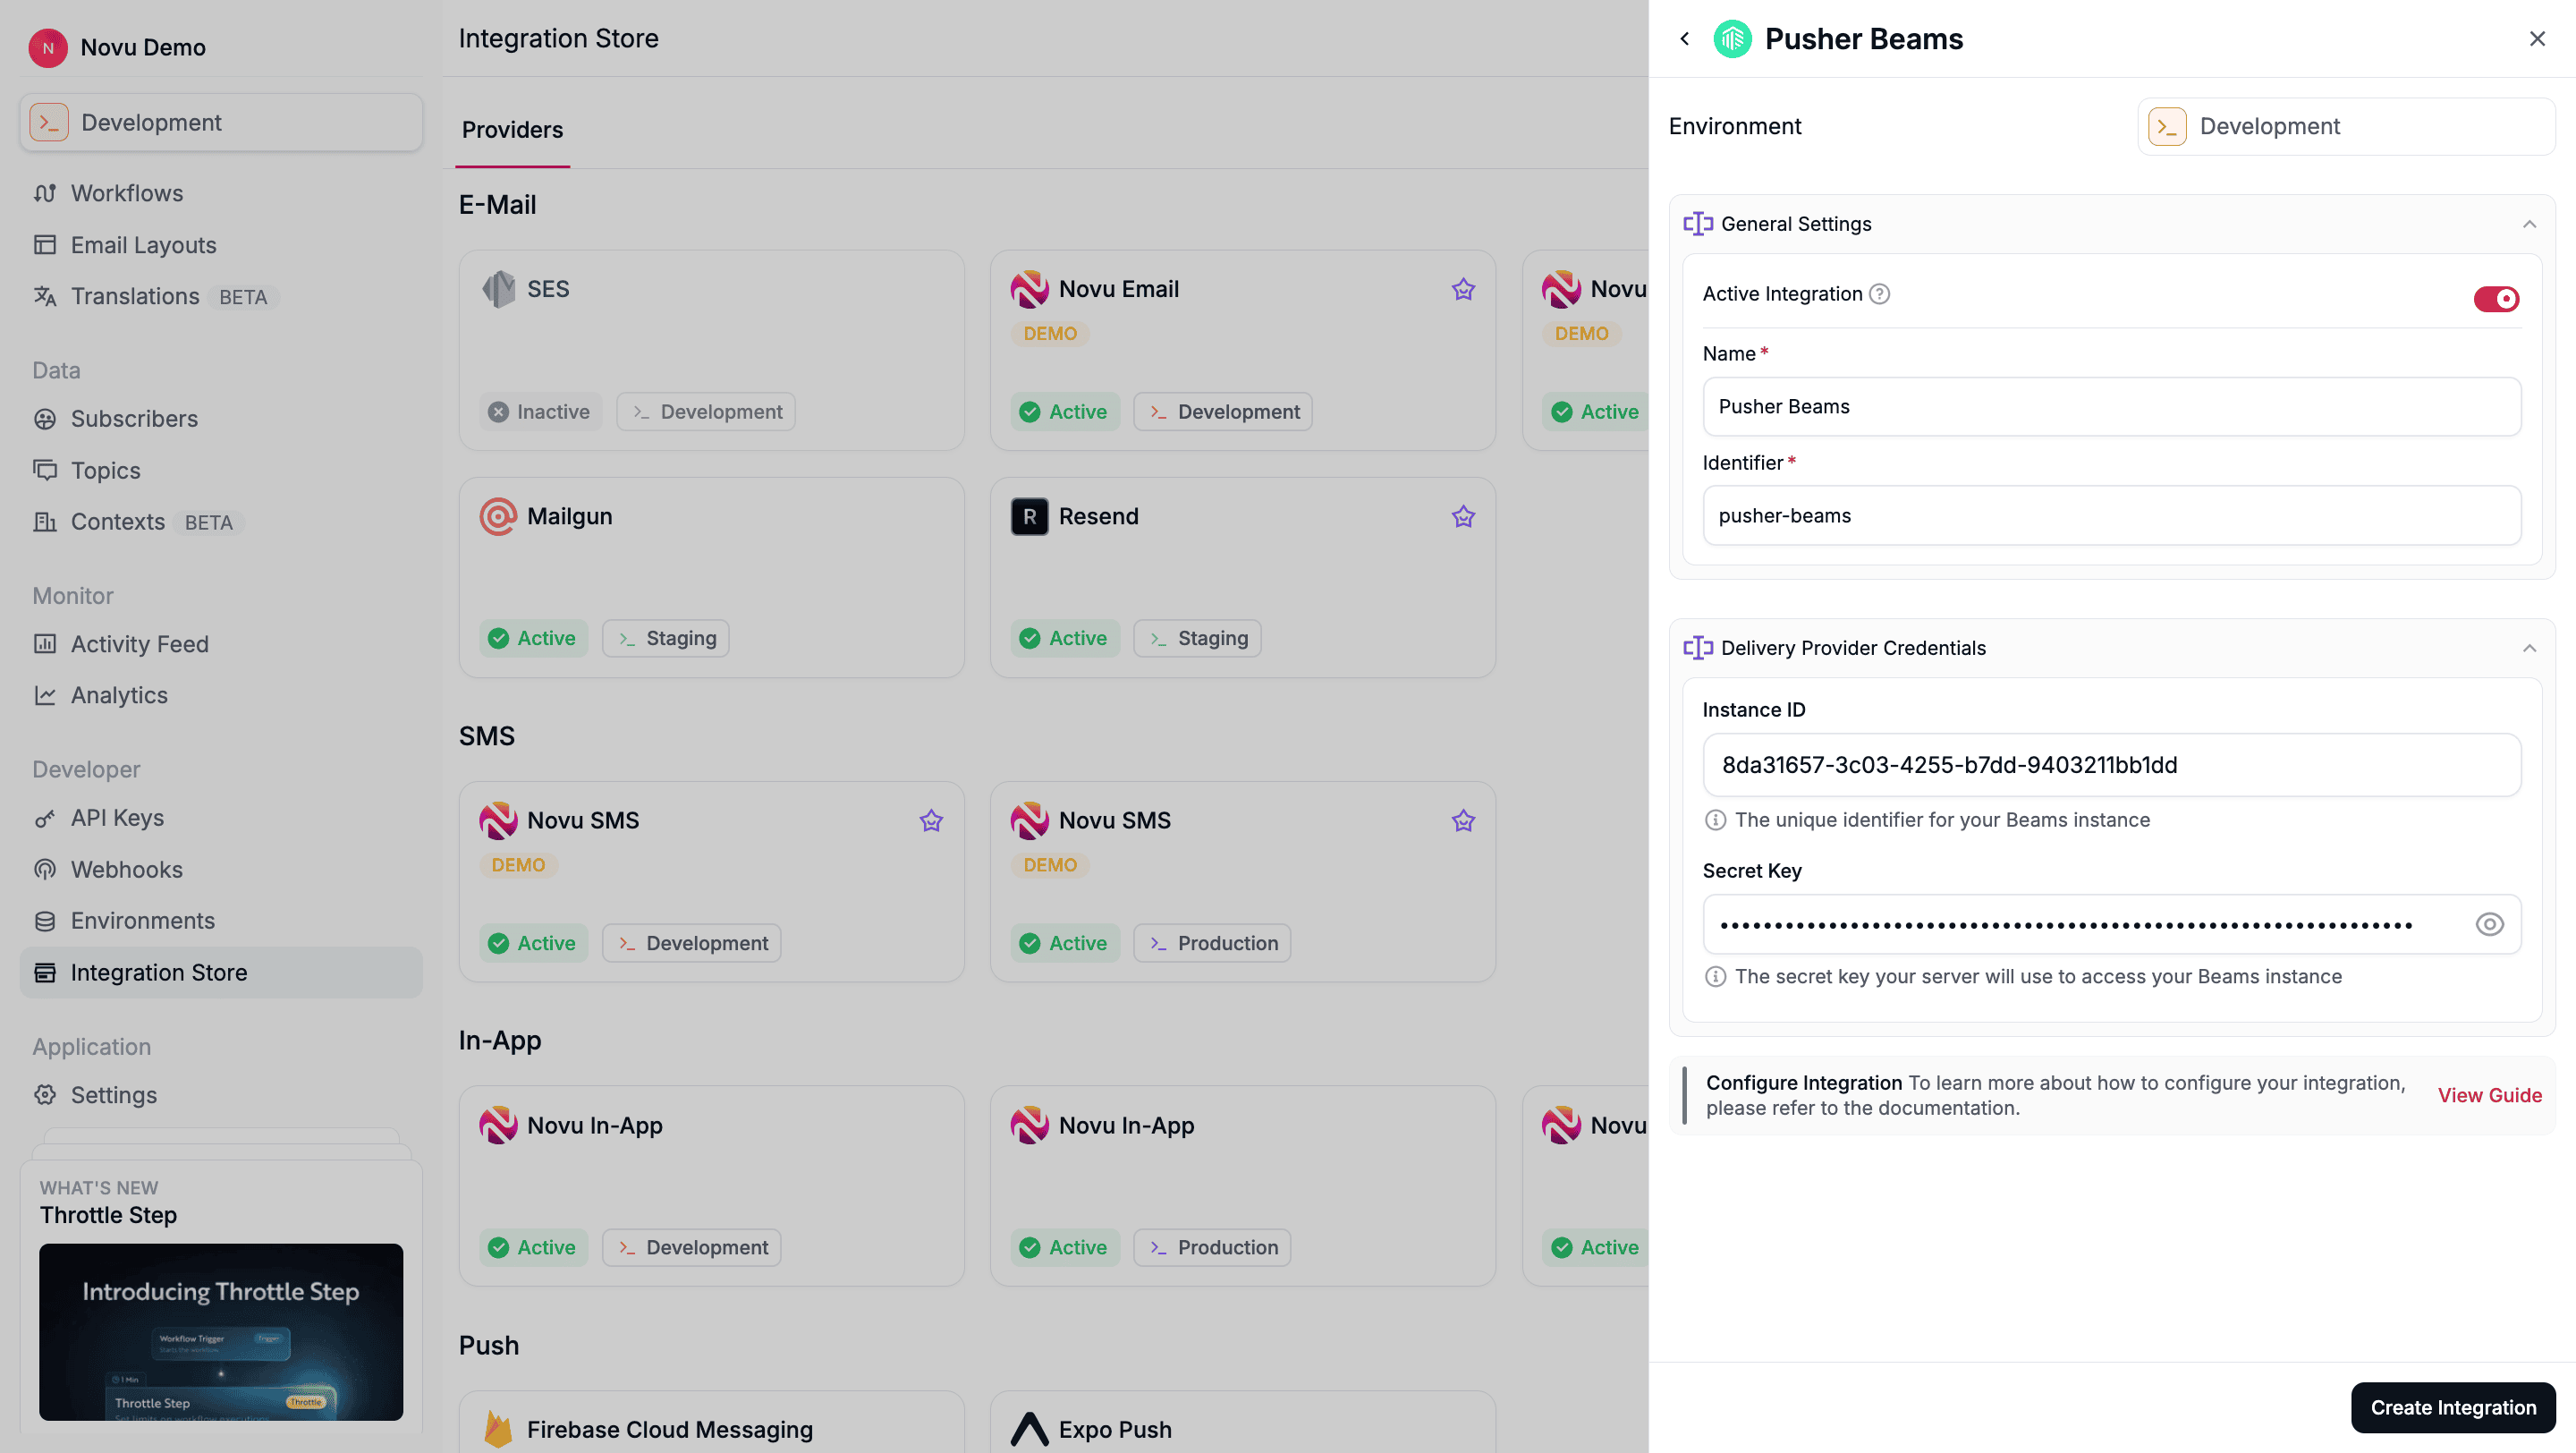
Using Pusher Beams with Novu
Once your integration is configured, you can start sending push notifications by registering your subscribers’userId and triggering a workflow.
Step 1: Add subscriber device token
After setting up the Pusher Beams SDK in your application, you must associate users with their devices using Pusher Beams’ Authenticated Users feature. This assigns them auserId.
To target a Pusher Beams user from Novu, you must register this userId as the deviceToken for their Novu subscriber profile. You can retrieve this value using the getUserId() method from the Pusher Beams SDK.
You can do this by making an API call to update the subscriber’s credentials.
- Node.js
- cURL
Step 2: Send a notification
Now you’re ready to send a push notification. Create a workflow with a Push step and trigger it. Novu sends the notification to theuserId’s associated with the subscriber.
The example below demonstrates a simple trigger using Novu’s SDK.